Featured

What can Dane Gagai teach us about Risk Management?

Risk management refers to:

the practice of identifying potential risks in advance, analyzing them and taking precautionary steps to reduce/curb the risk.”

In rugby league the risks we are worried about are those that lead to the concession of points – the most basic of which is your opponent having the ball.

So how do we minimise opponent having the ball?

When in possession:

  • Score within the 6 tackles
  • Hold the ball for the full 6 tackles
  • Force opponent to concede penalty/set restart
  • Retain possession via forced drop out, 20/40 or 40/20
  • Force opponent error on possession transition (eg difficult grubber/bomb)
  • Avoid 7 tackle sets on possession transition
  • Retain possession from kick-offs/drop outs

When not in possession:

  • one on one steal
  • intercept
  • force offensive error eg knock on, tackle or pass over sideline
  • force player into own in-goal
  • prevent them scoring
  • prevent forced drop out, 20/40 or 40/20
  • prevent kick-off/drop out retain possession events
  • win scrum against the feed

Nothing earth shattering here and I’m sure plenty of aww derr! comments but noting them all down is the process of risk management.

Now the fun part – what strategies can we apply?

For each element above a team needs to work out how they best manage it – this is where vast coaching resources are deployed – drone recording of training sessions, deploying defensive systems, tackling technique, attacking plays, yardage sets, last tackle options, opponent strengths/weaknesses etc all come in to play.

However given all this effort there are still aspects of the game that could be better managed.

This is where Dane Gagai can help us – because when a team has the ball they literally drop the ball on risk management.

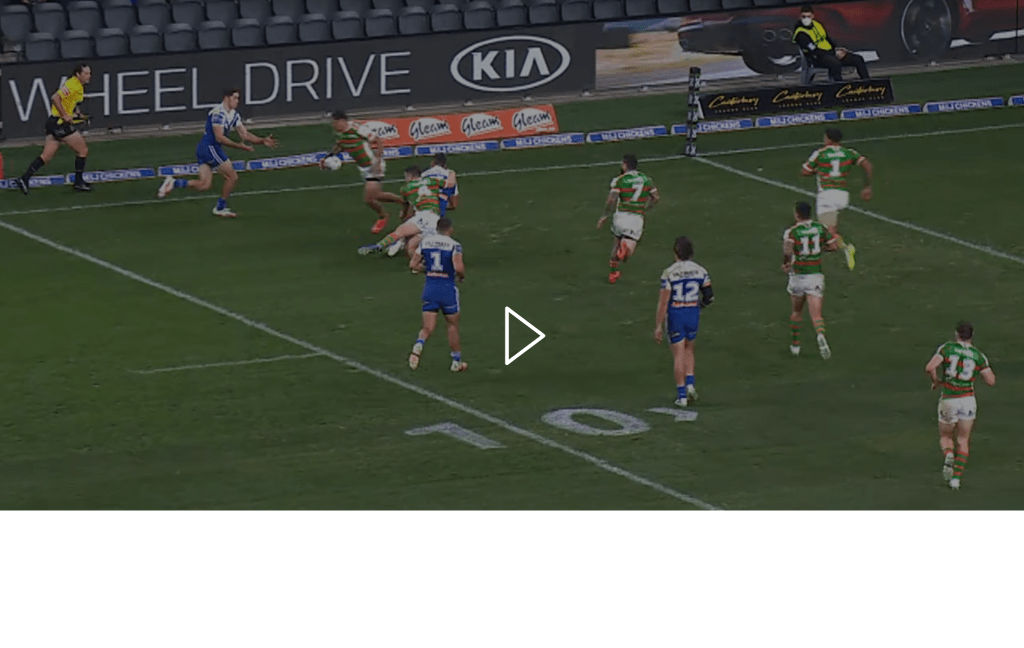
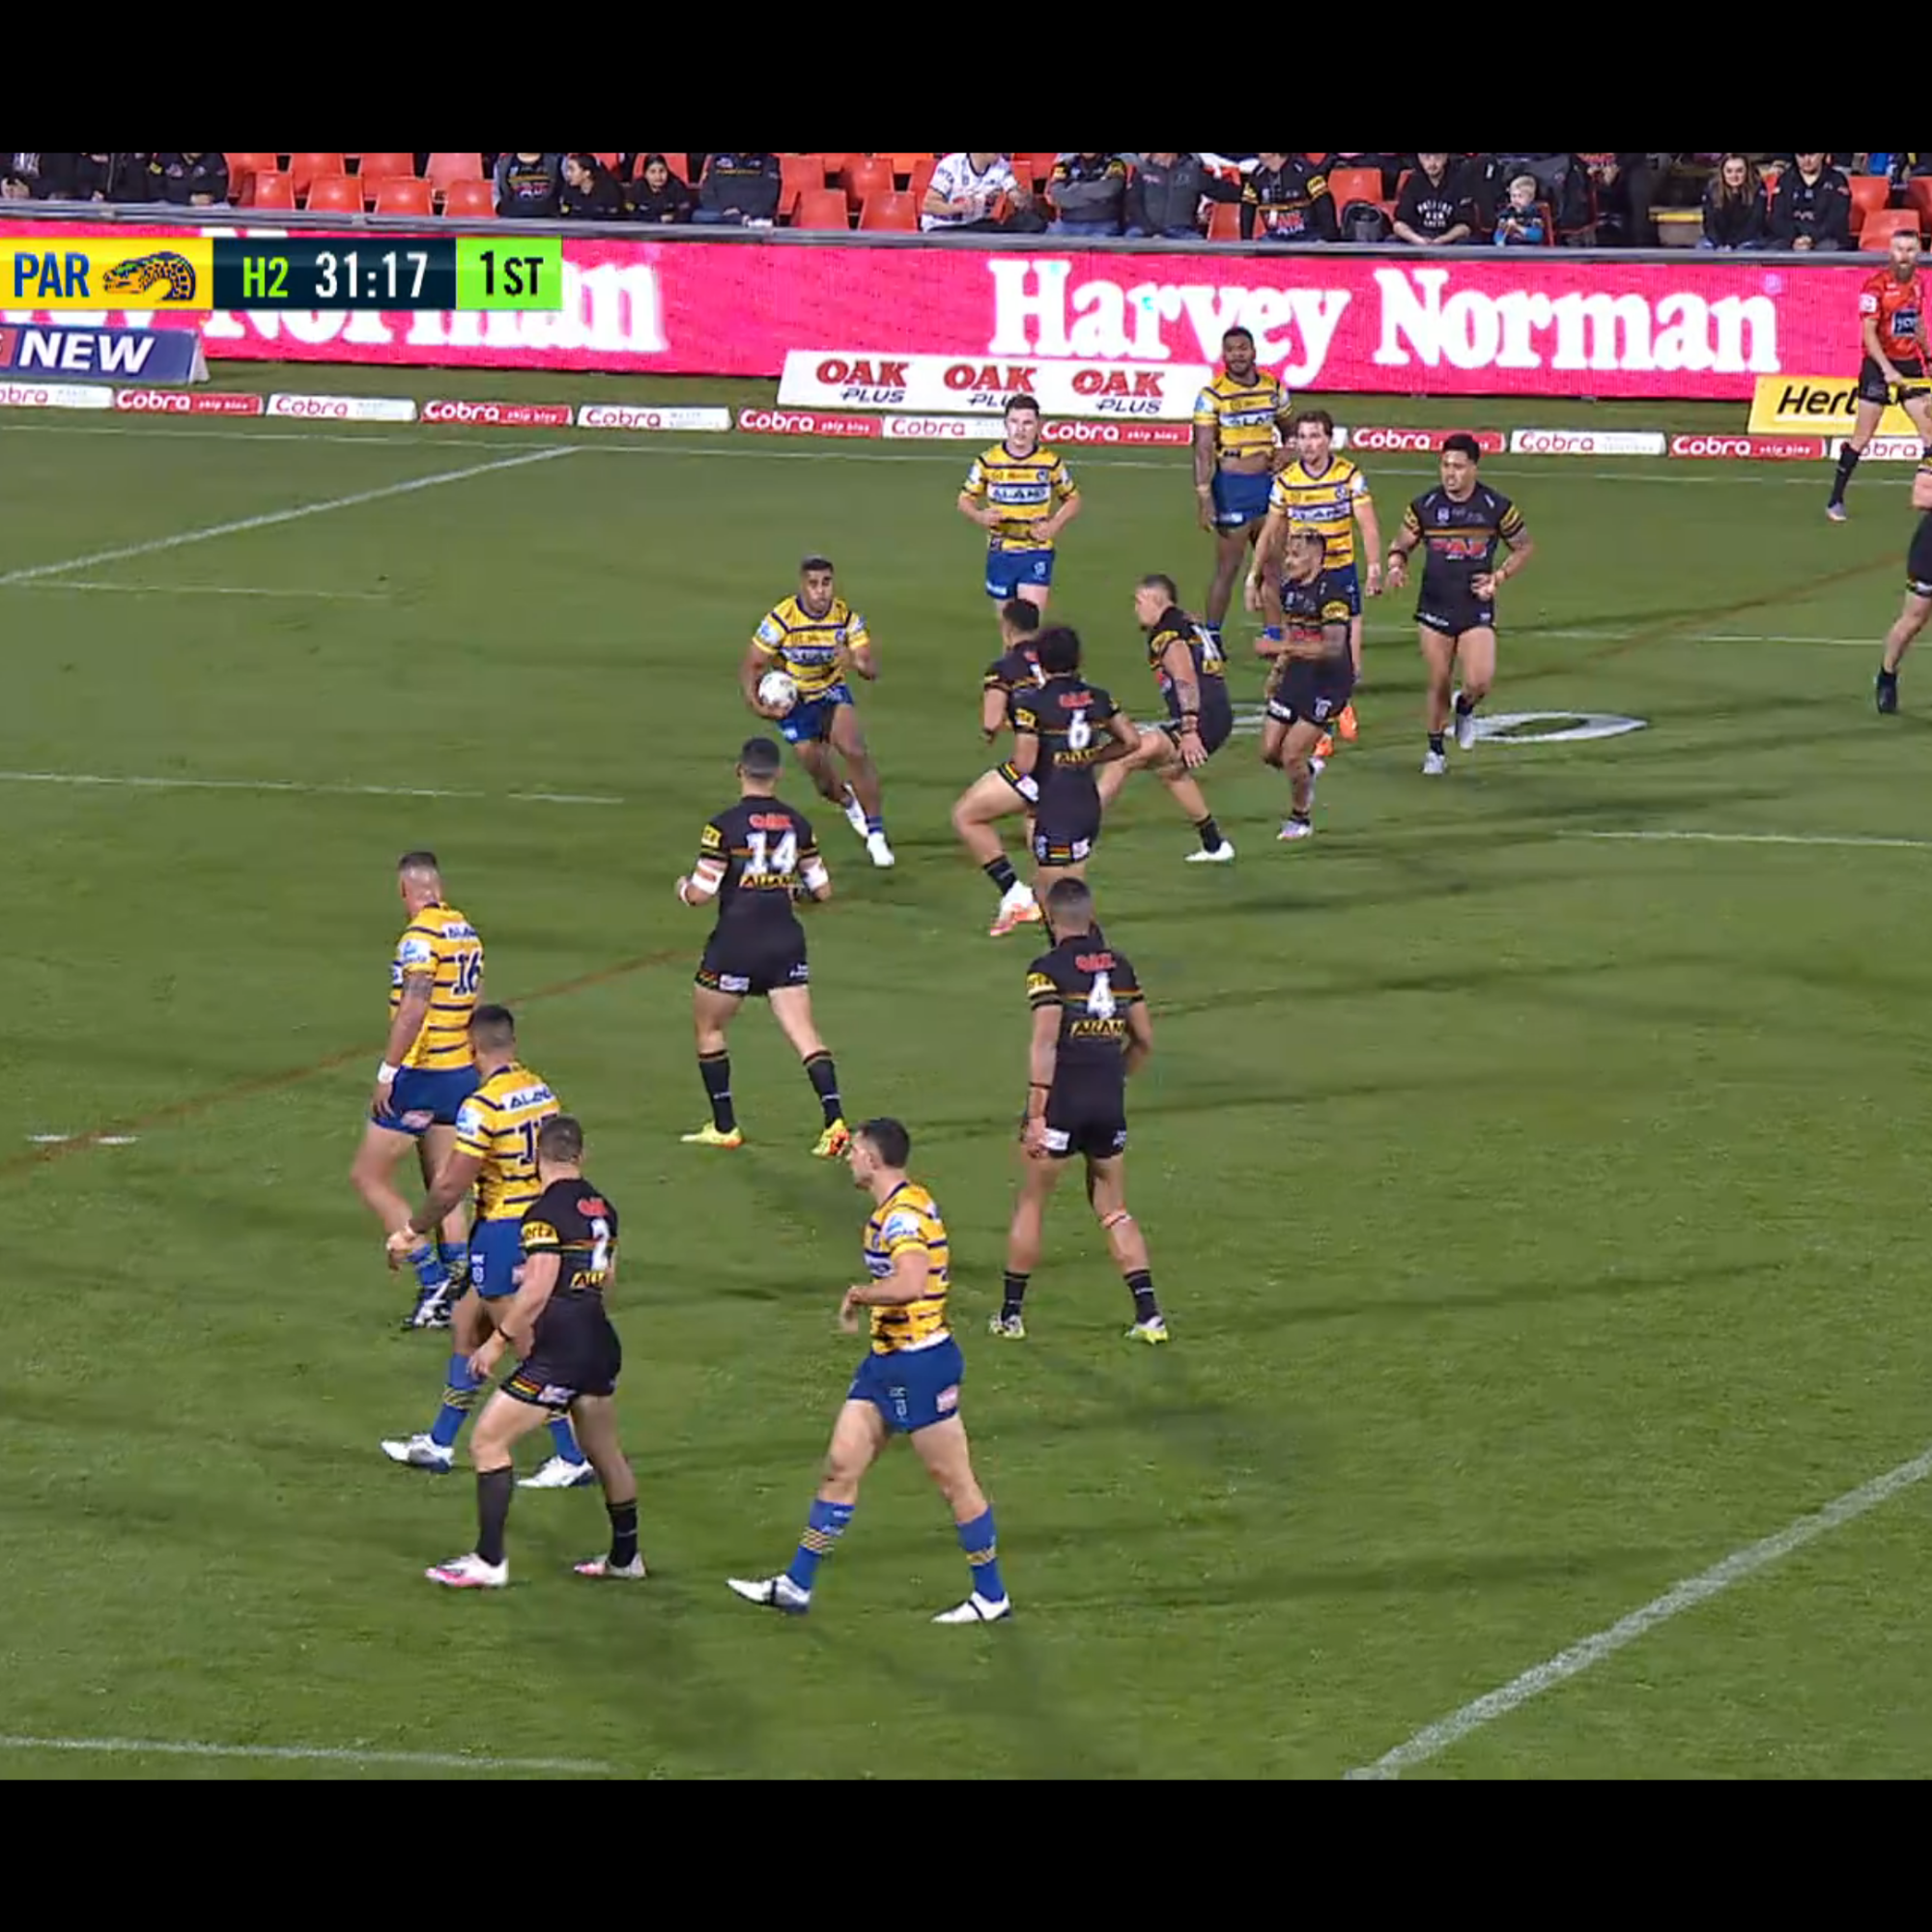
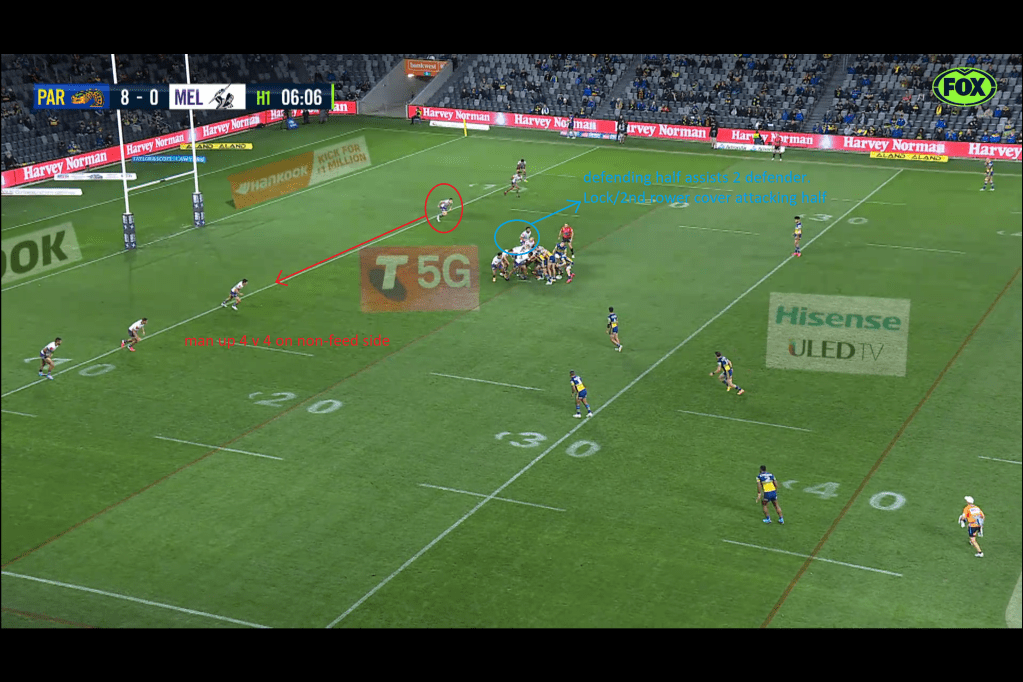
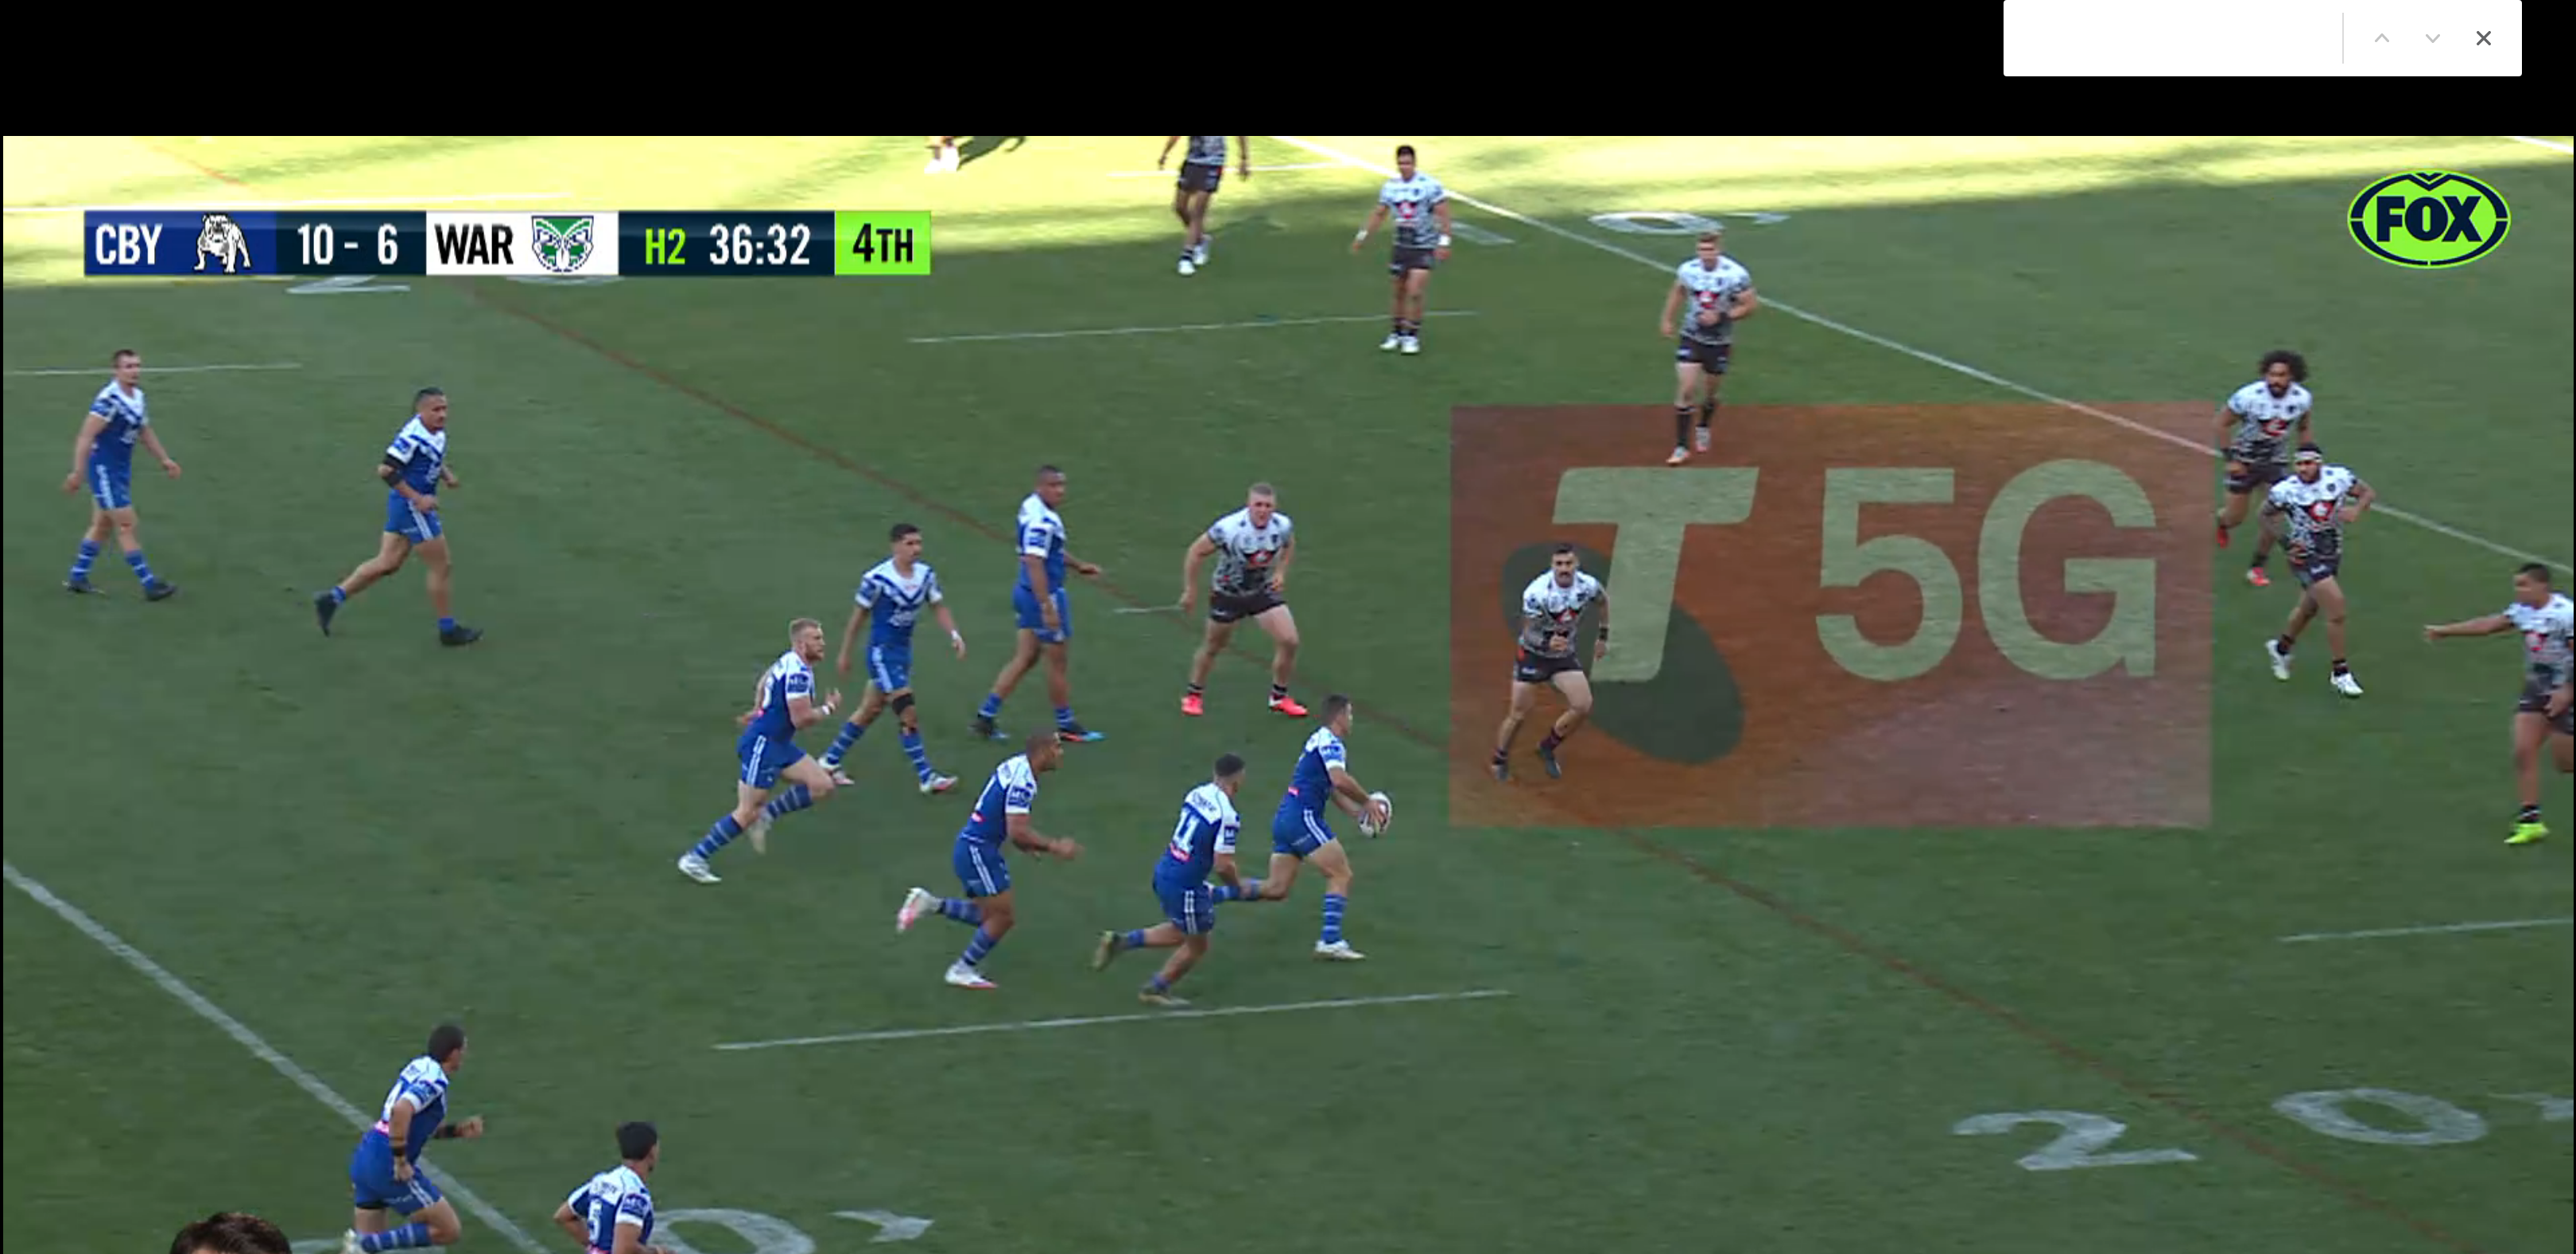
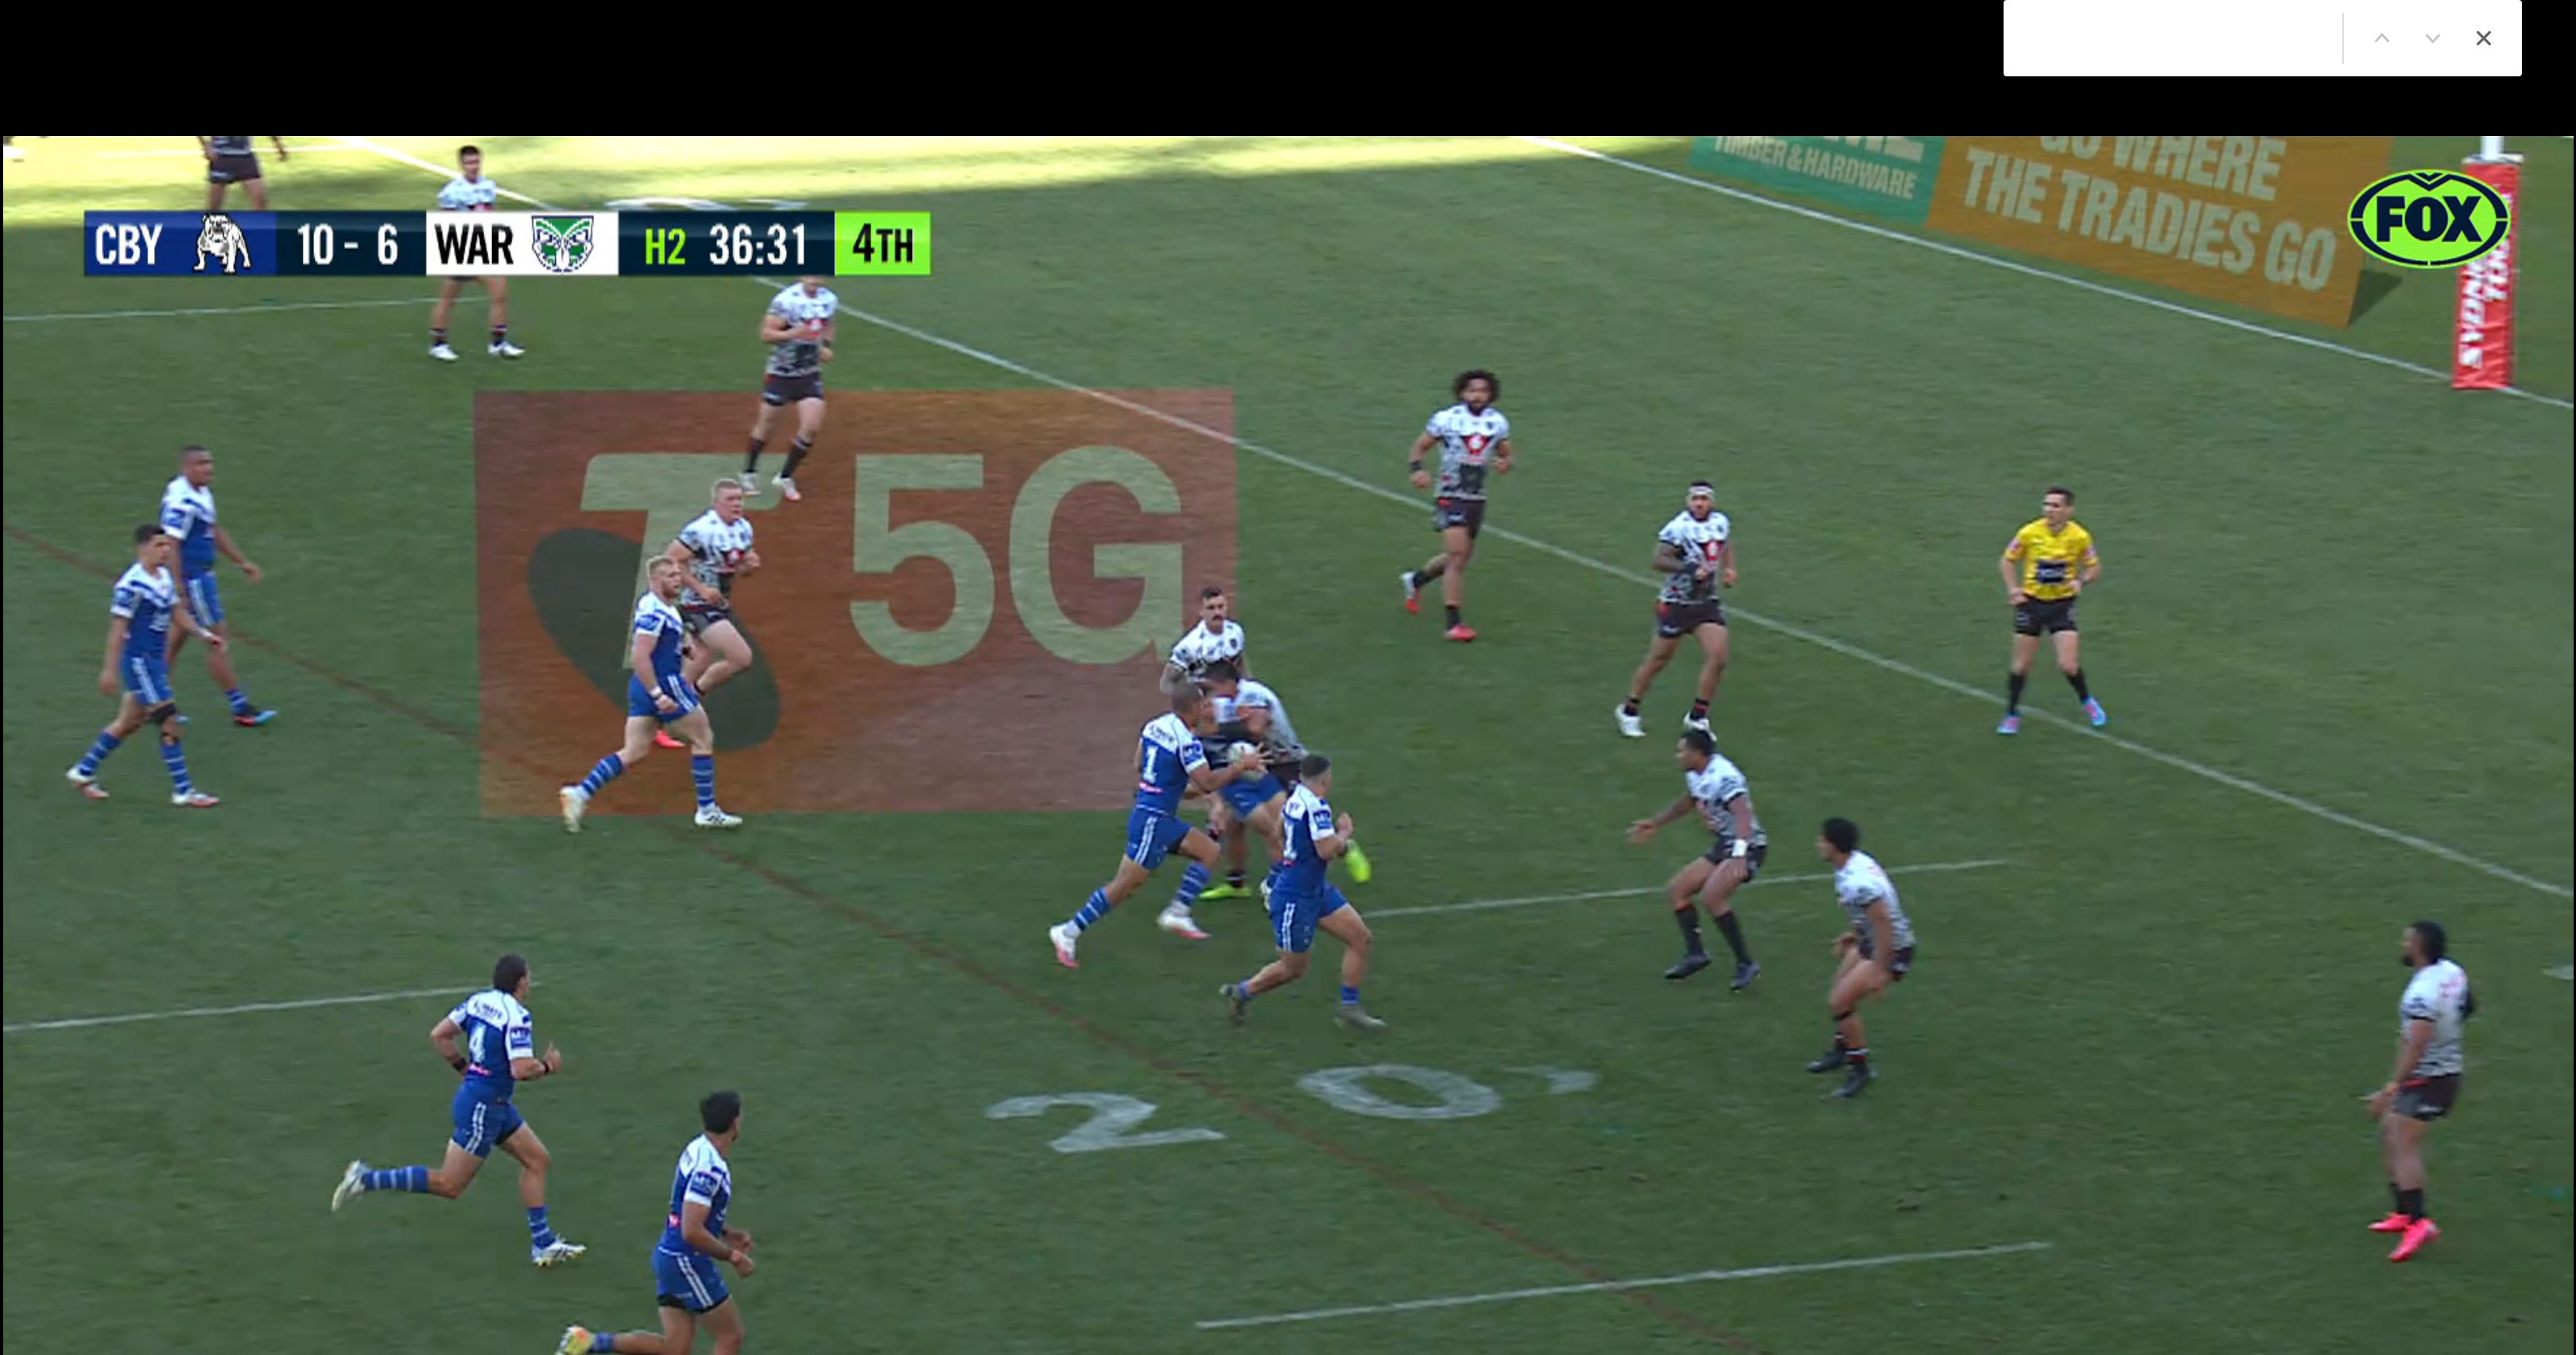
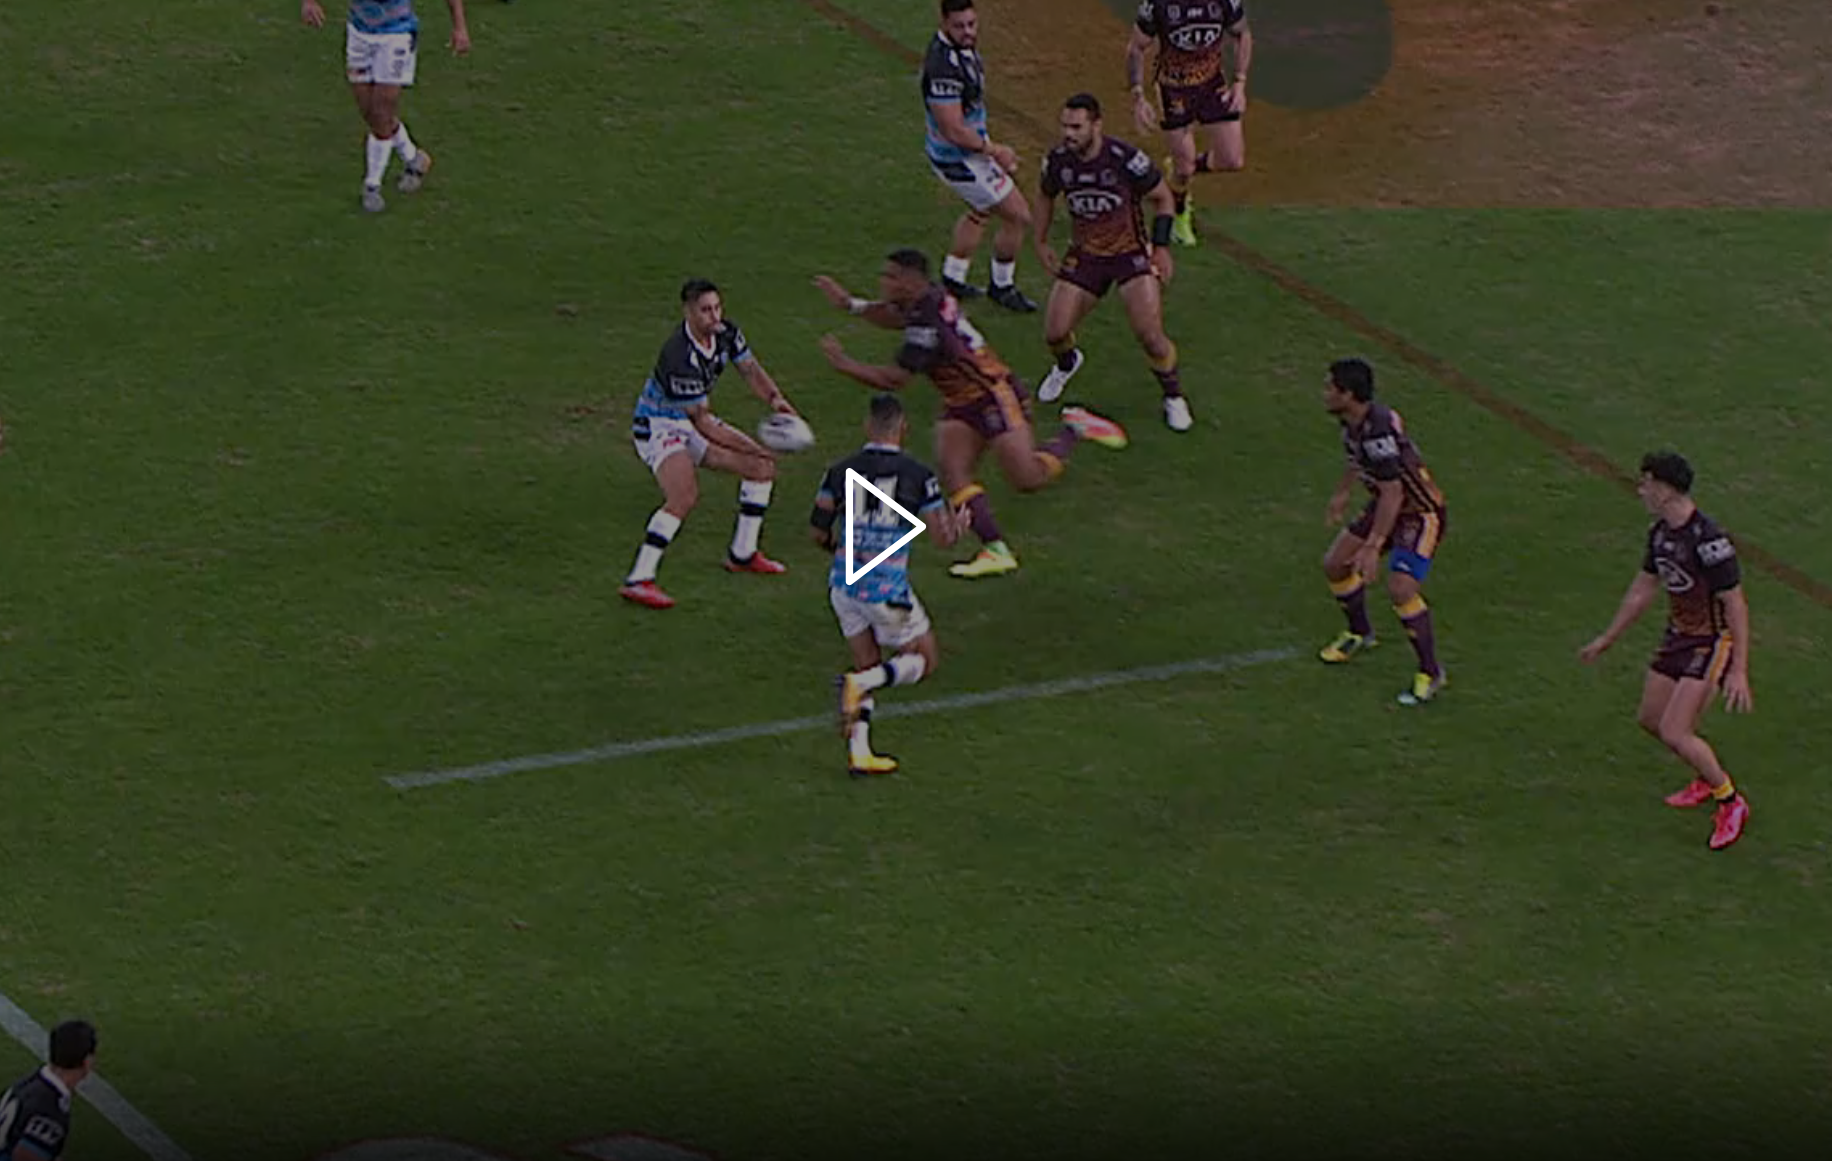
In the Dane Gagai example the Bulldogs are on the attack 10 metres out but have failed to manage the risk of an intercept.

As a risk manager I ask “why was no player behind the play in case this happened?” (there are other questions such as what can be done to prevent an intercept eg draw and pass execution etc but let’s focus on what we could do post intercept).

How difficult would it have been for the Bulldogs to have a player positioned behind the play “just in case”?

Normally the “just in case” manager is the fullback (and I will publish more posts on how to exploit this opportunity) but this doesn’t work if they are deployed in the attacking play – opening up a defensive hole in a team’s risk management to a fast change of possession – so it needs to be someone else.

A potential strategy

The player preferably shouldn’t be there at the start of the play to prevent signalling to the defence which side you are going to attack. An option could be for a far side attacker to rotate into a “defensive” position post shifting of the ball from dummy half.

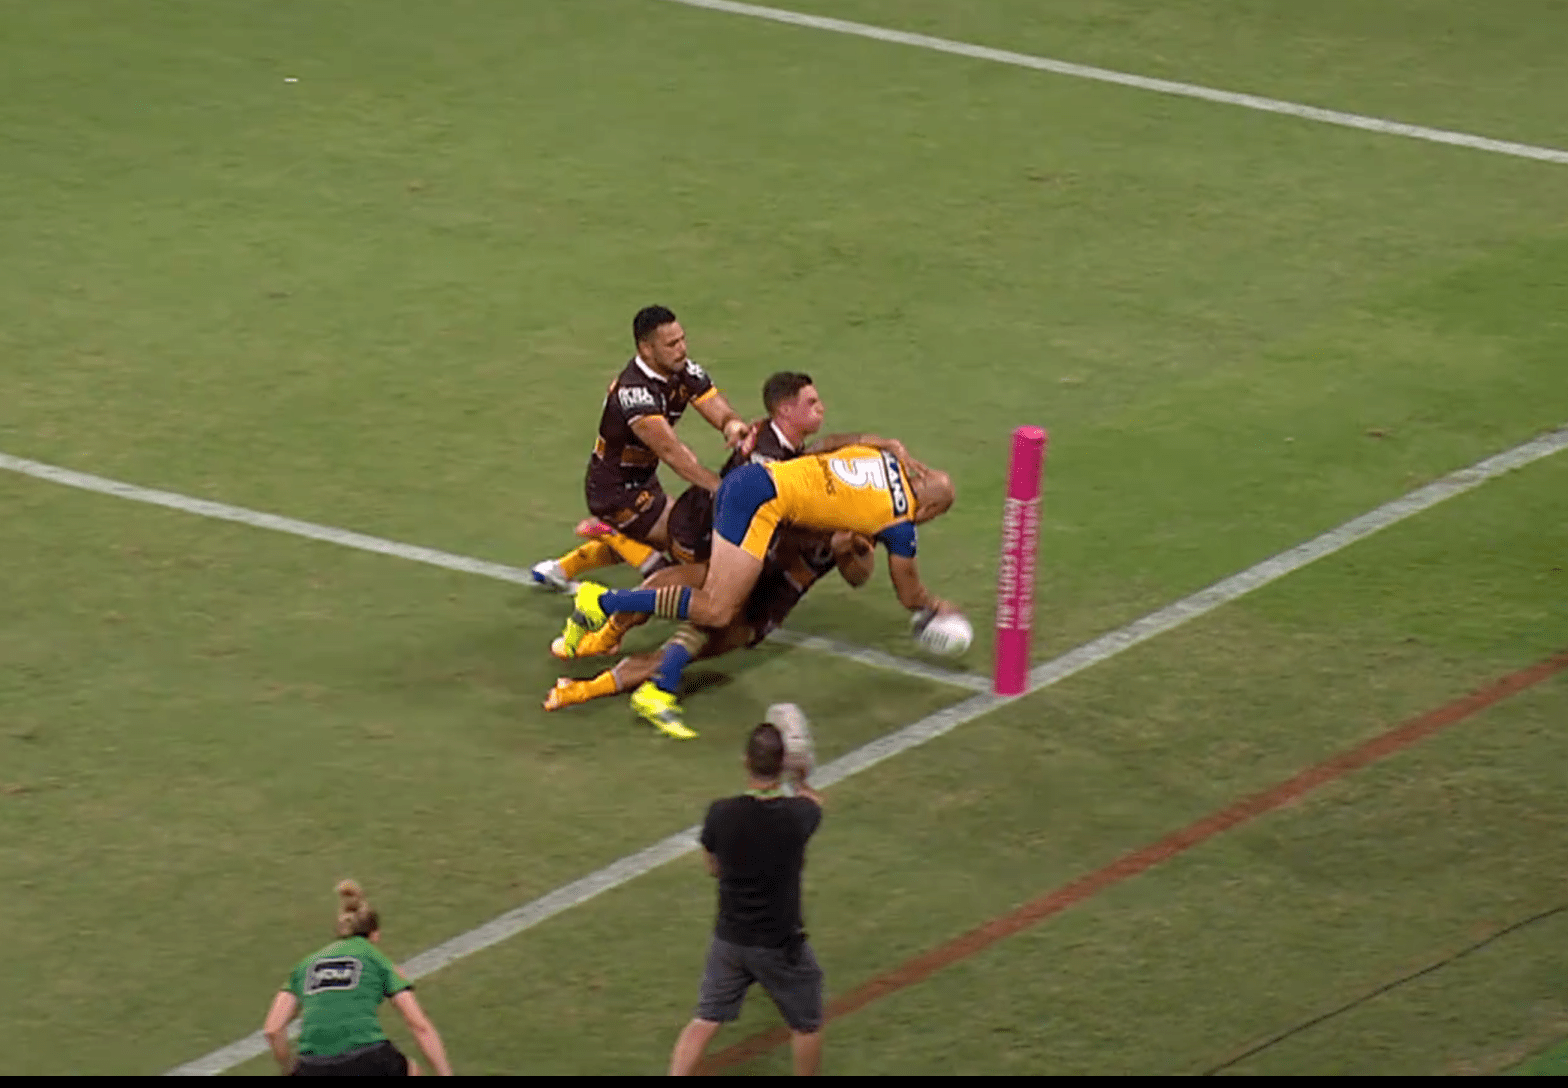
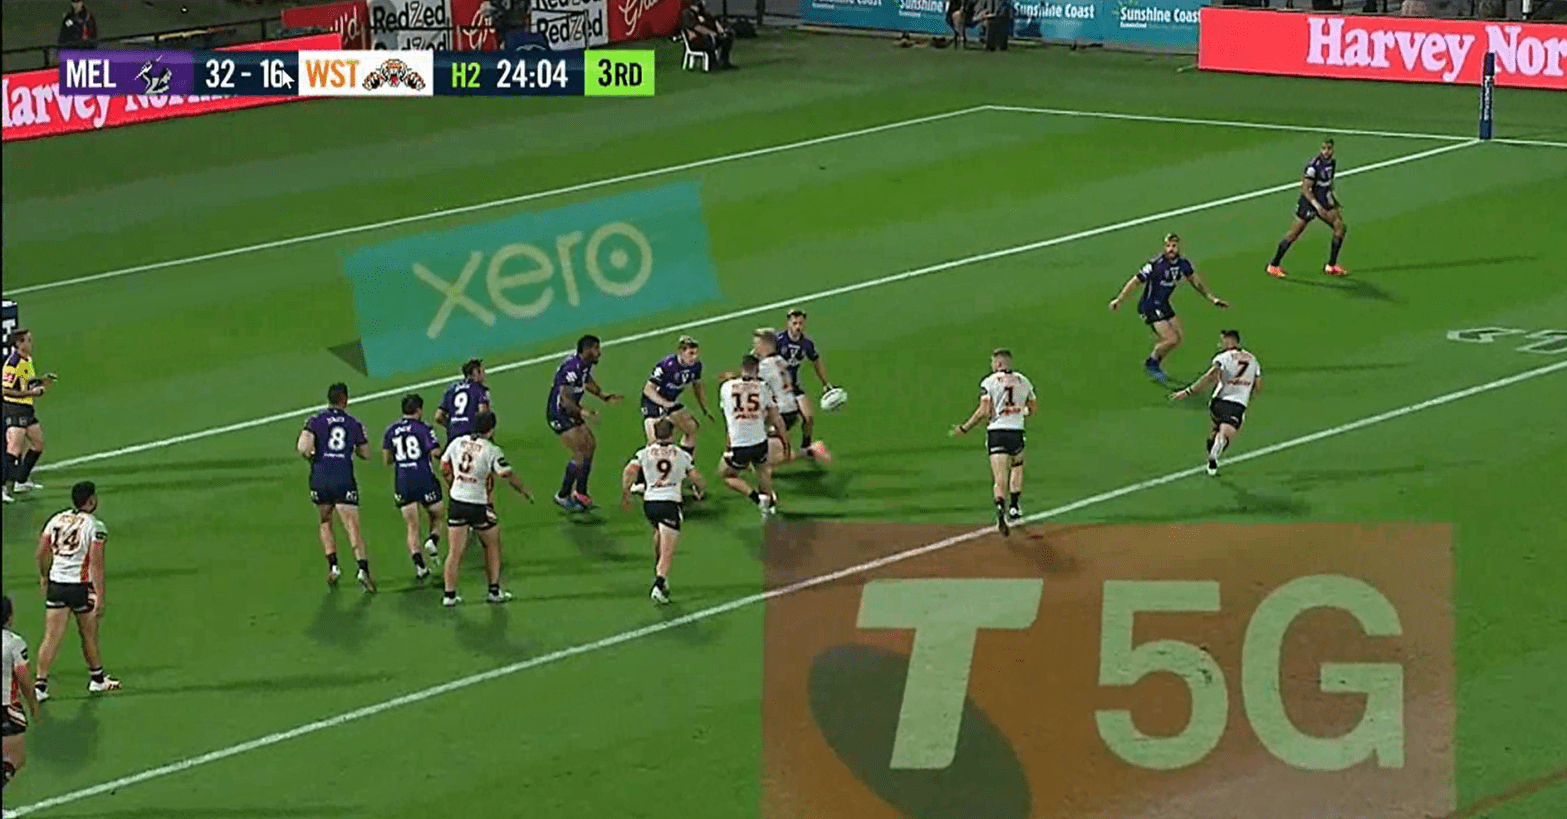
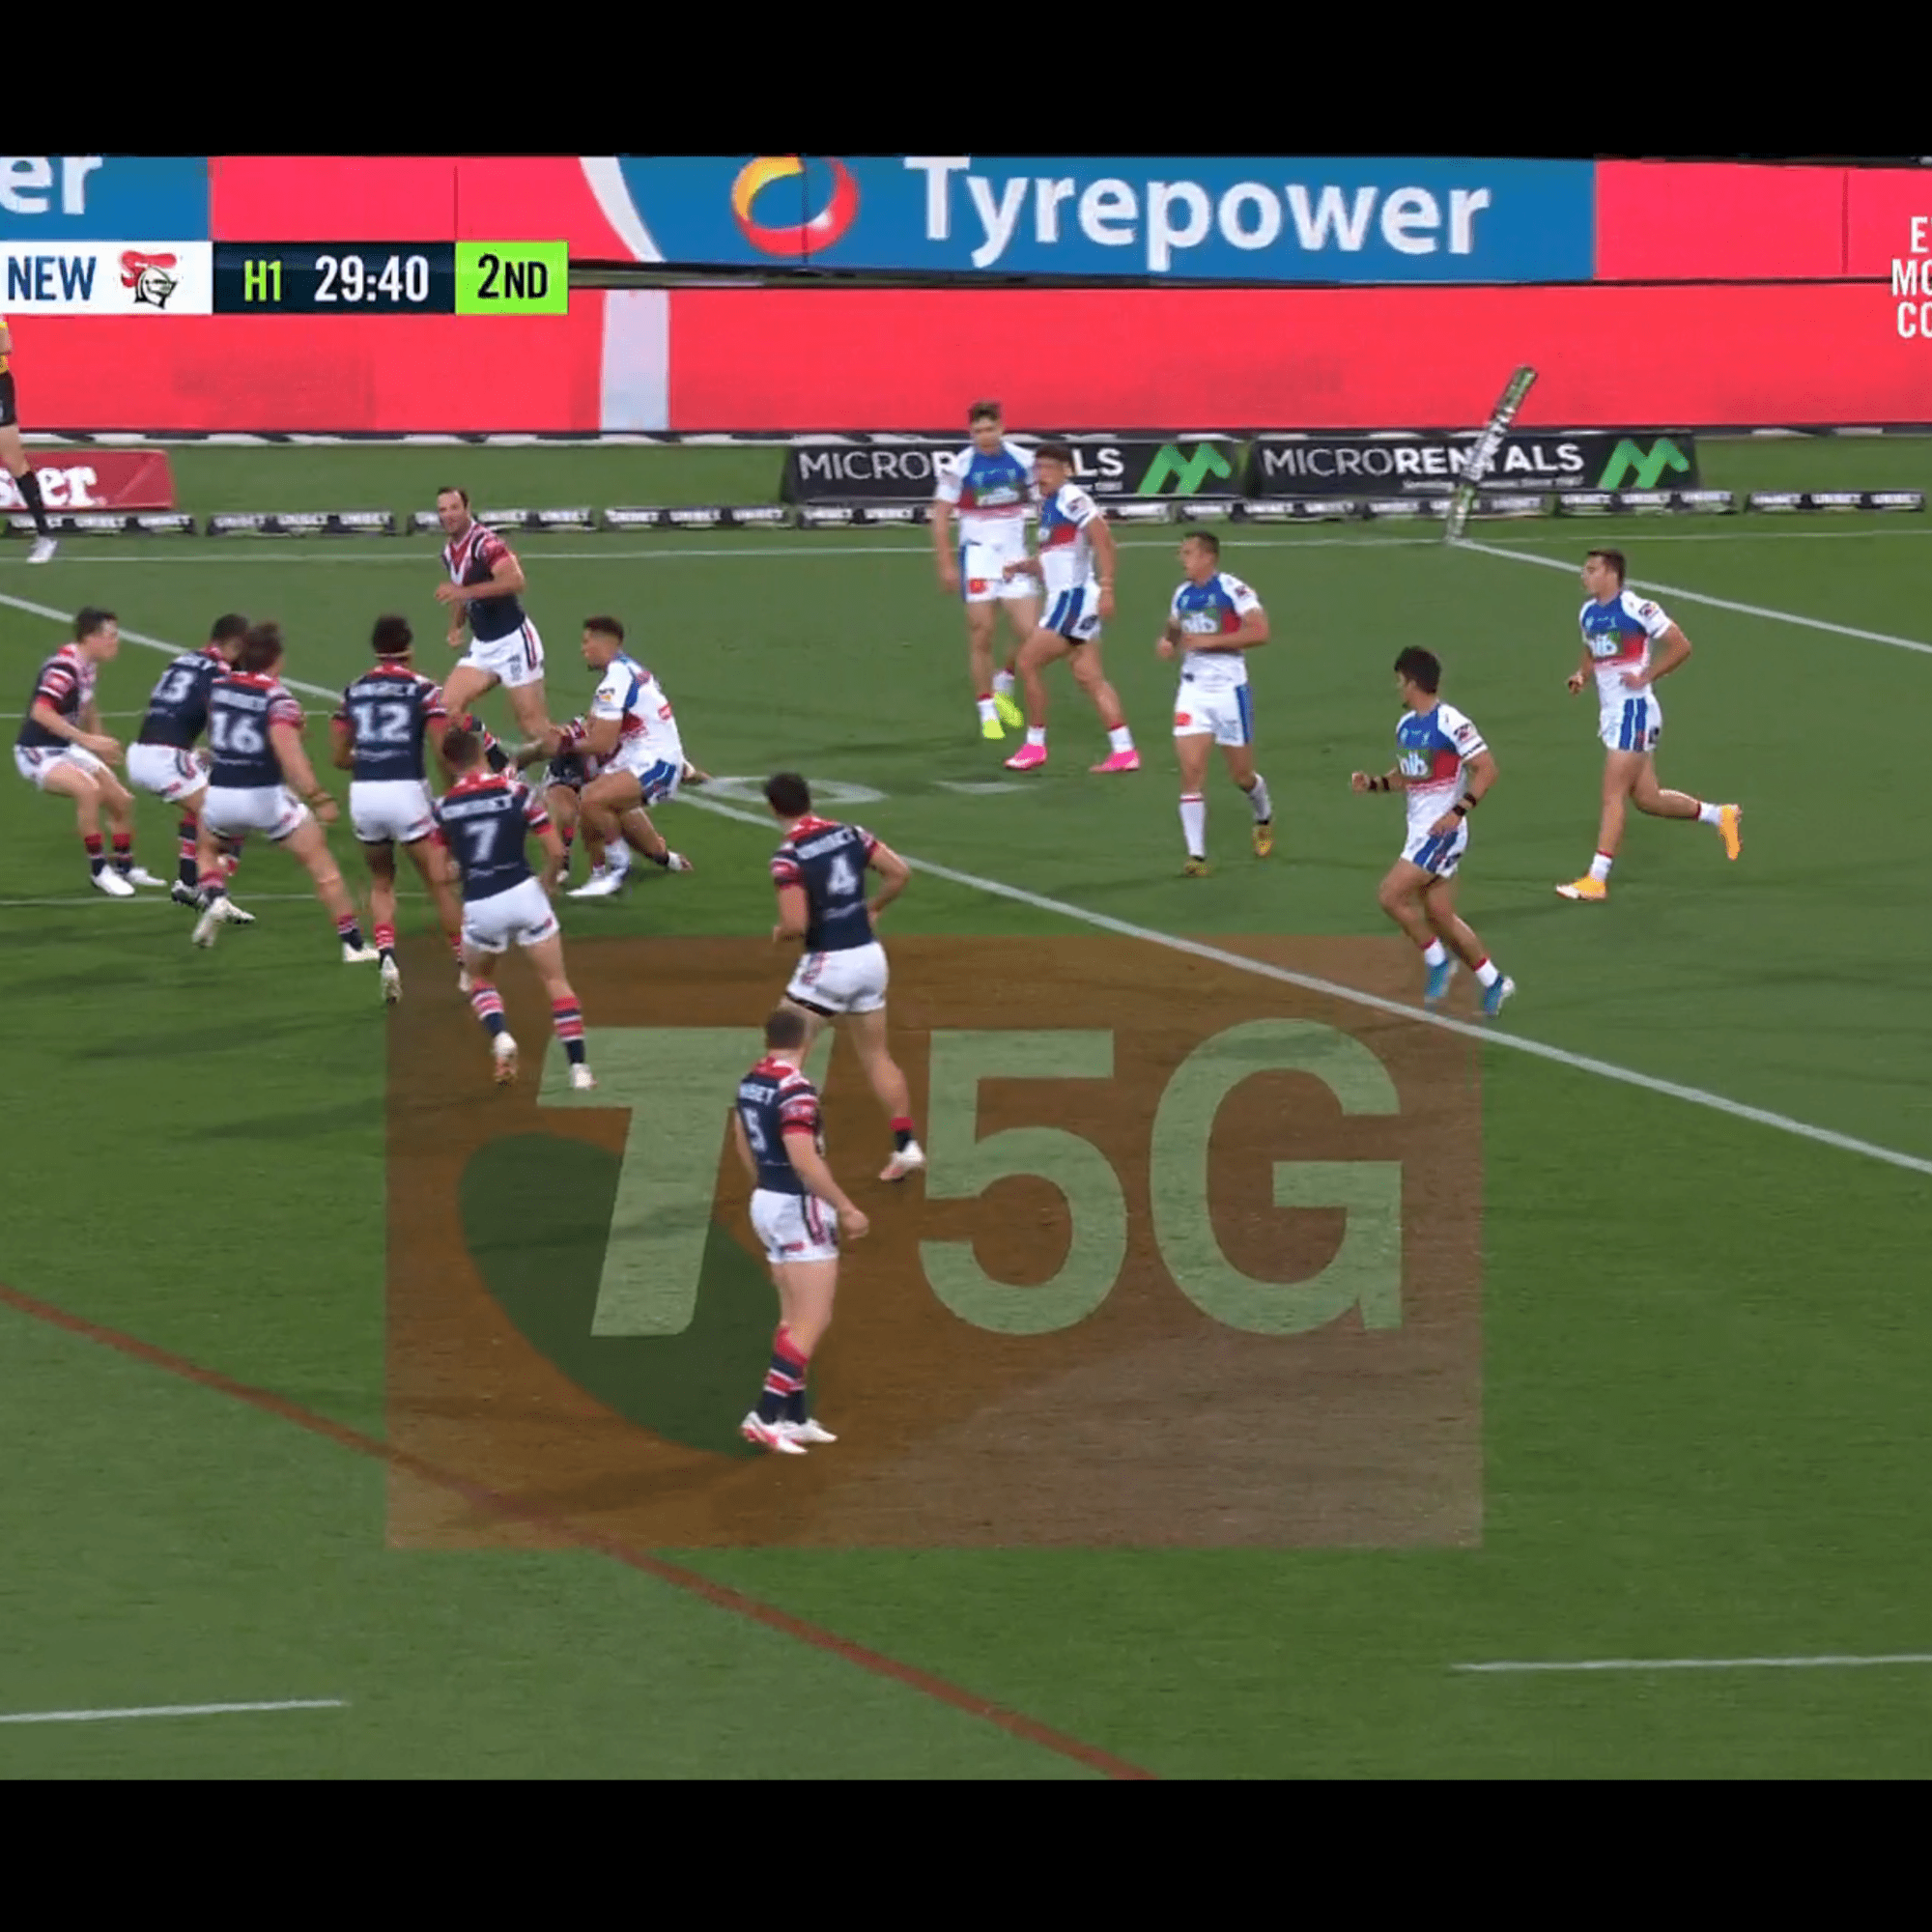
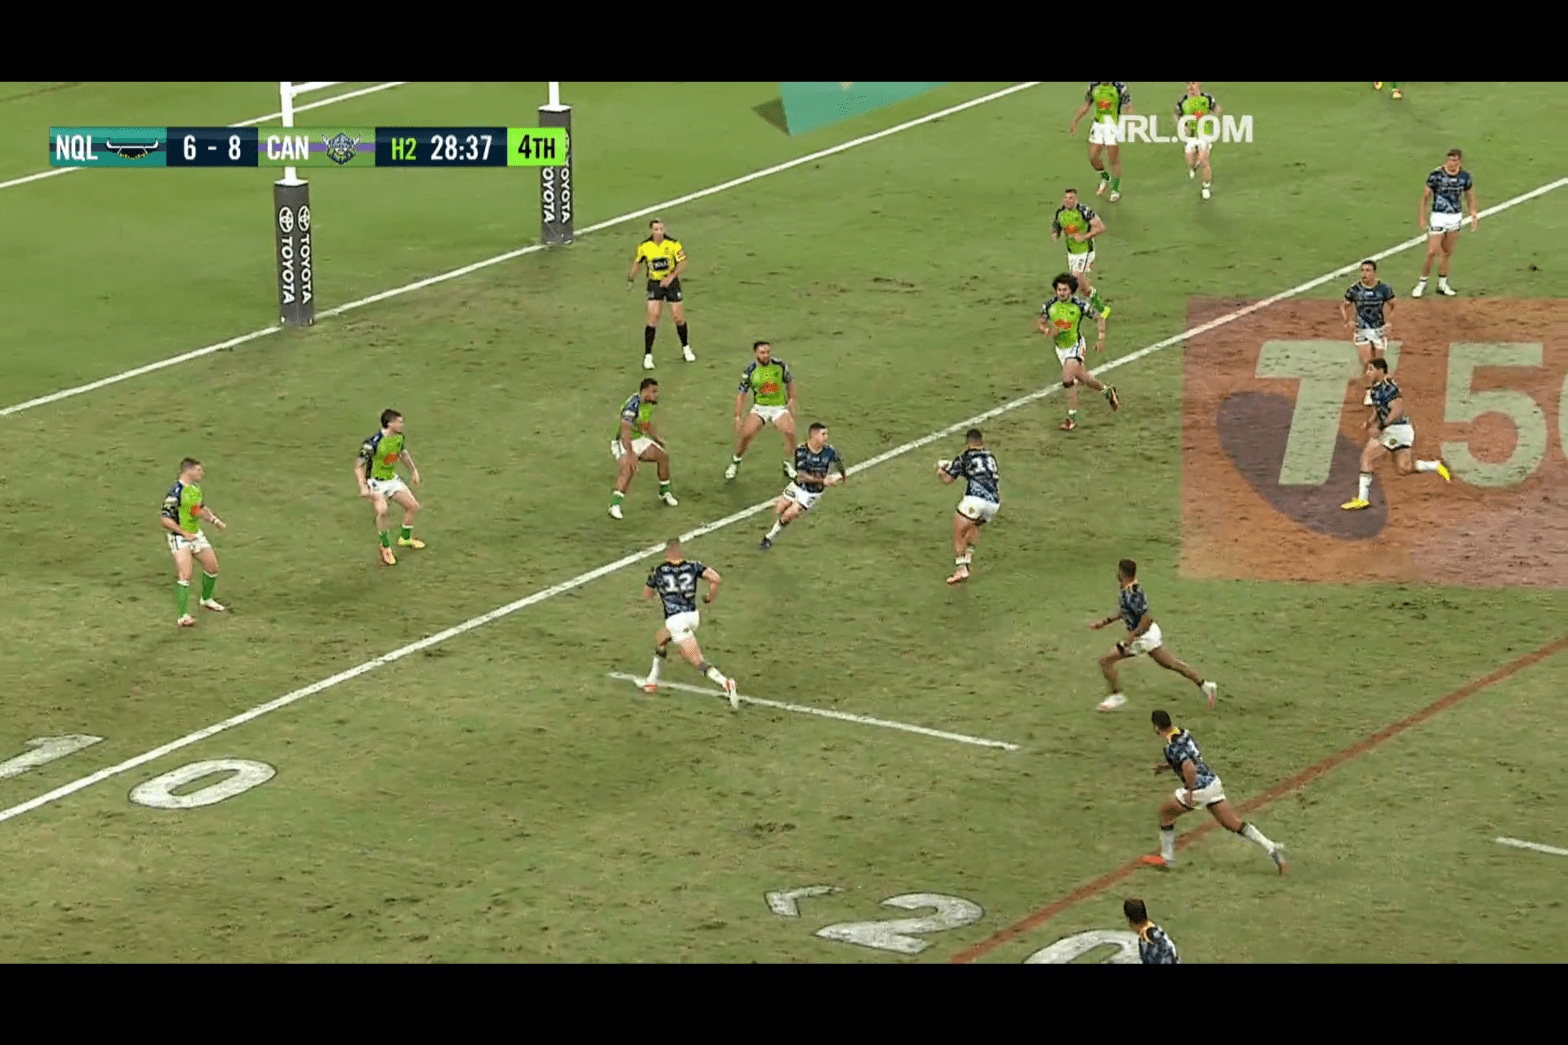
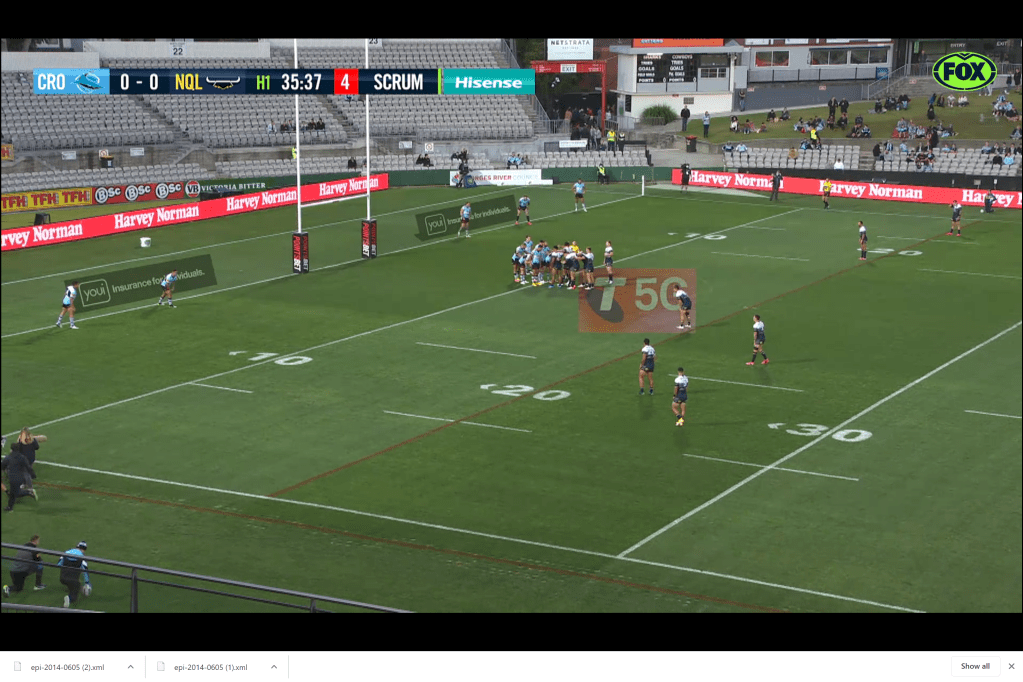
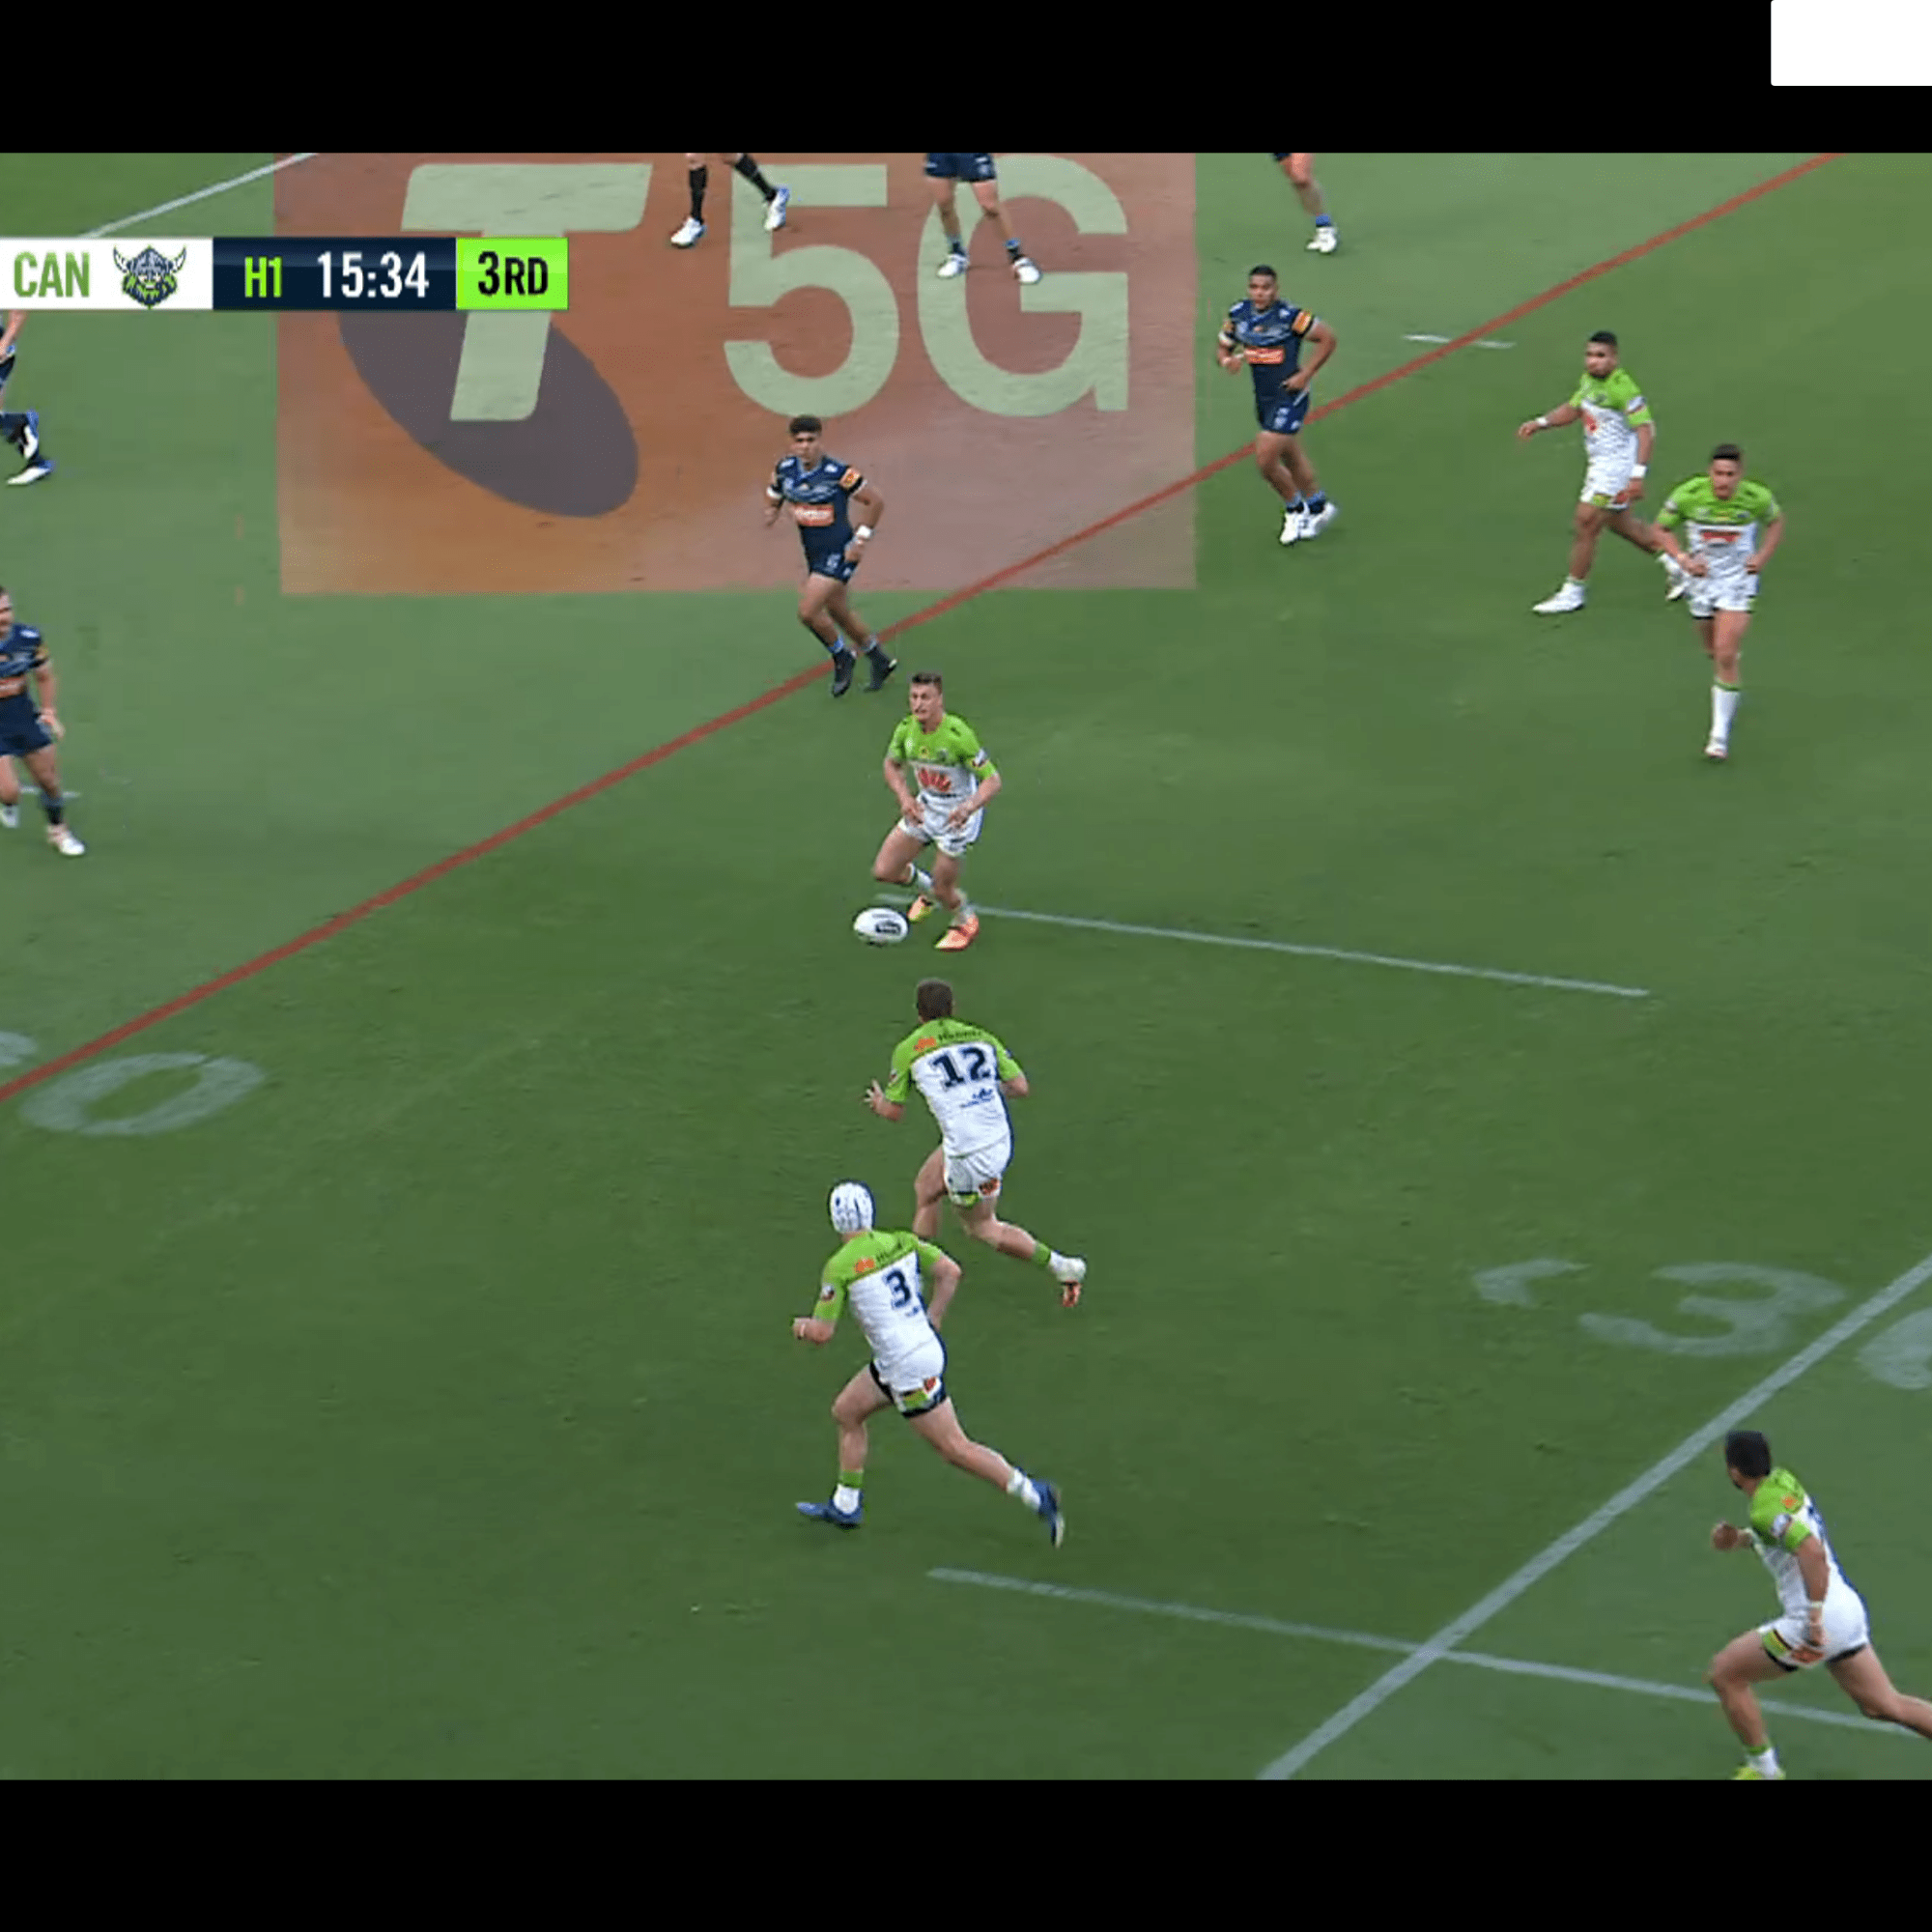
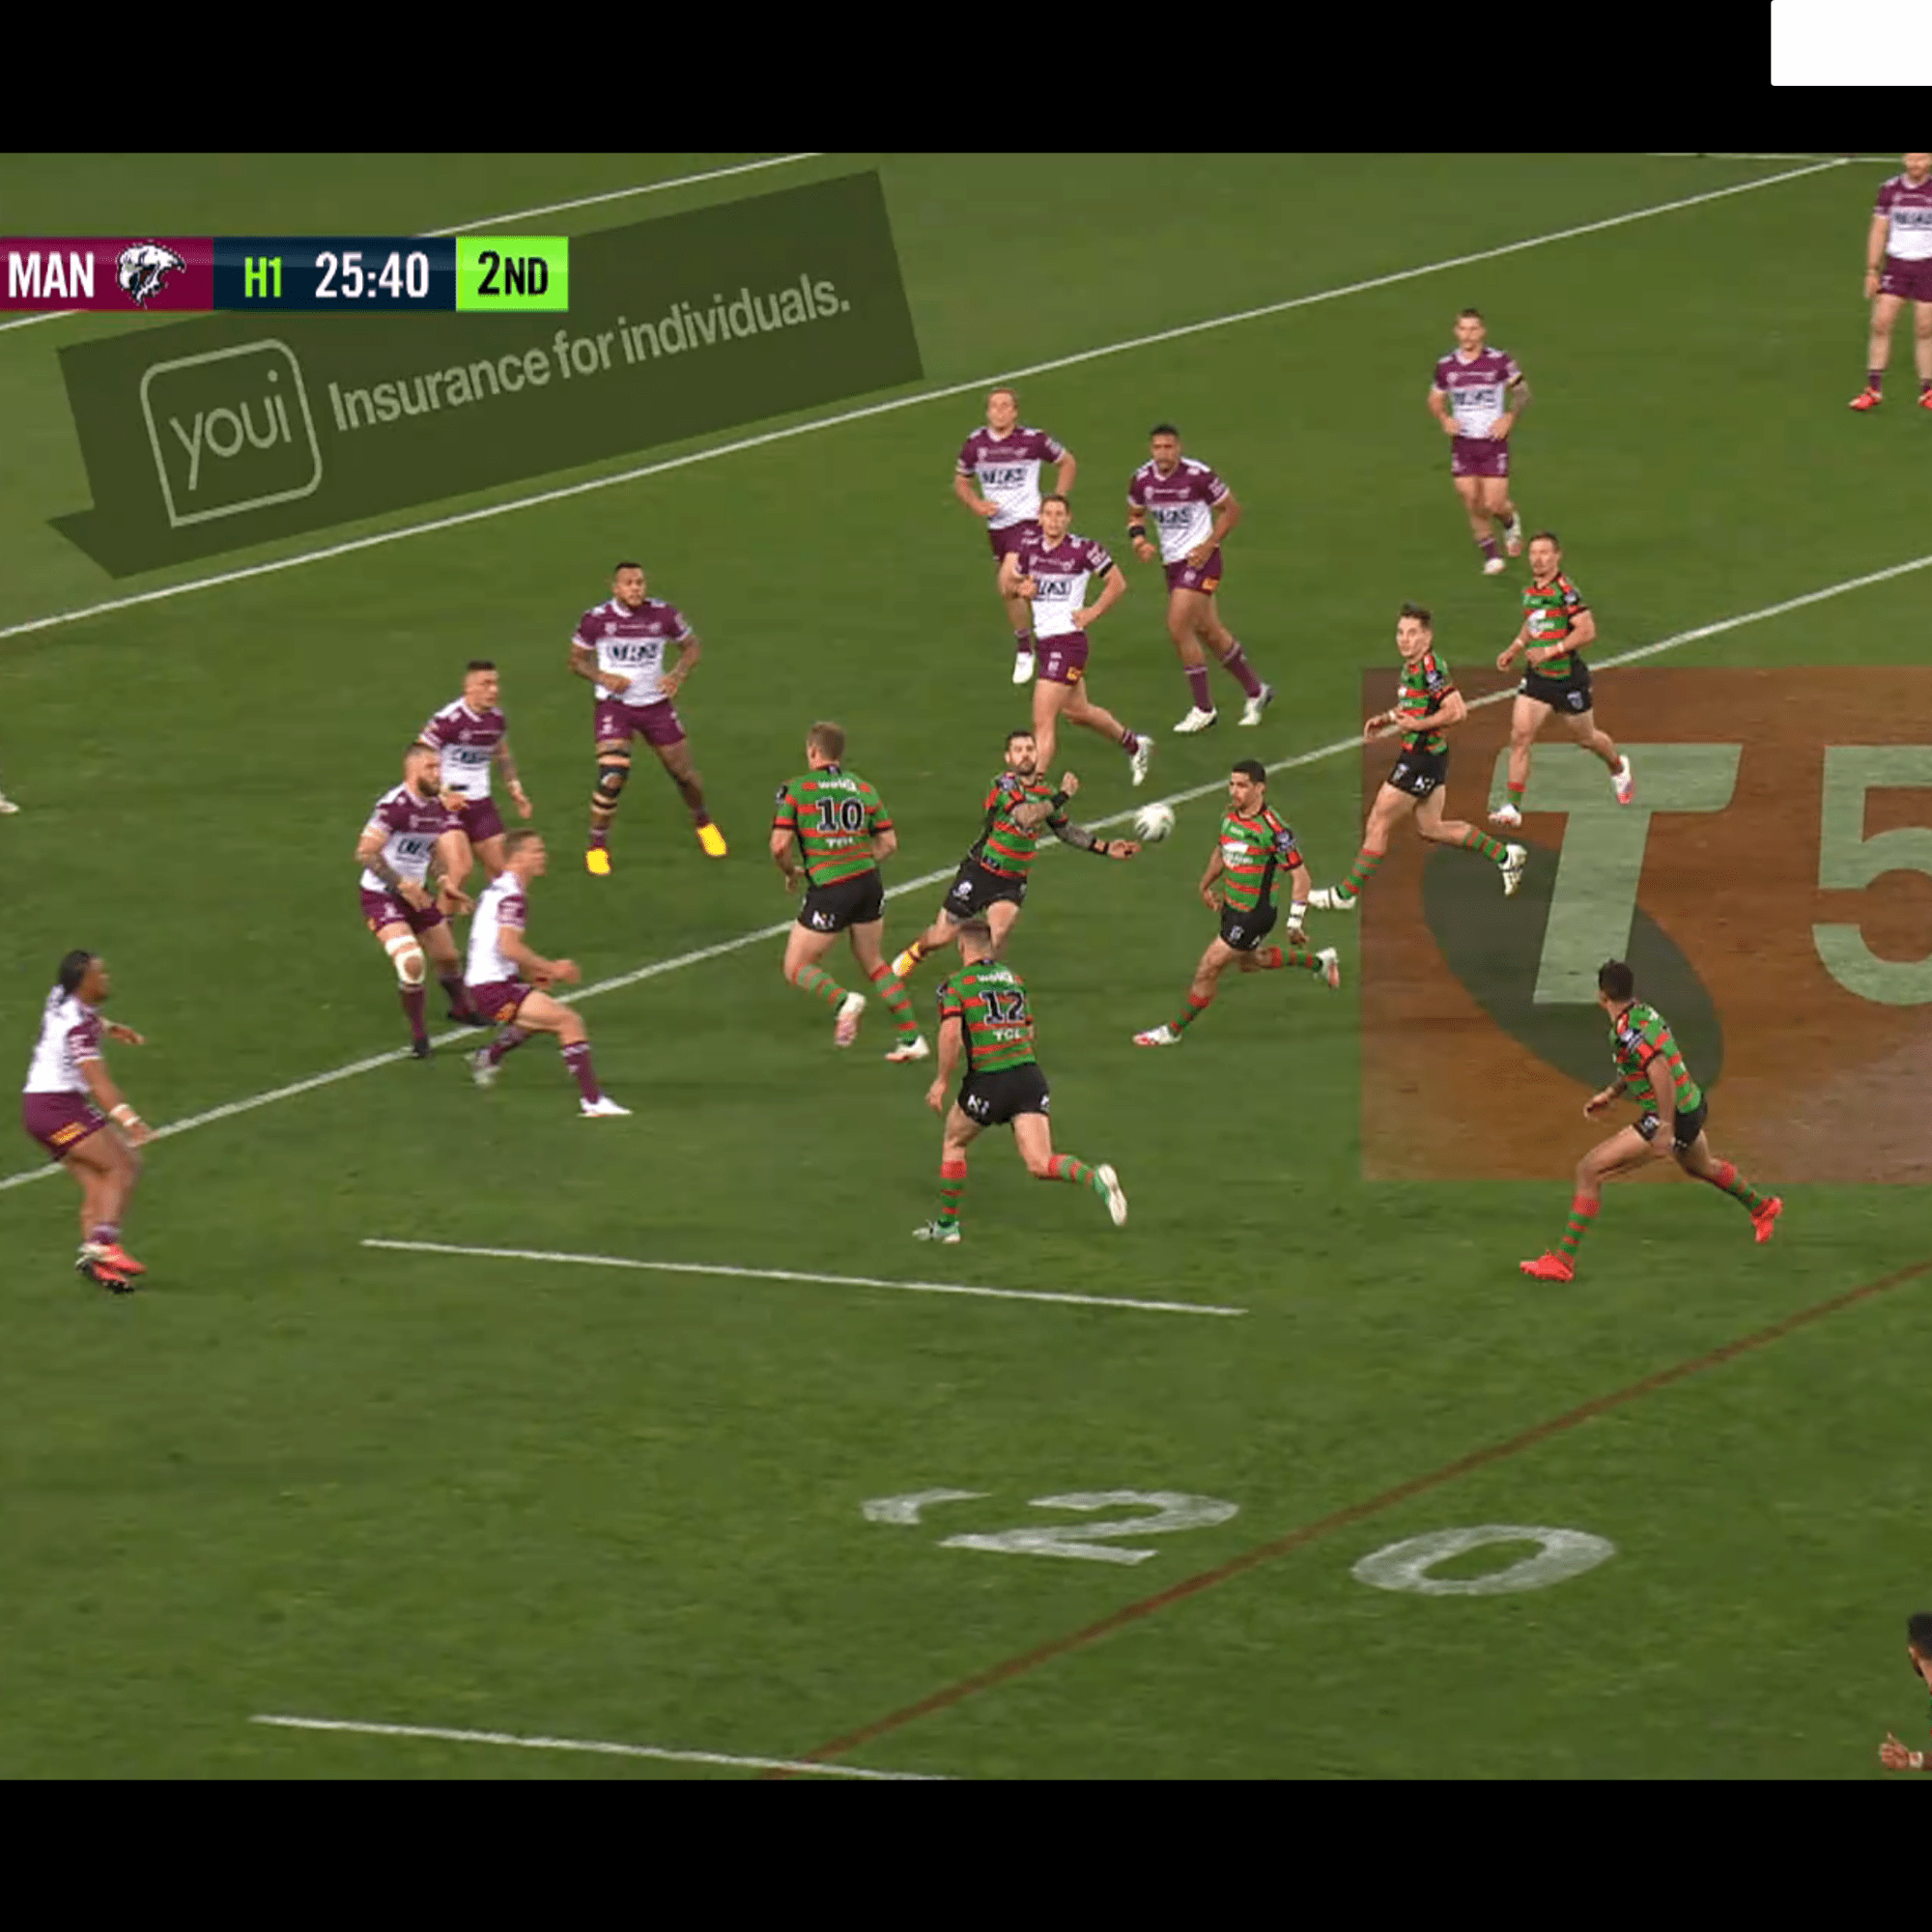
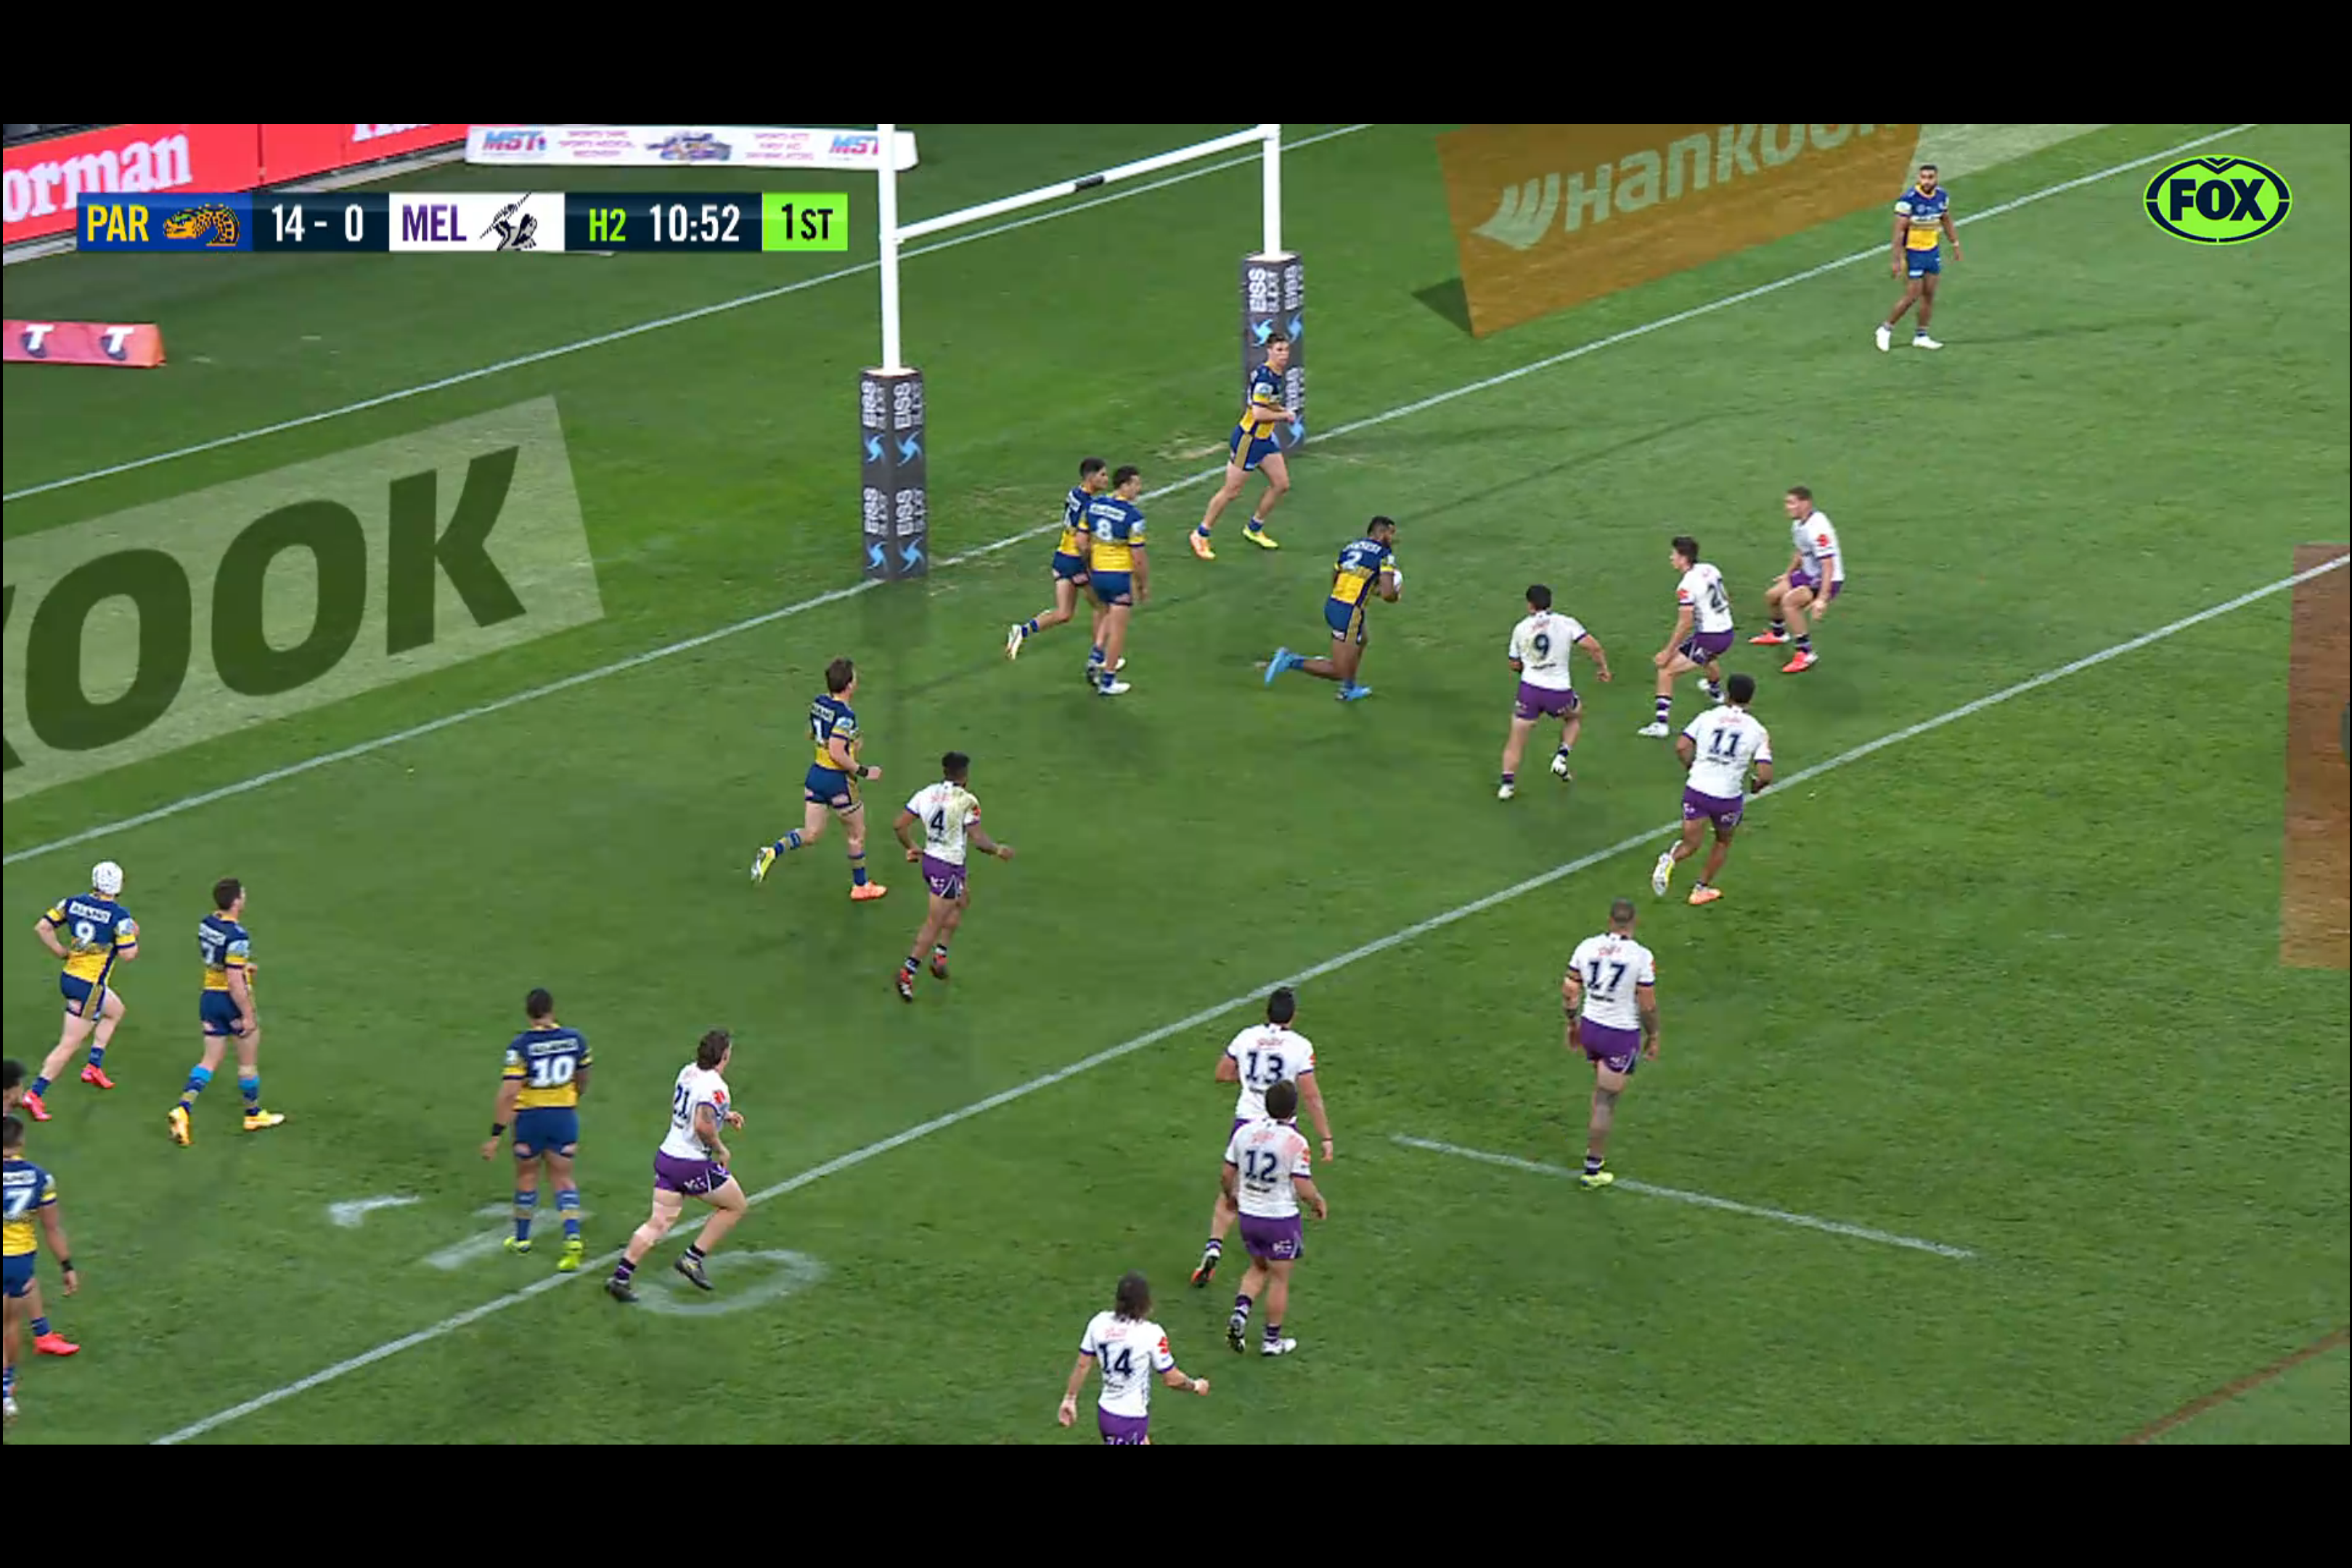
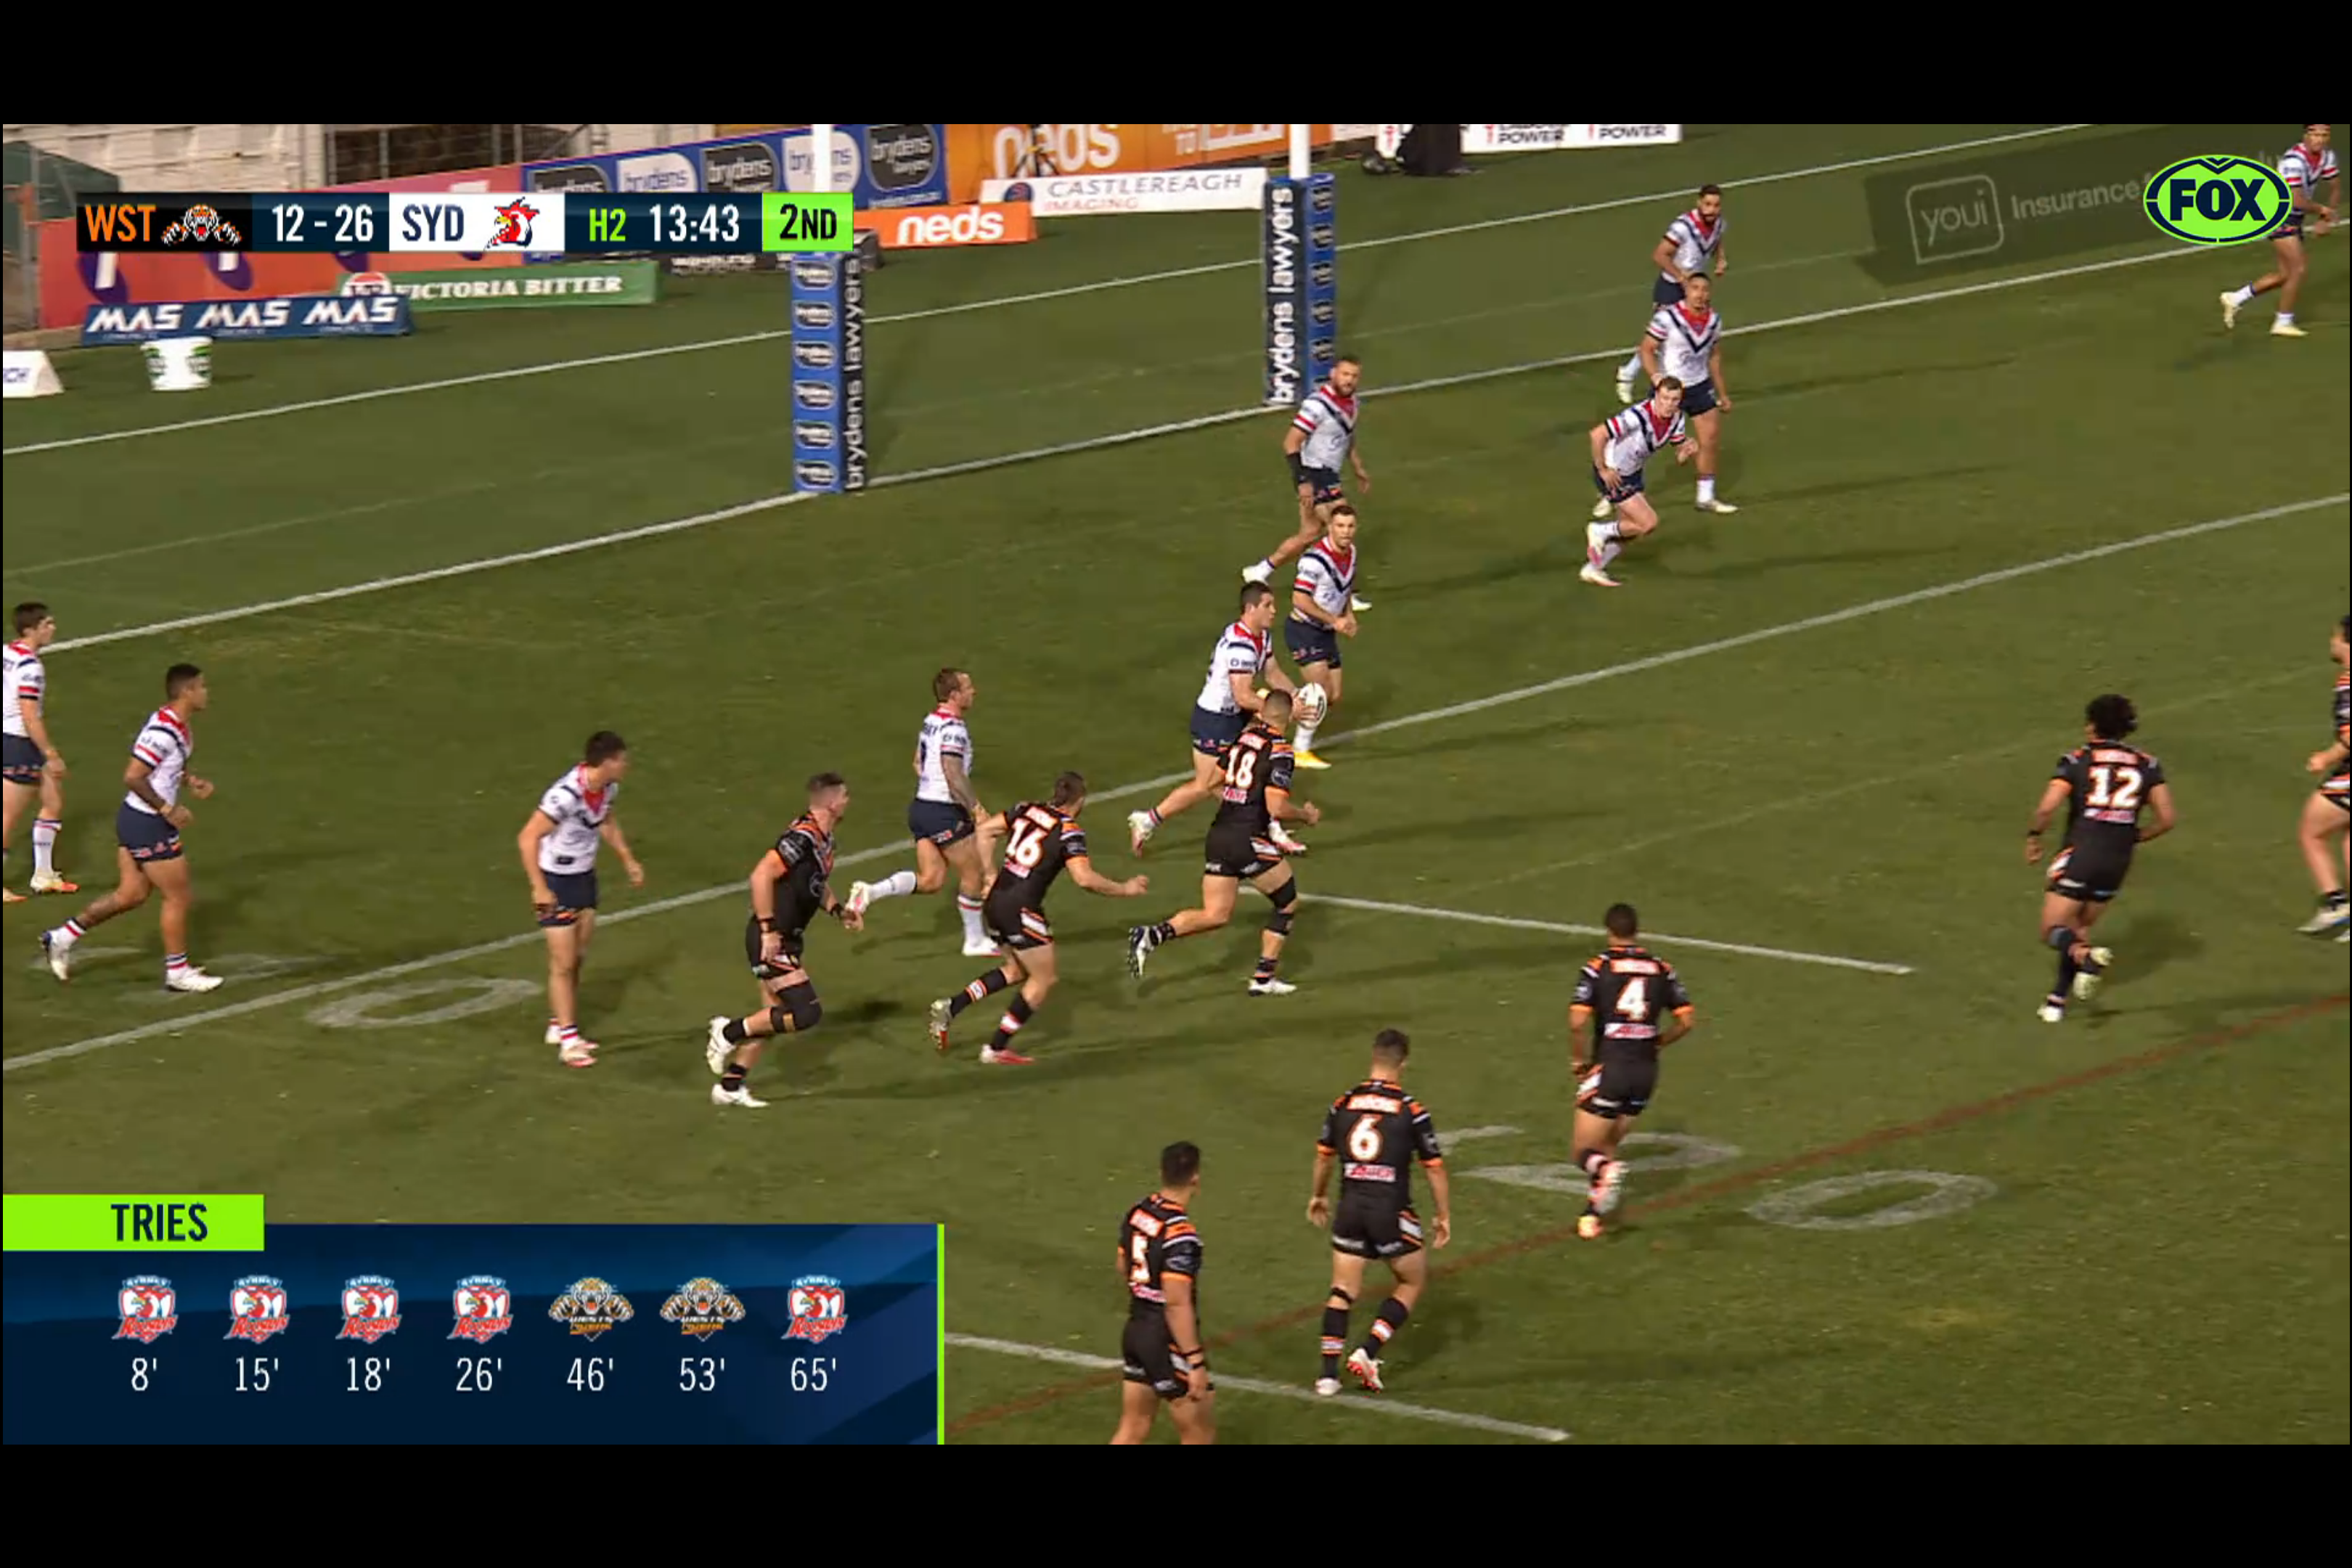
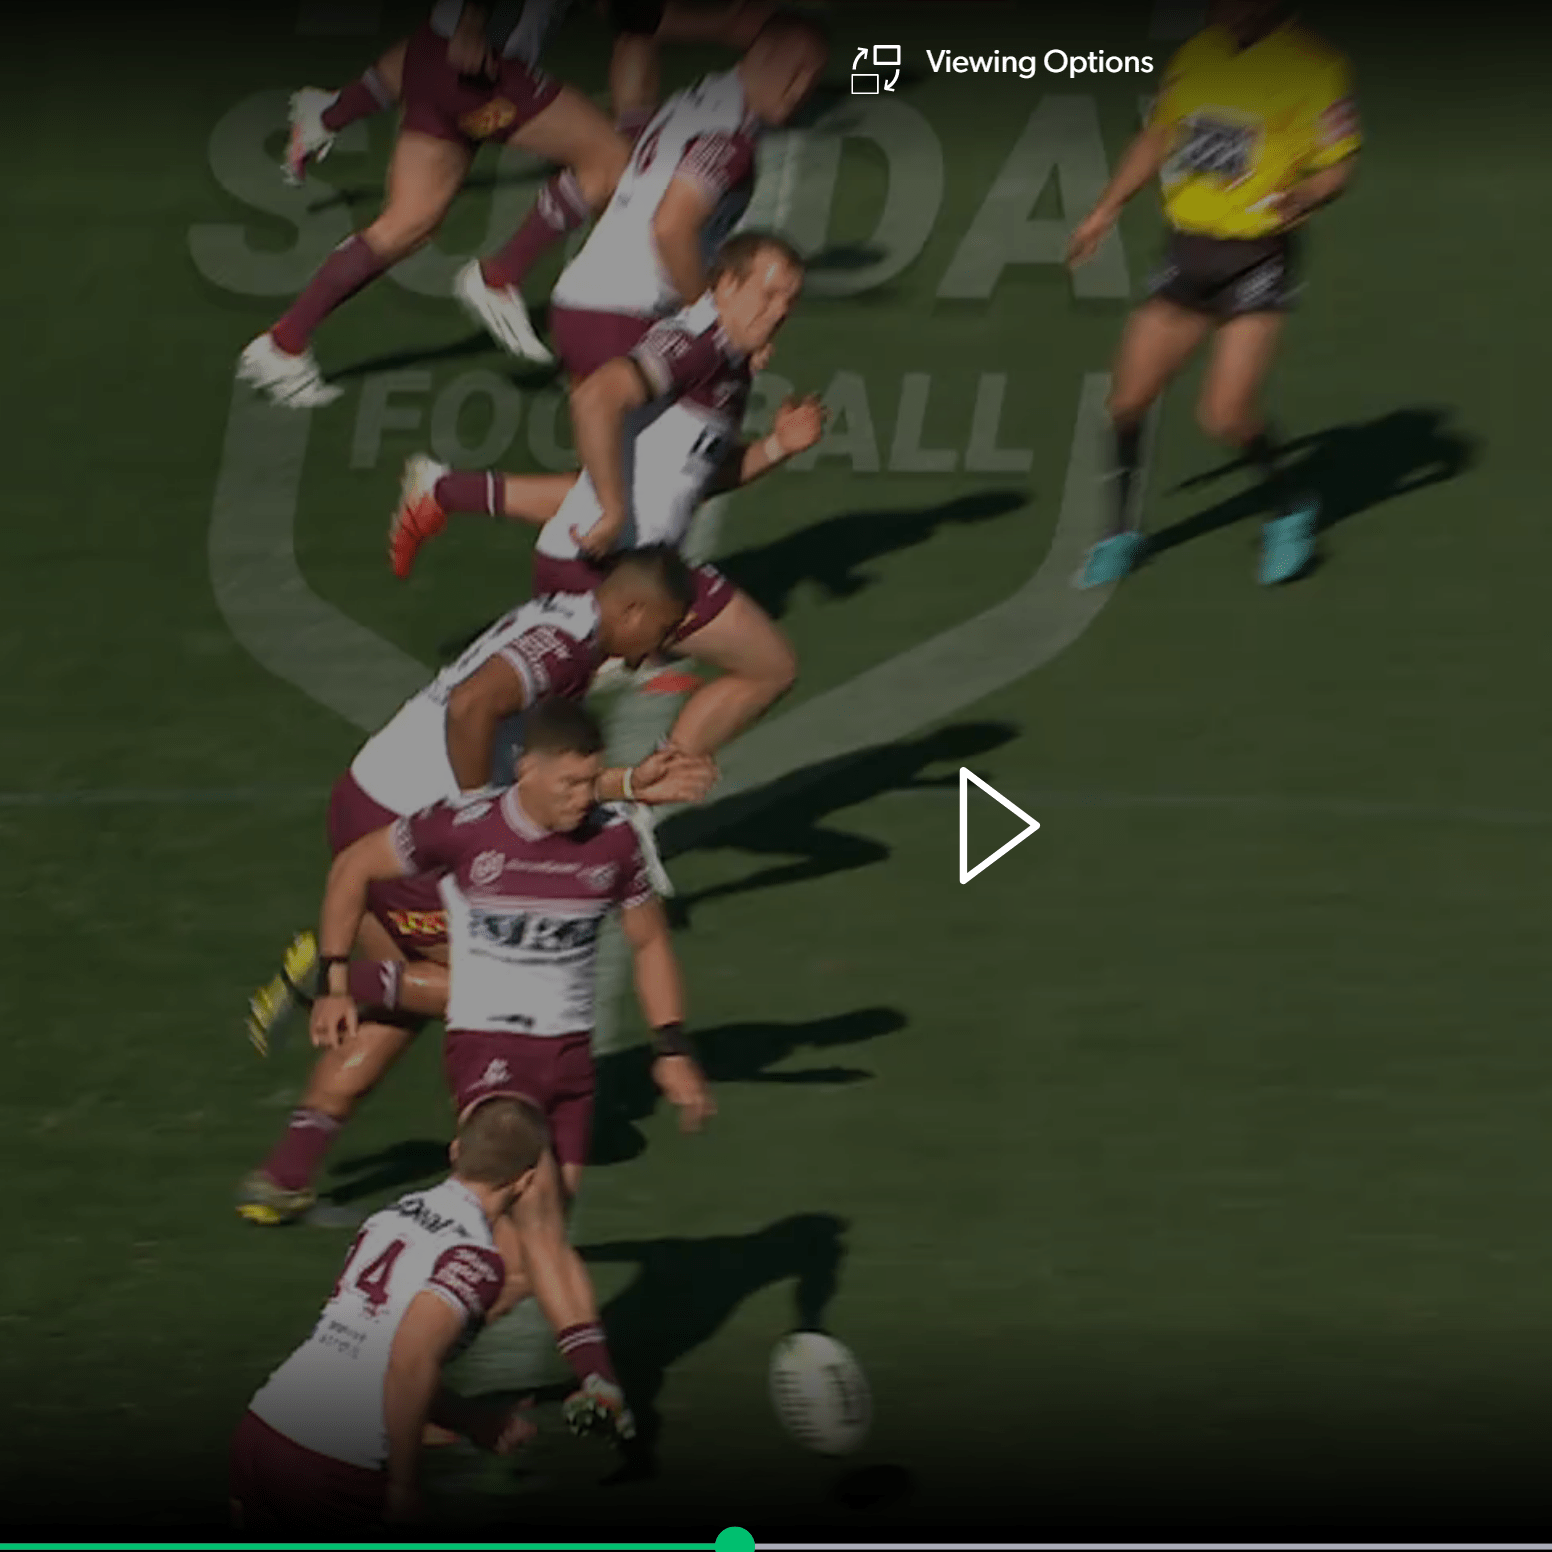
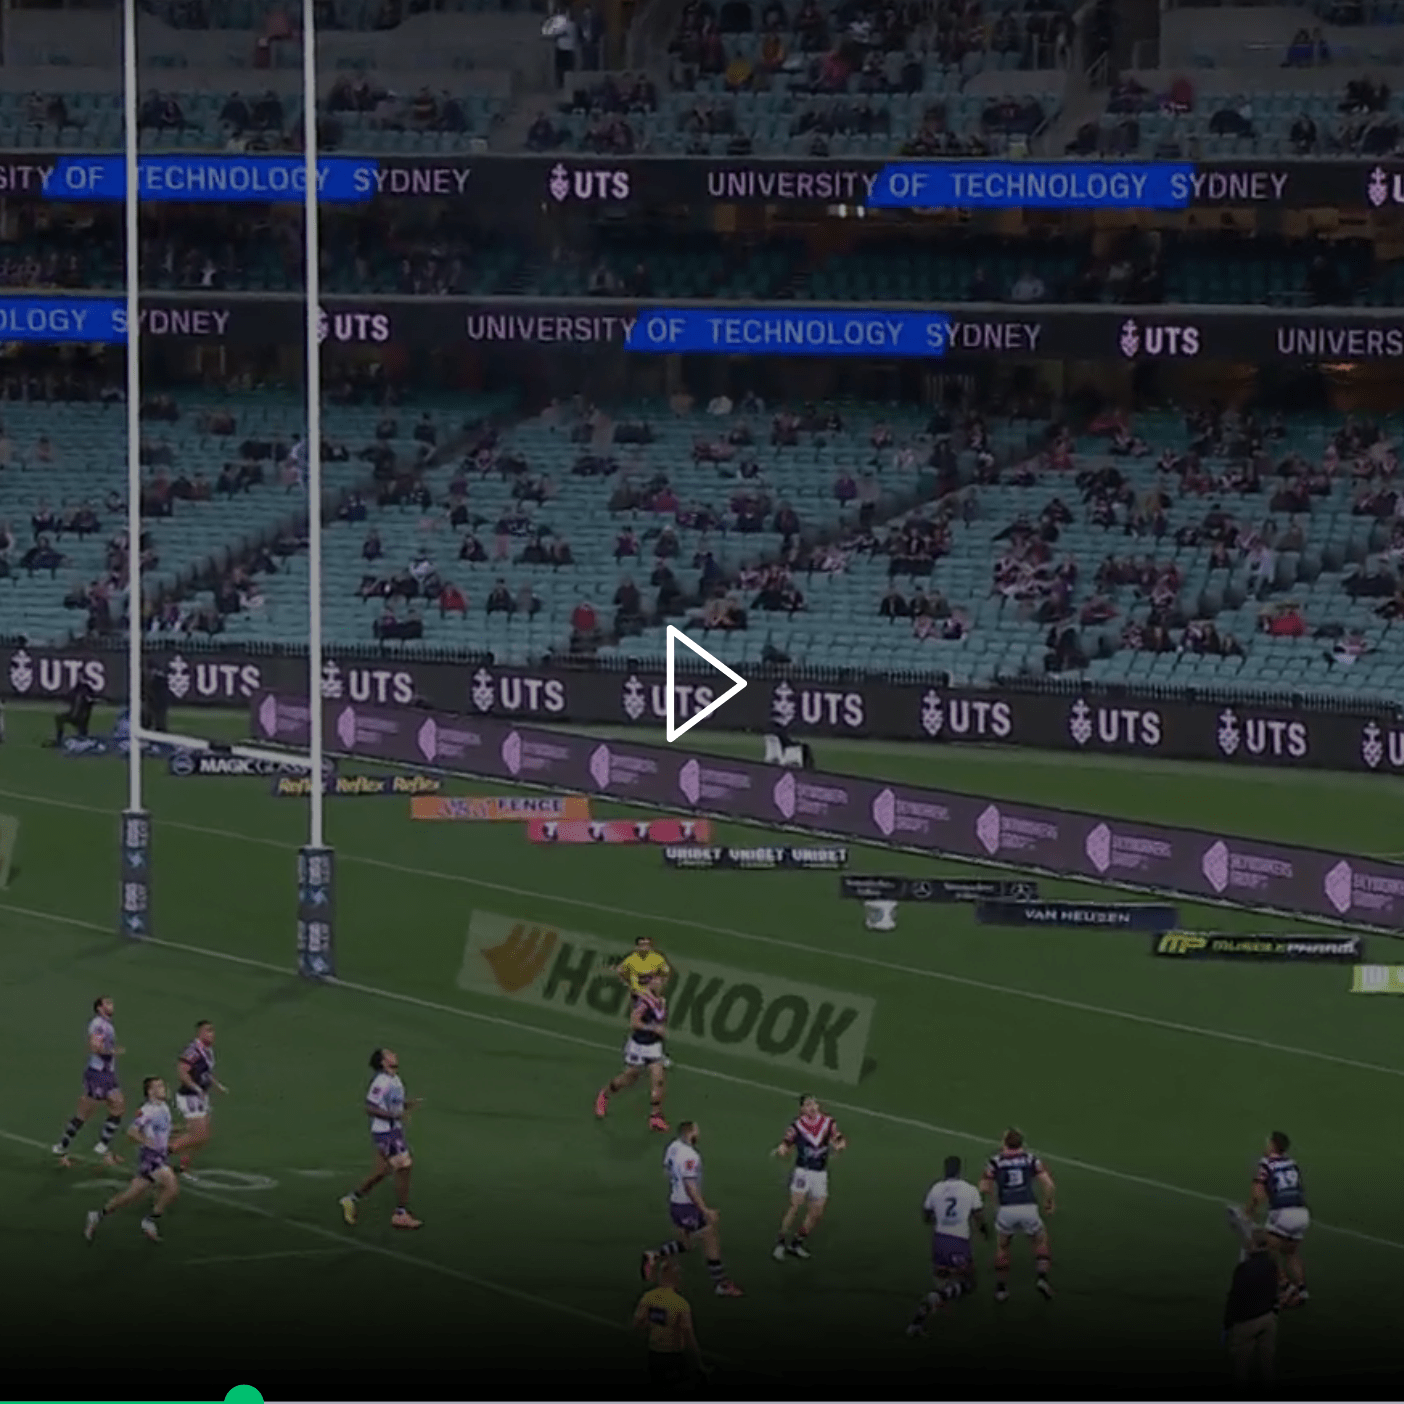
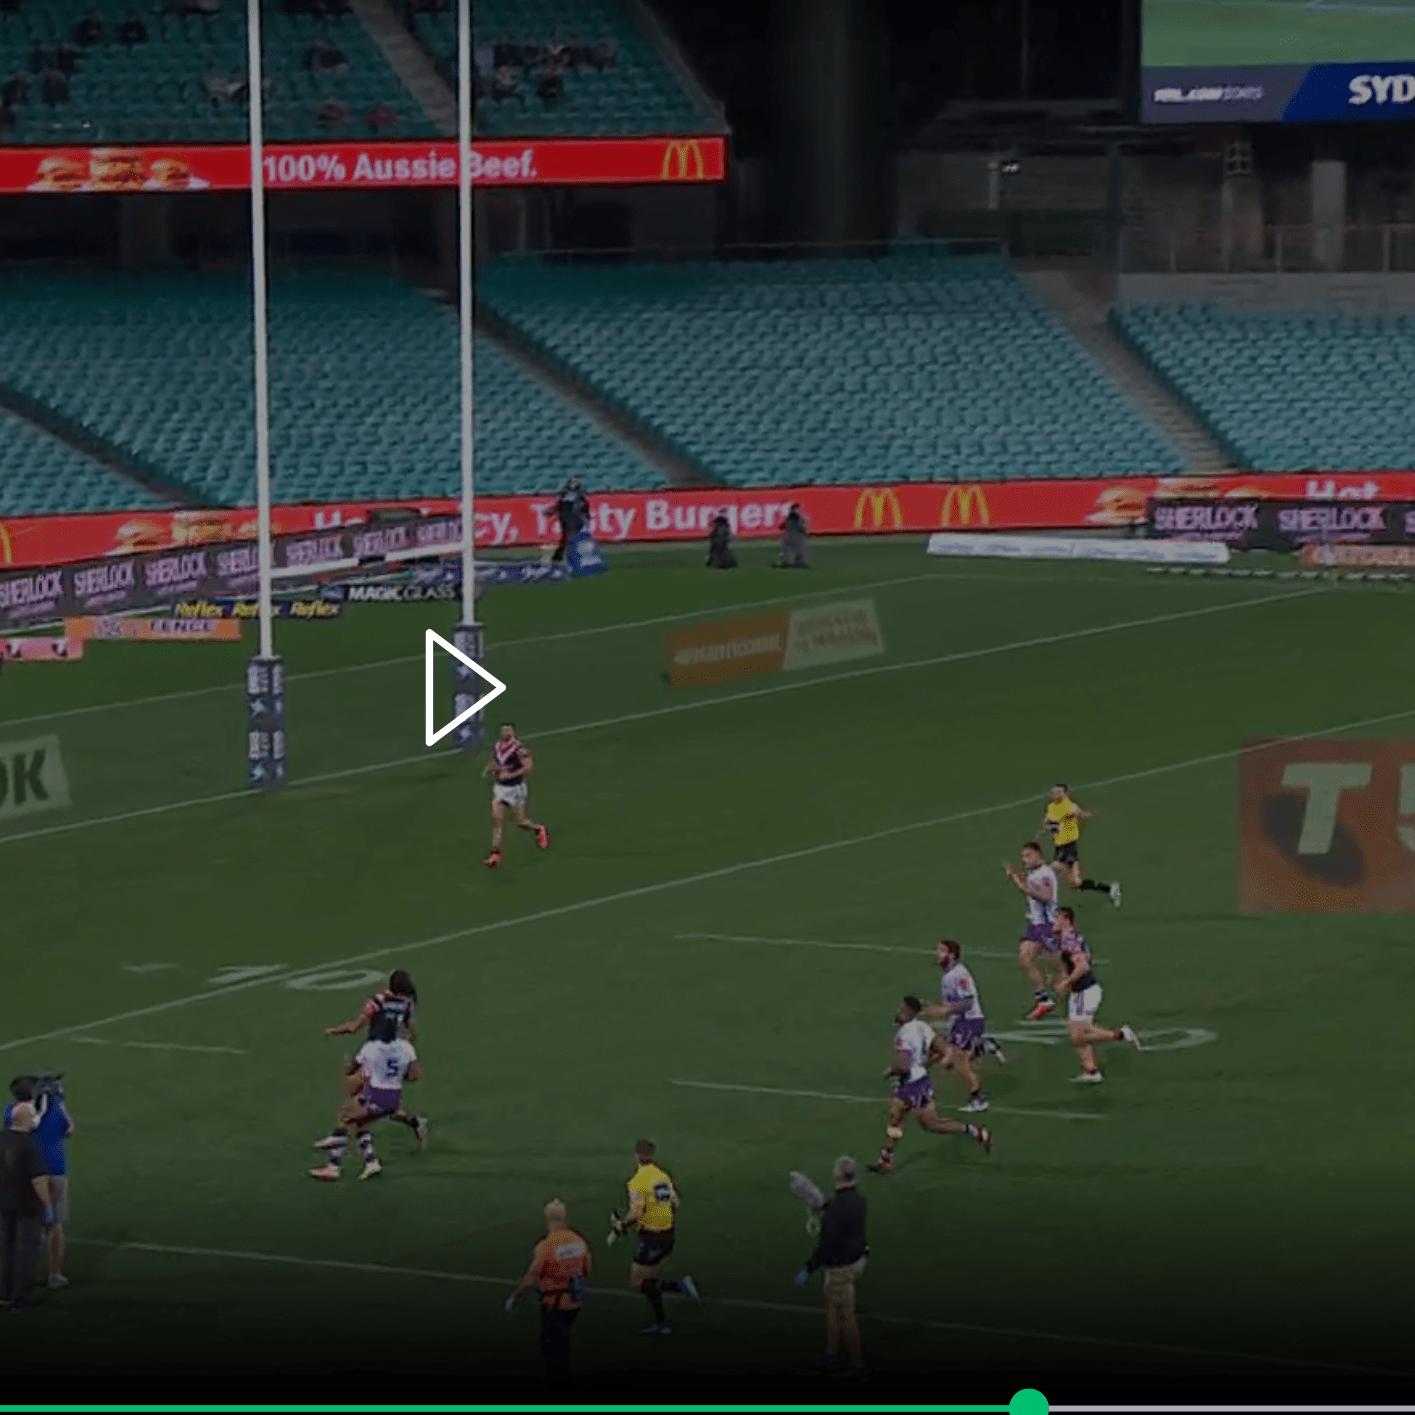
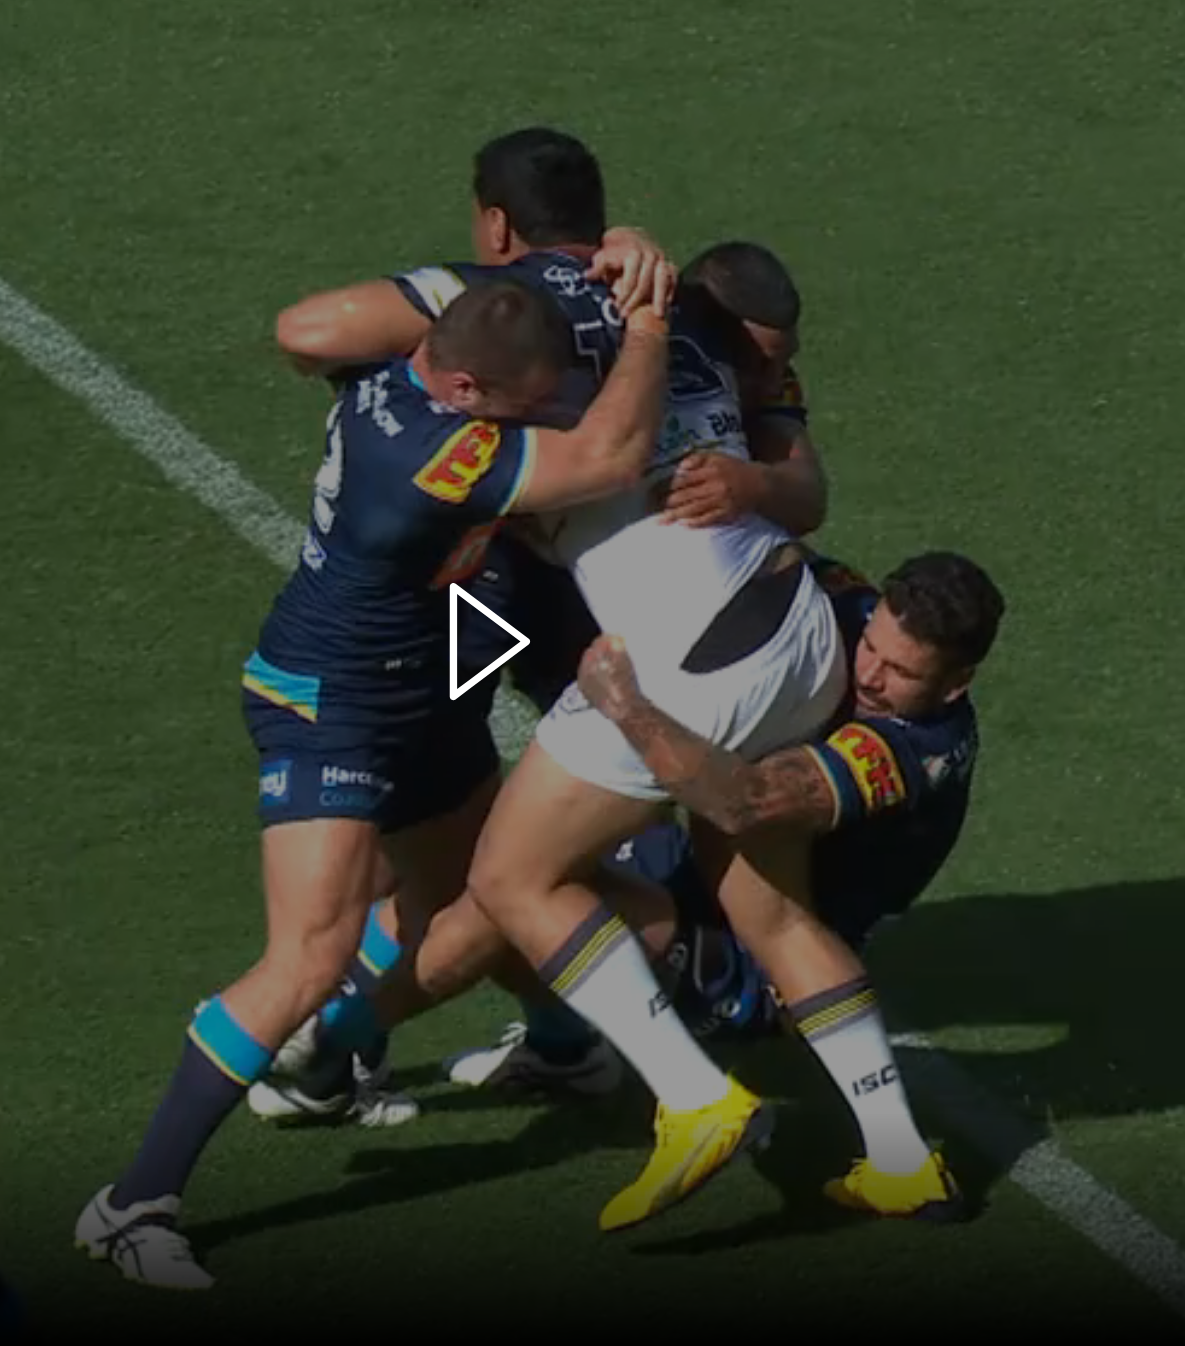
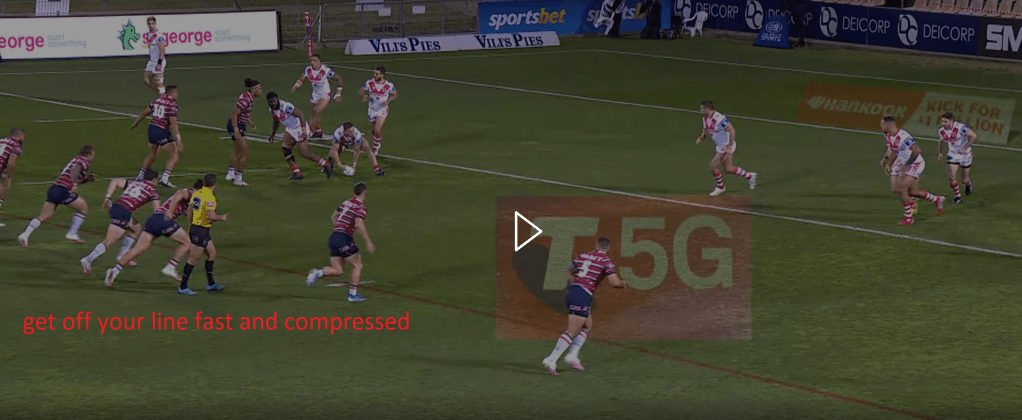
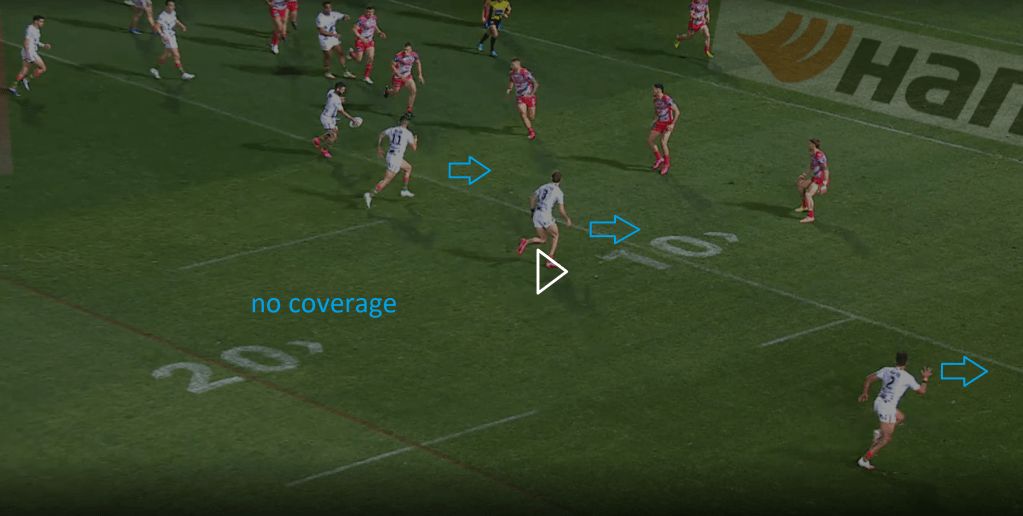
The sequence below is taken from the round 12 Souths vs St George game. In this case it’s not an intercept but a ‘trap and scrap’. Souths are attacking right – their fullback is on the left for shape but equally could have been involved in the play on the right.

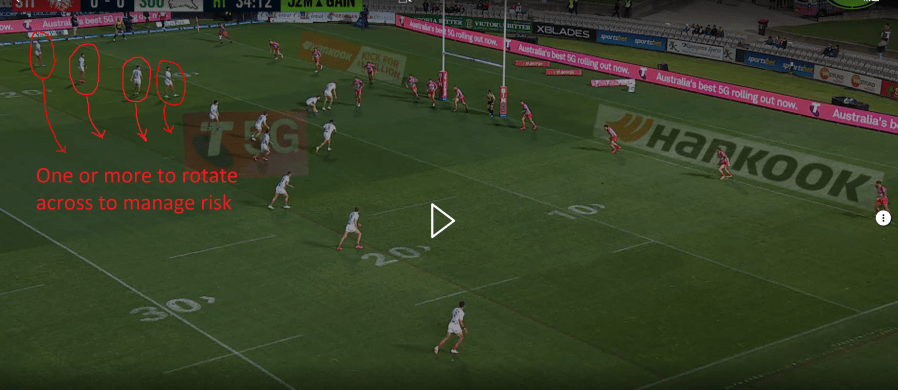
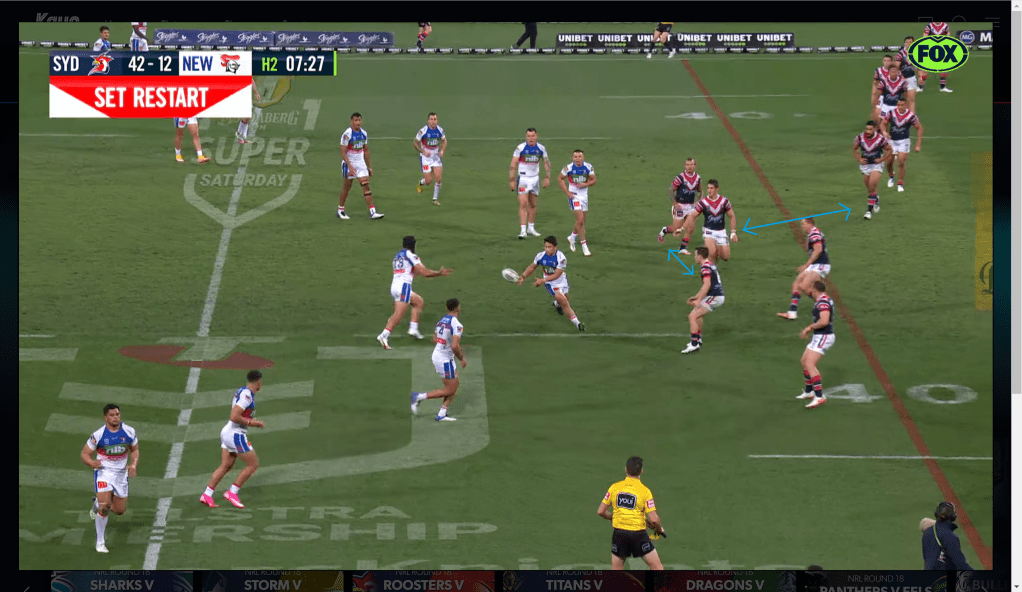
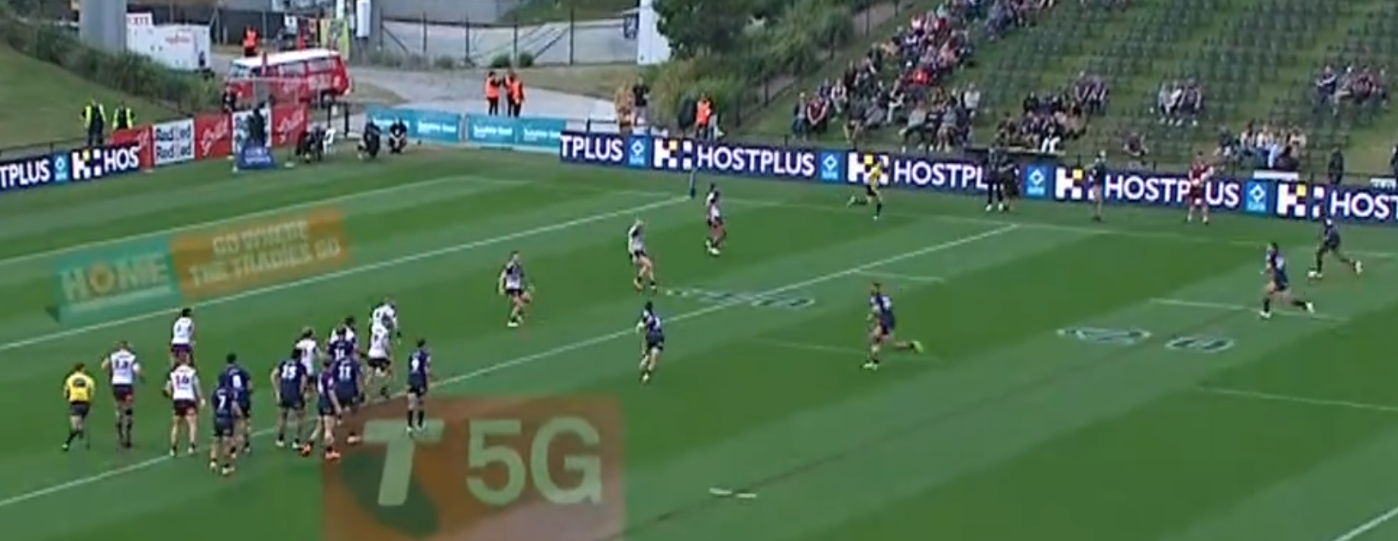
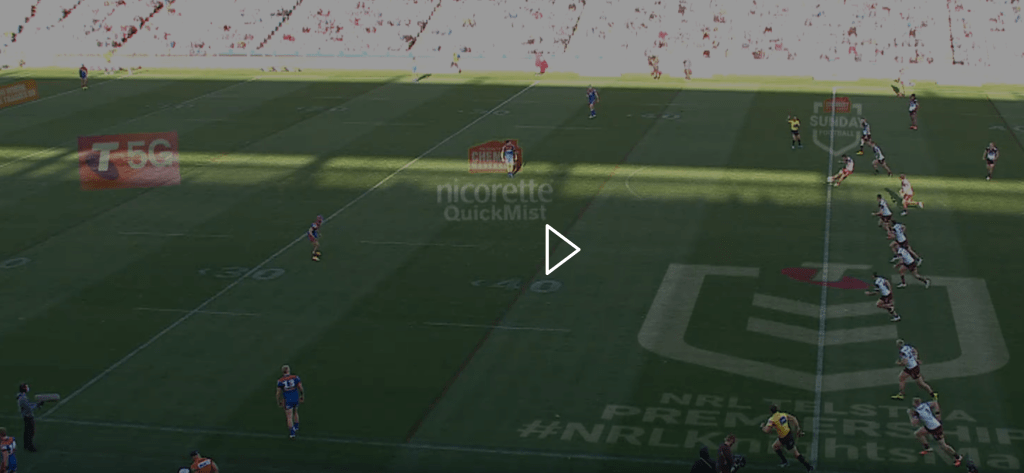
Post the shift from dummy half my suggestion is for a non-attack side player to rotate across in defence as shown in the picture below.

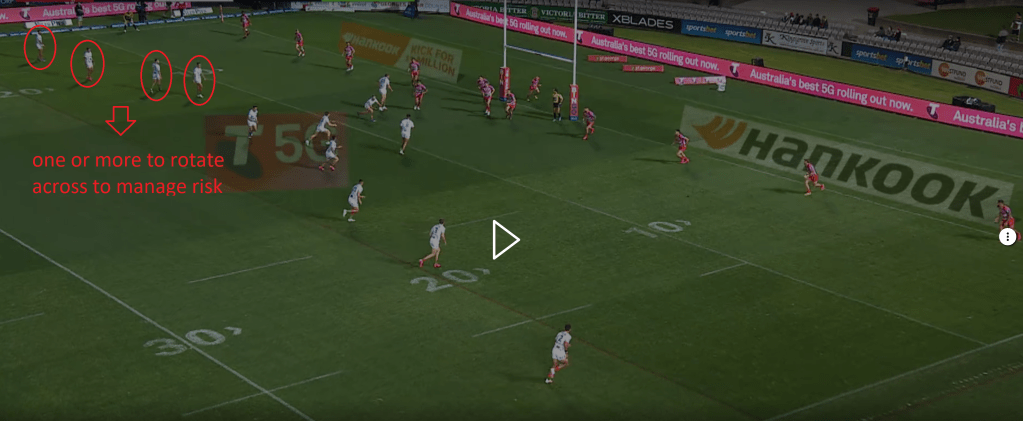
Attacks like this are very common with all attackers committed with no coverage if something goes wrong – ie no risk management.

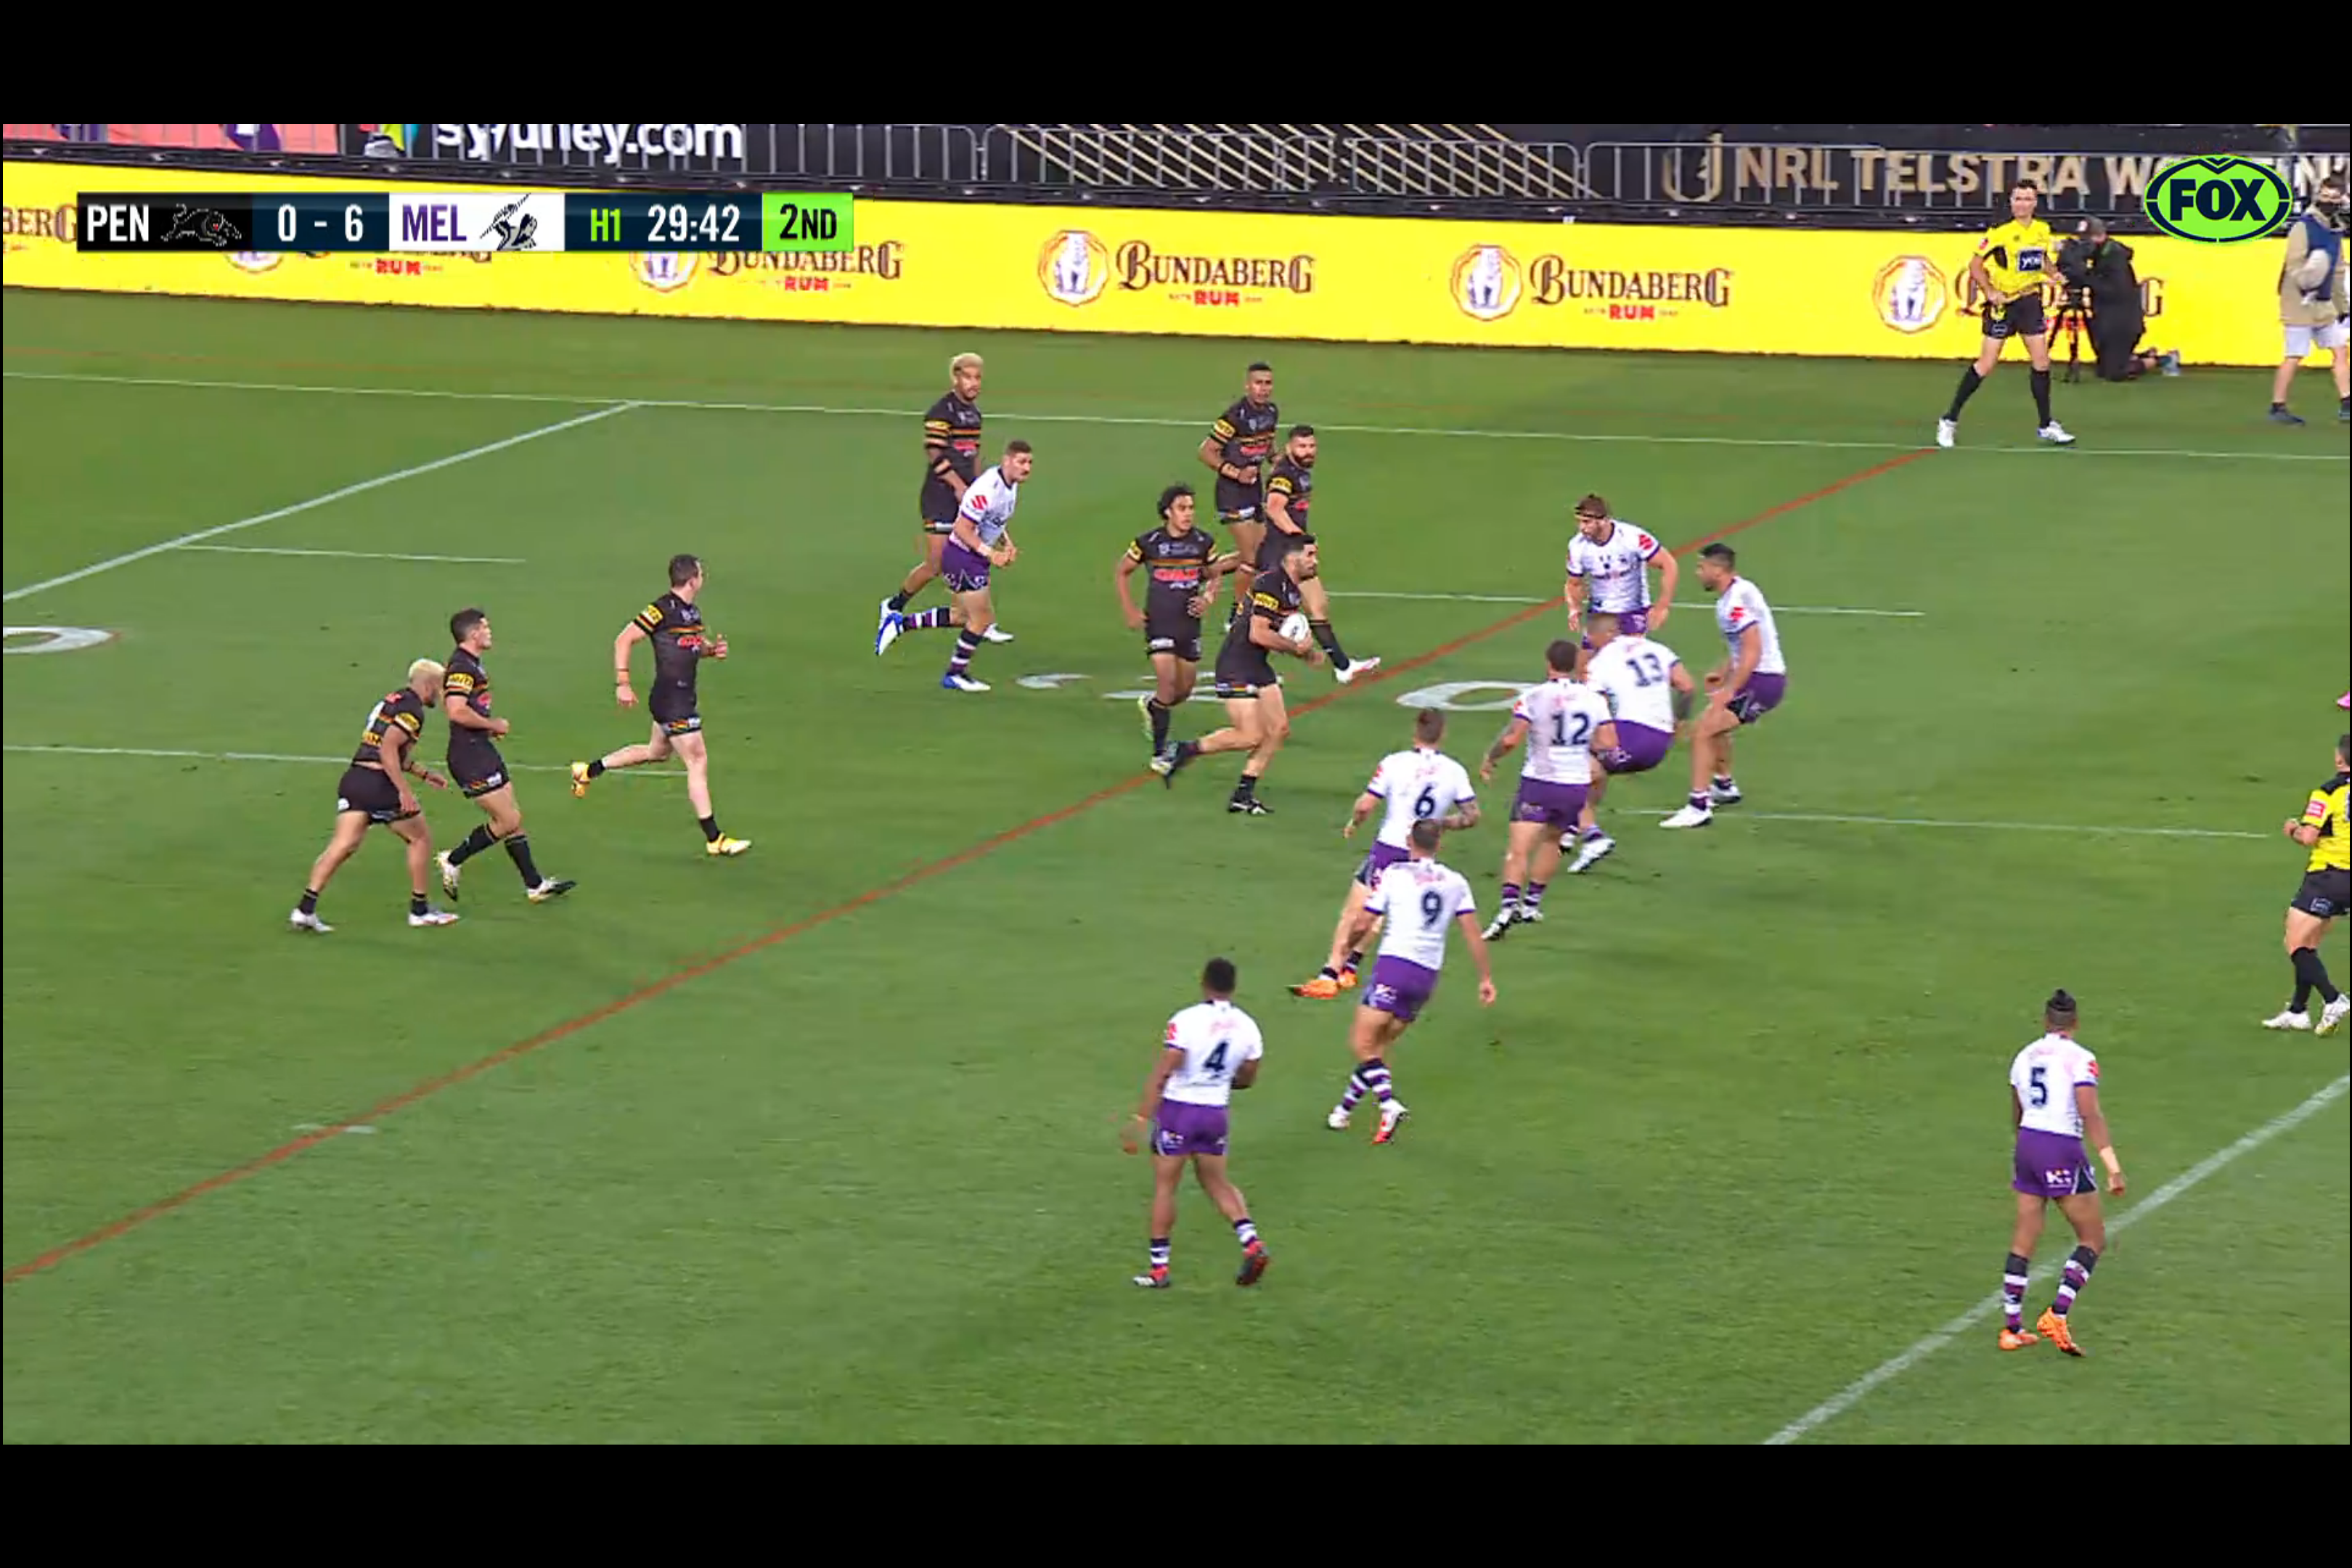
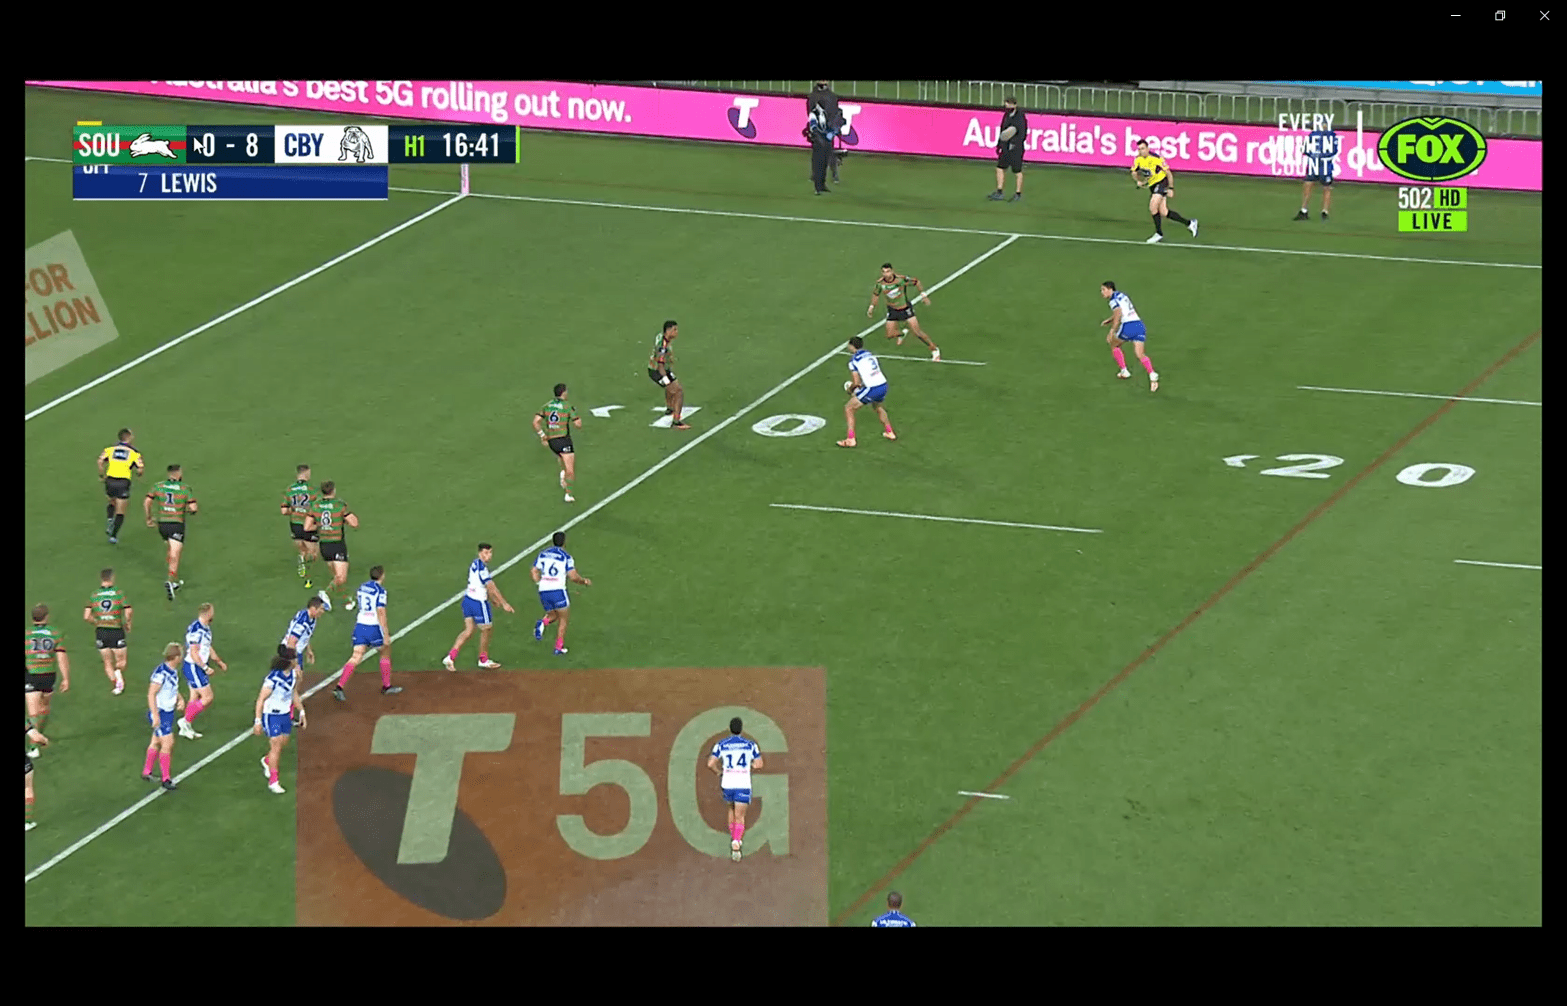
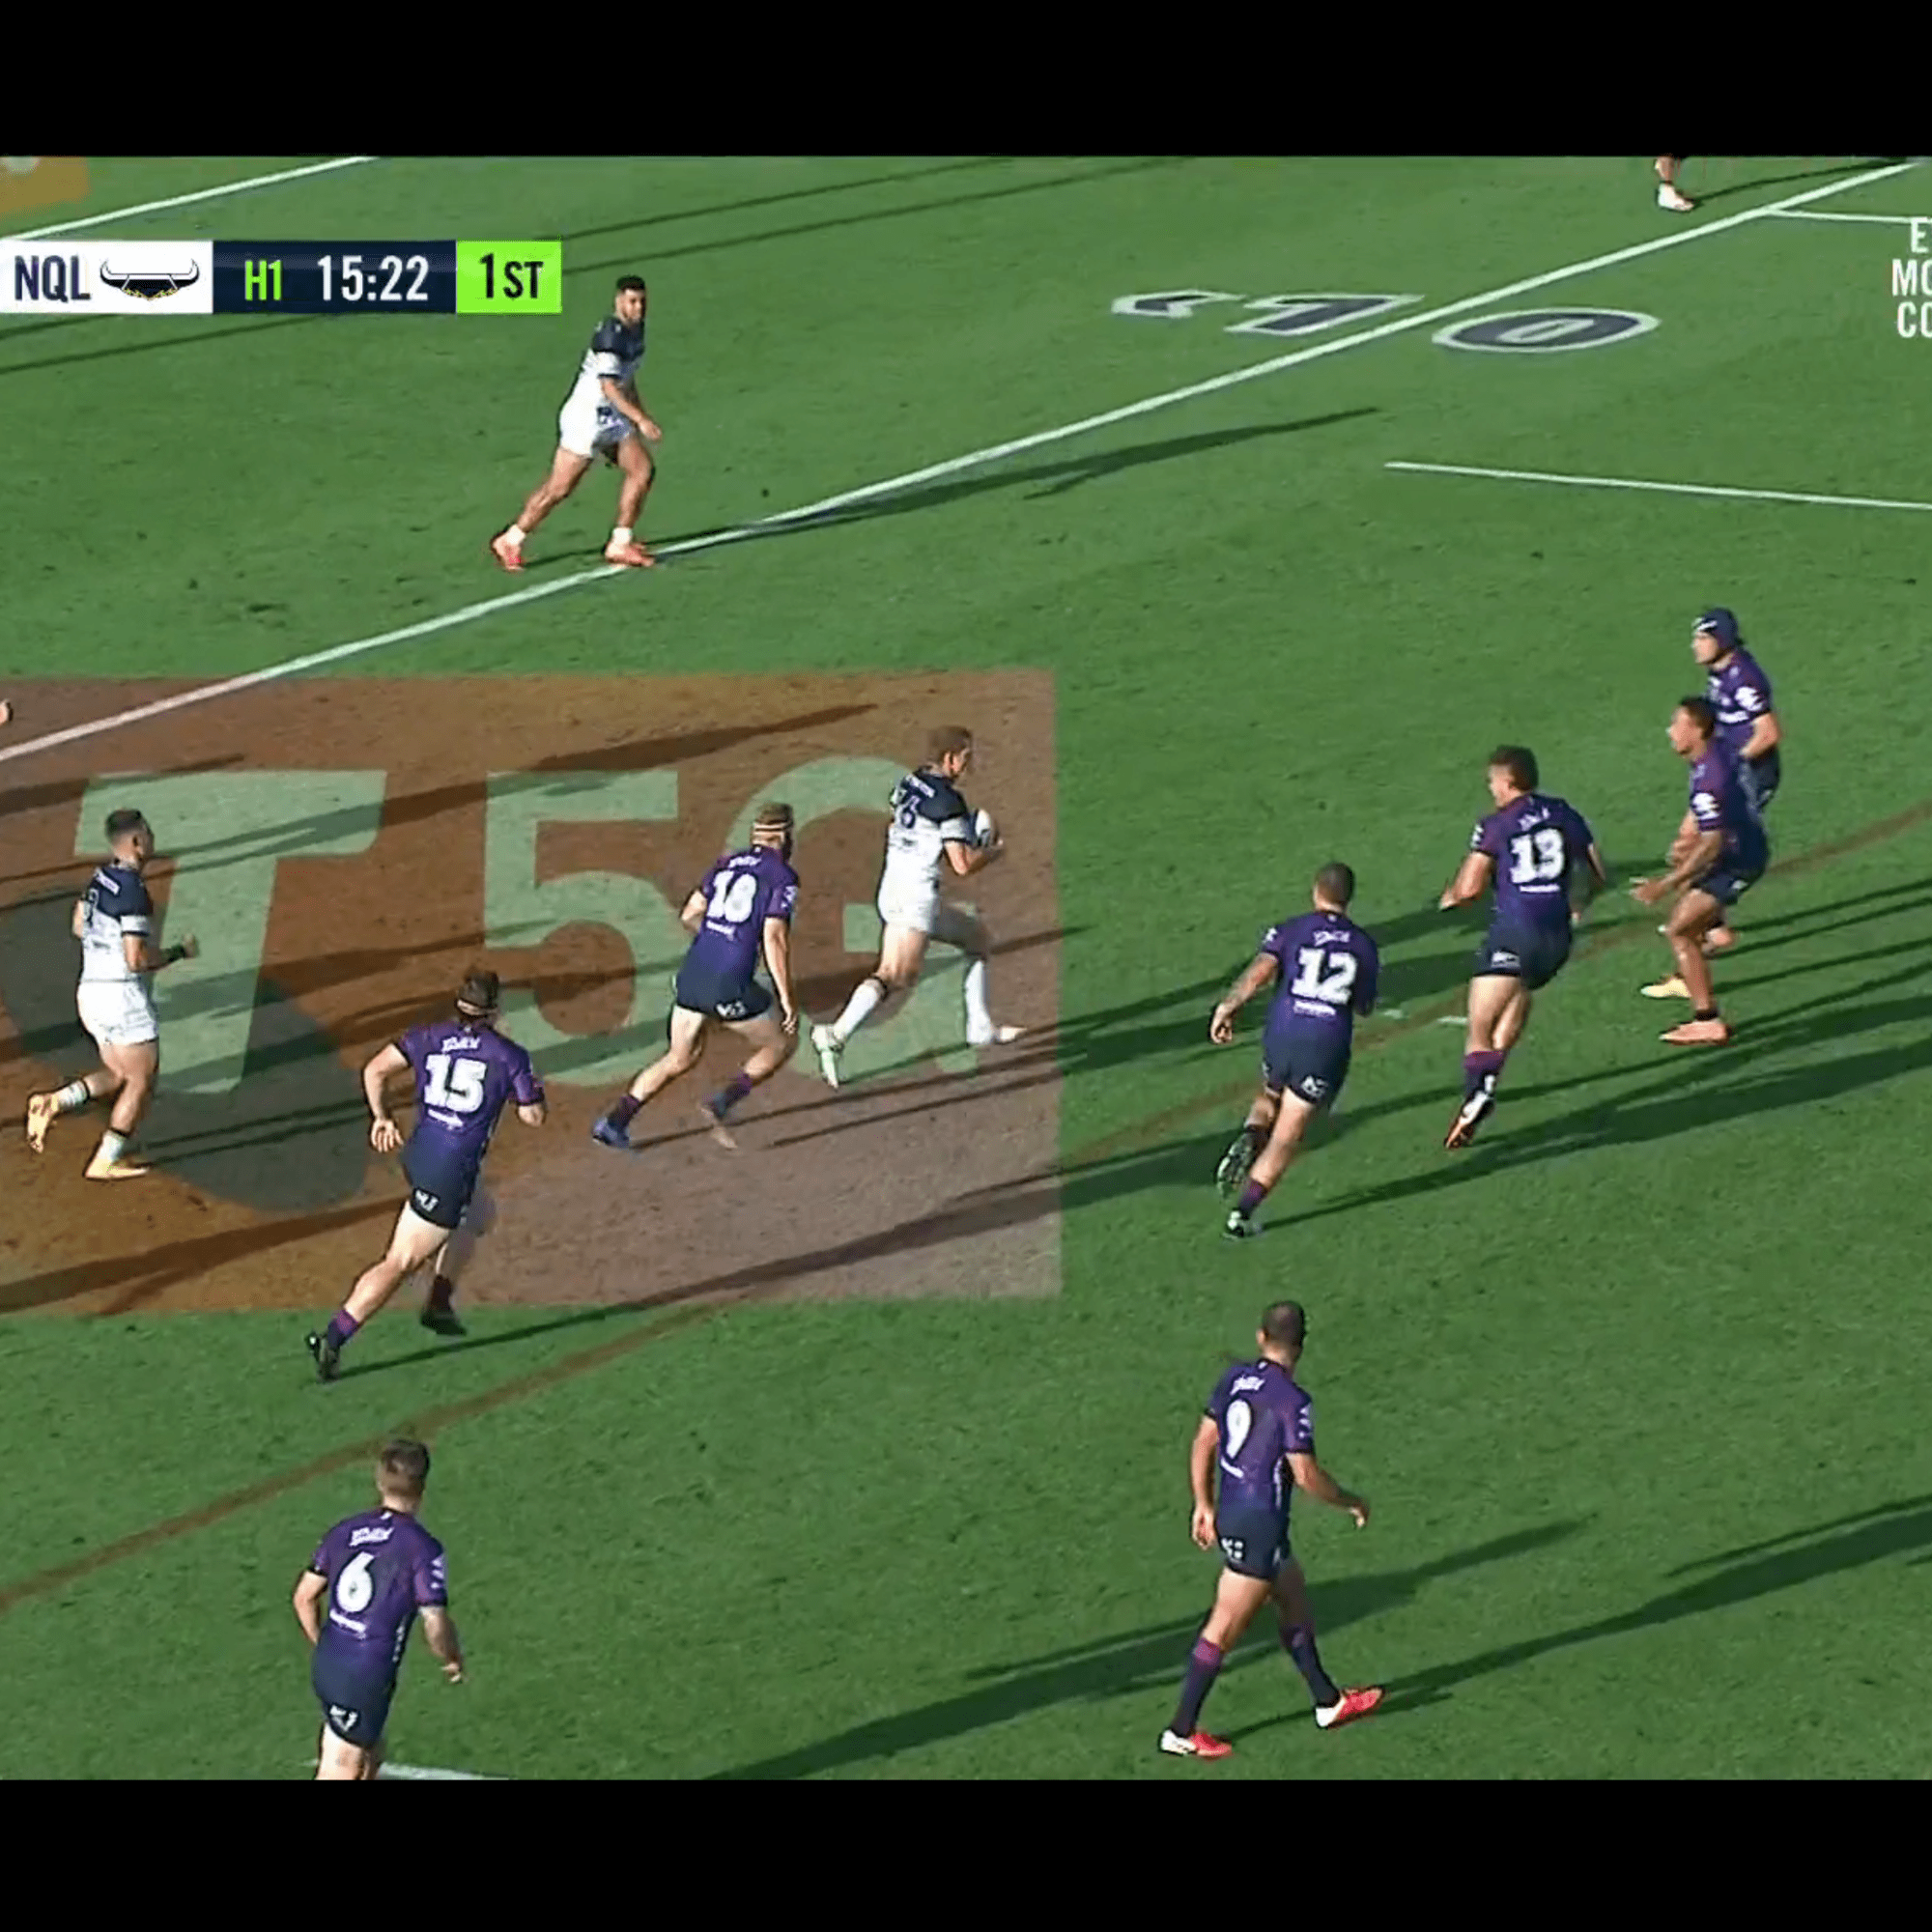
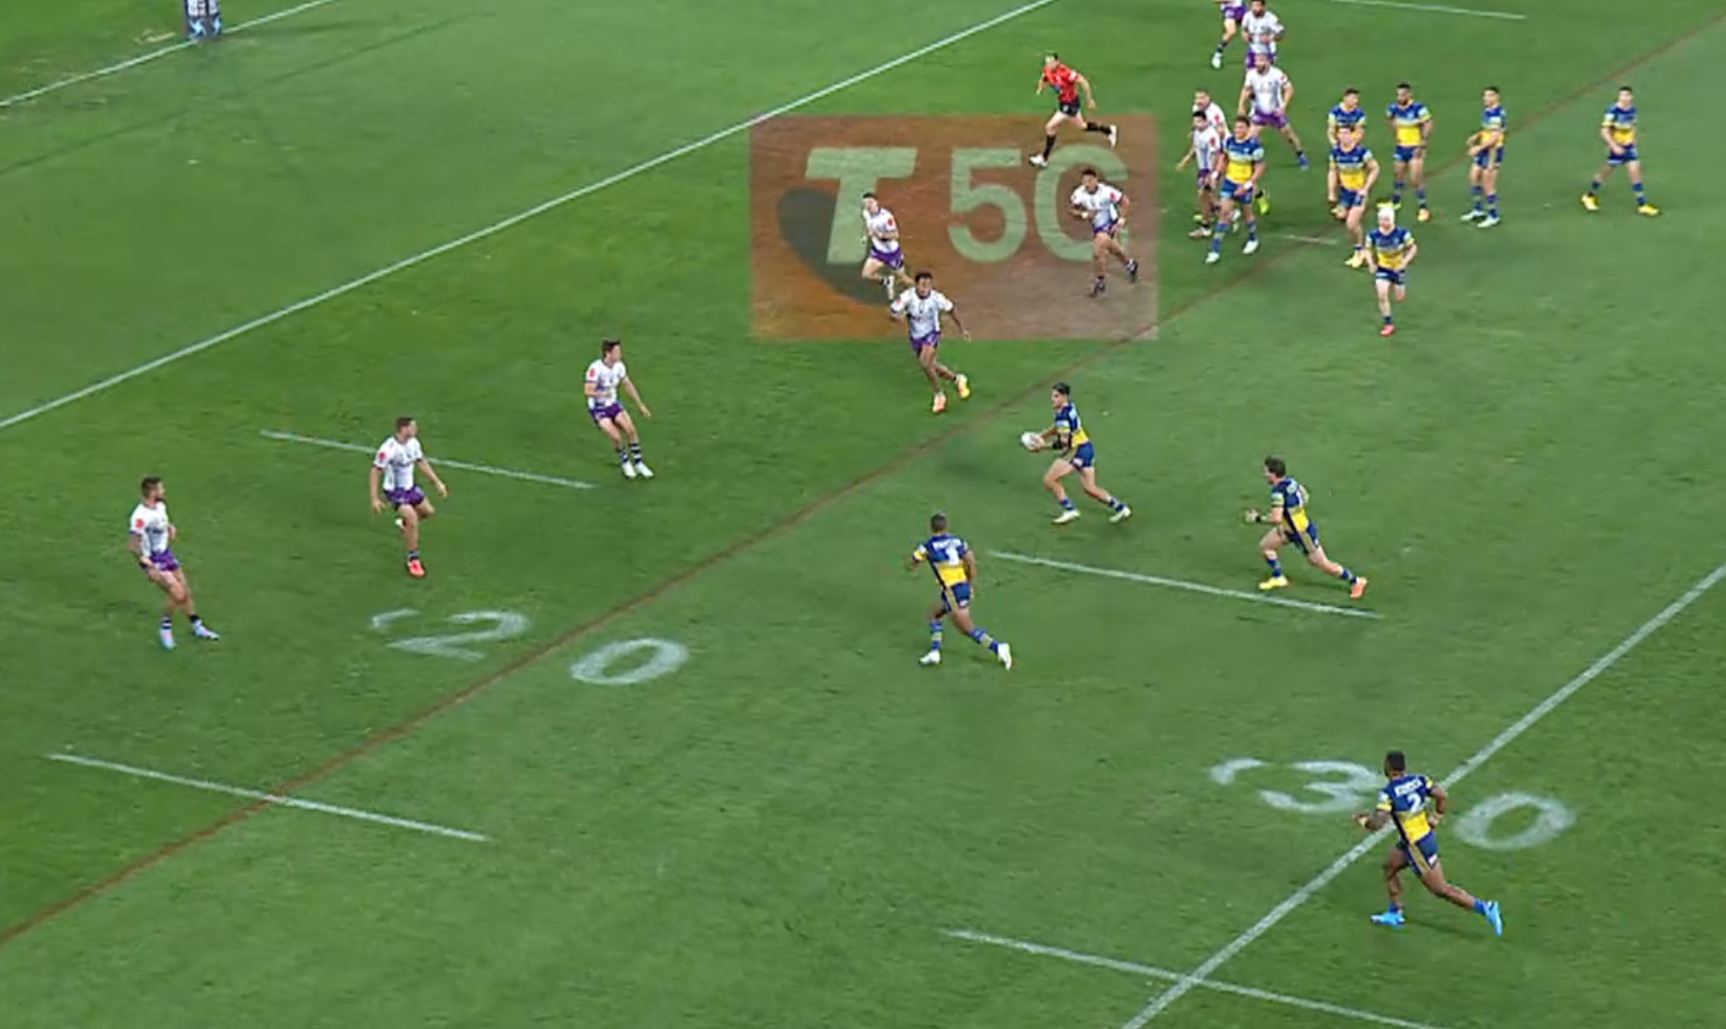
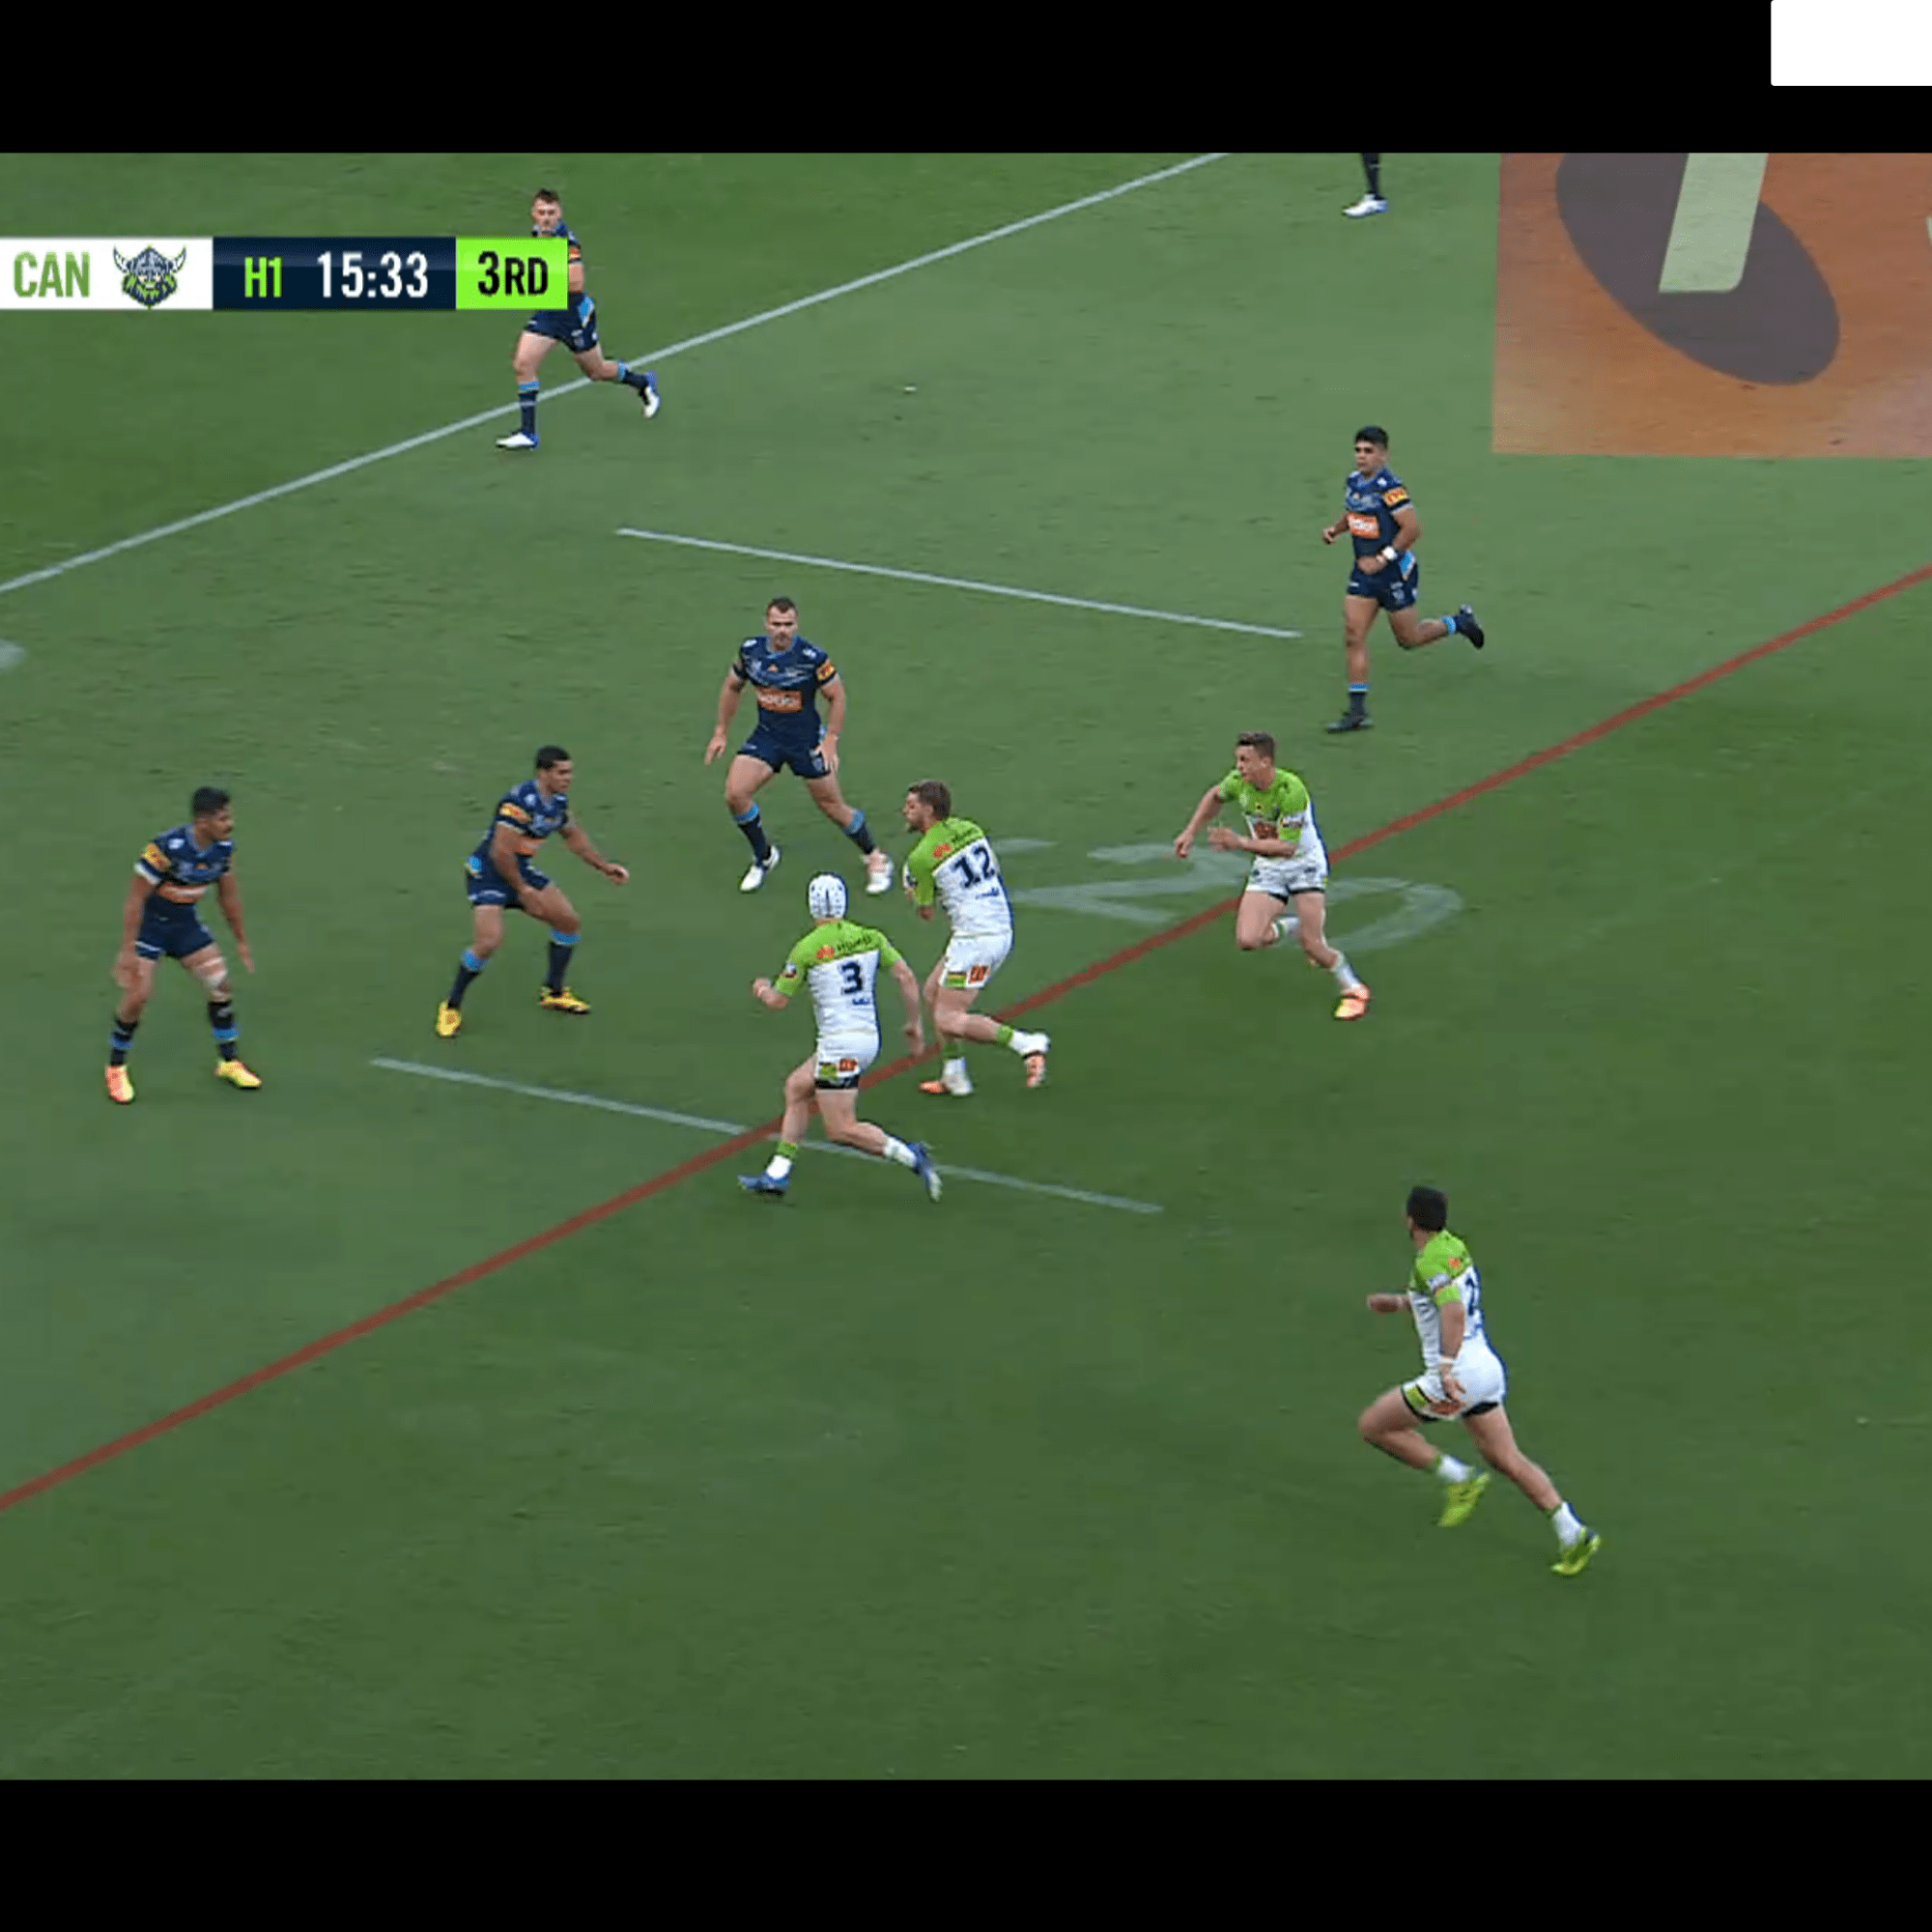
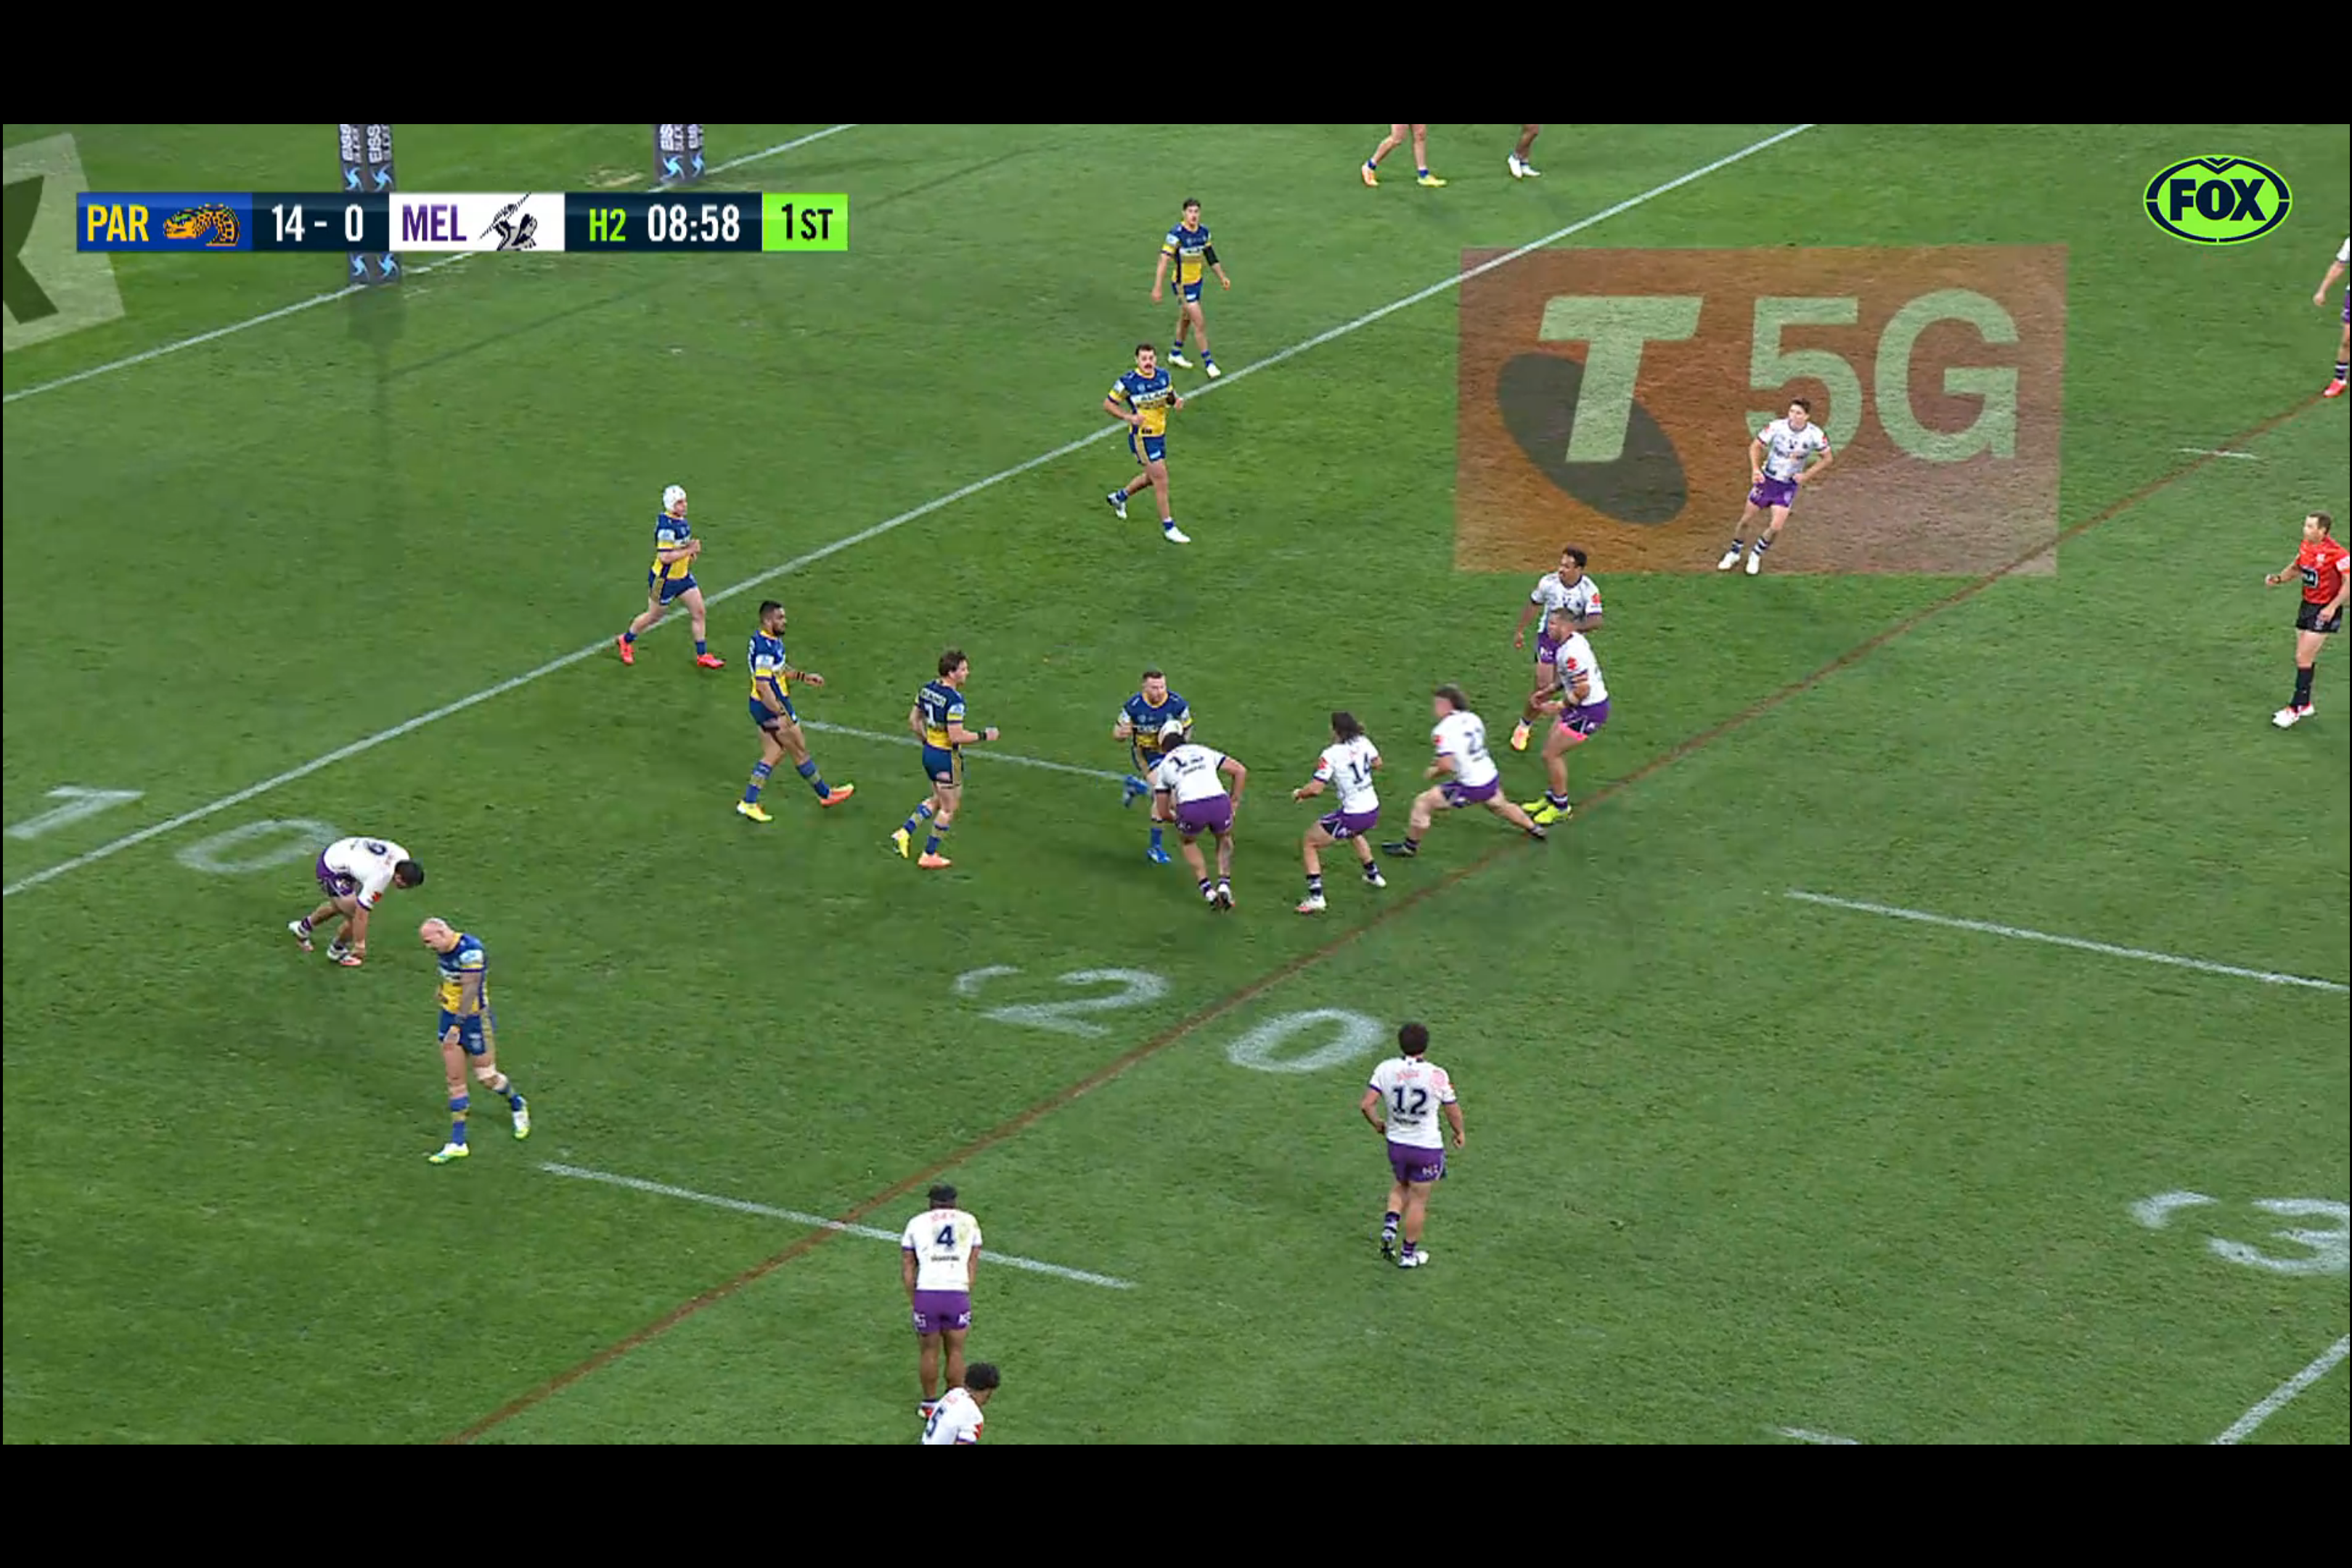
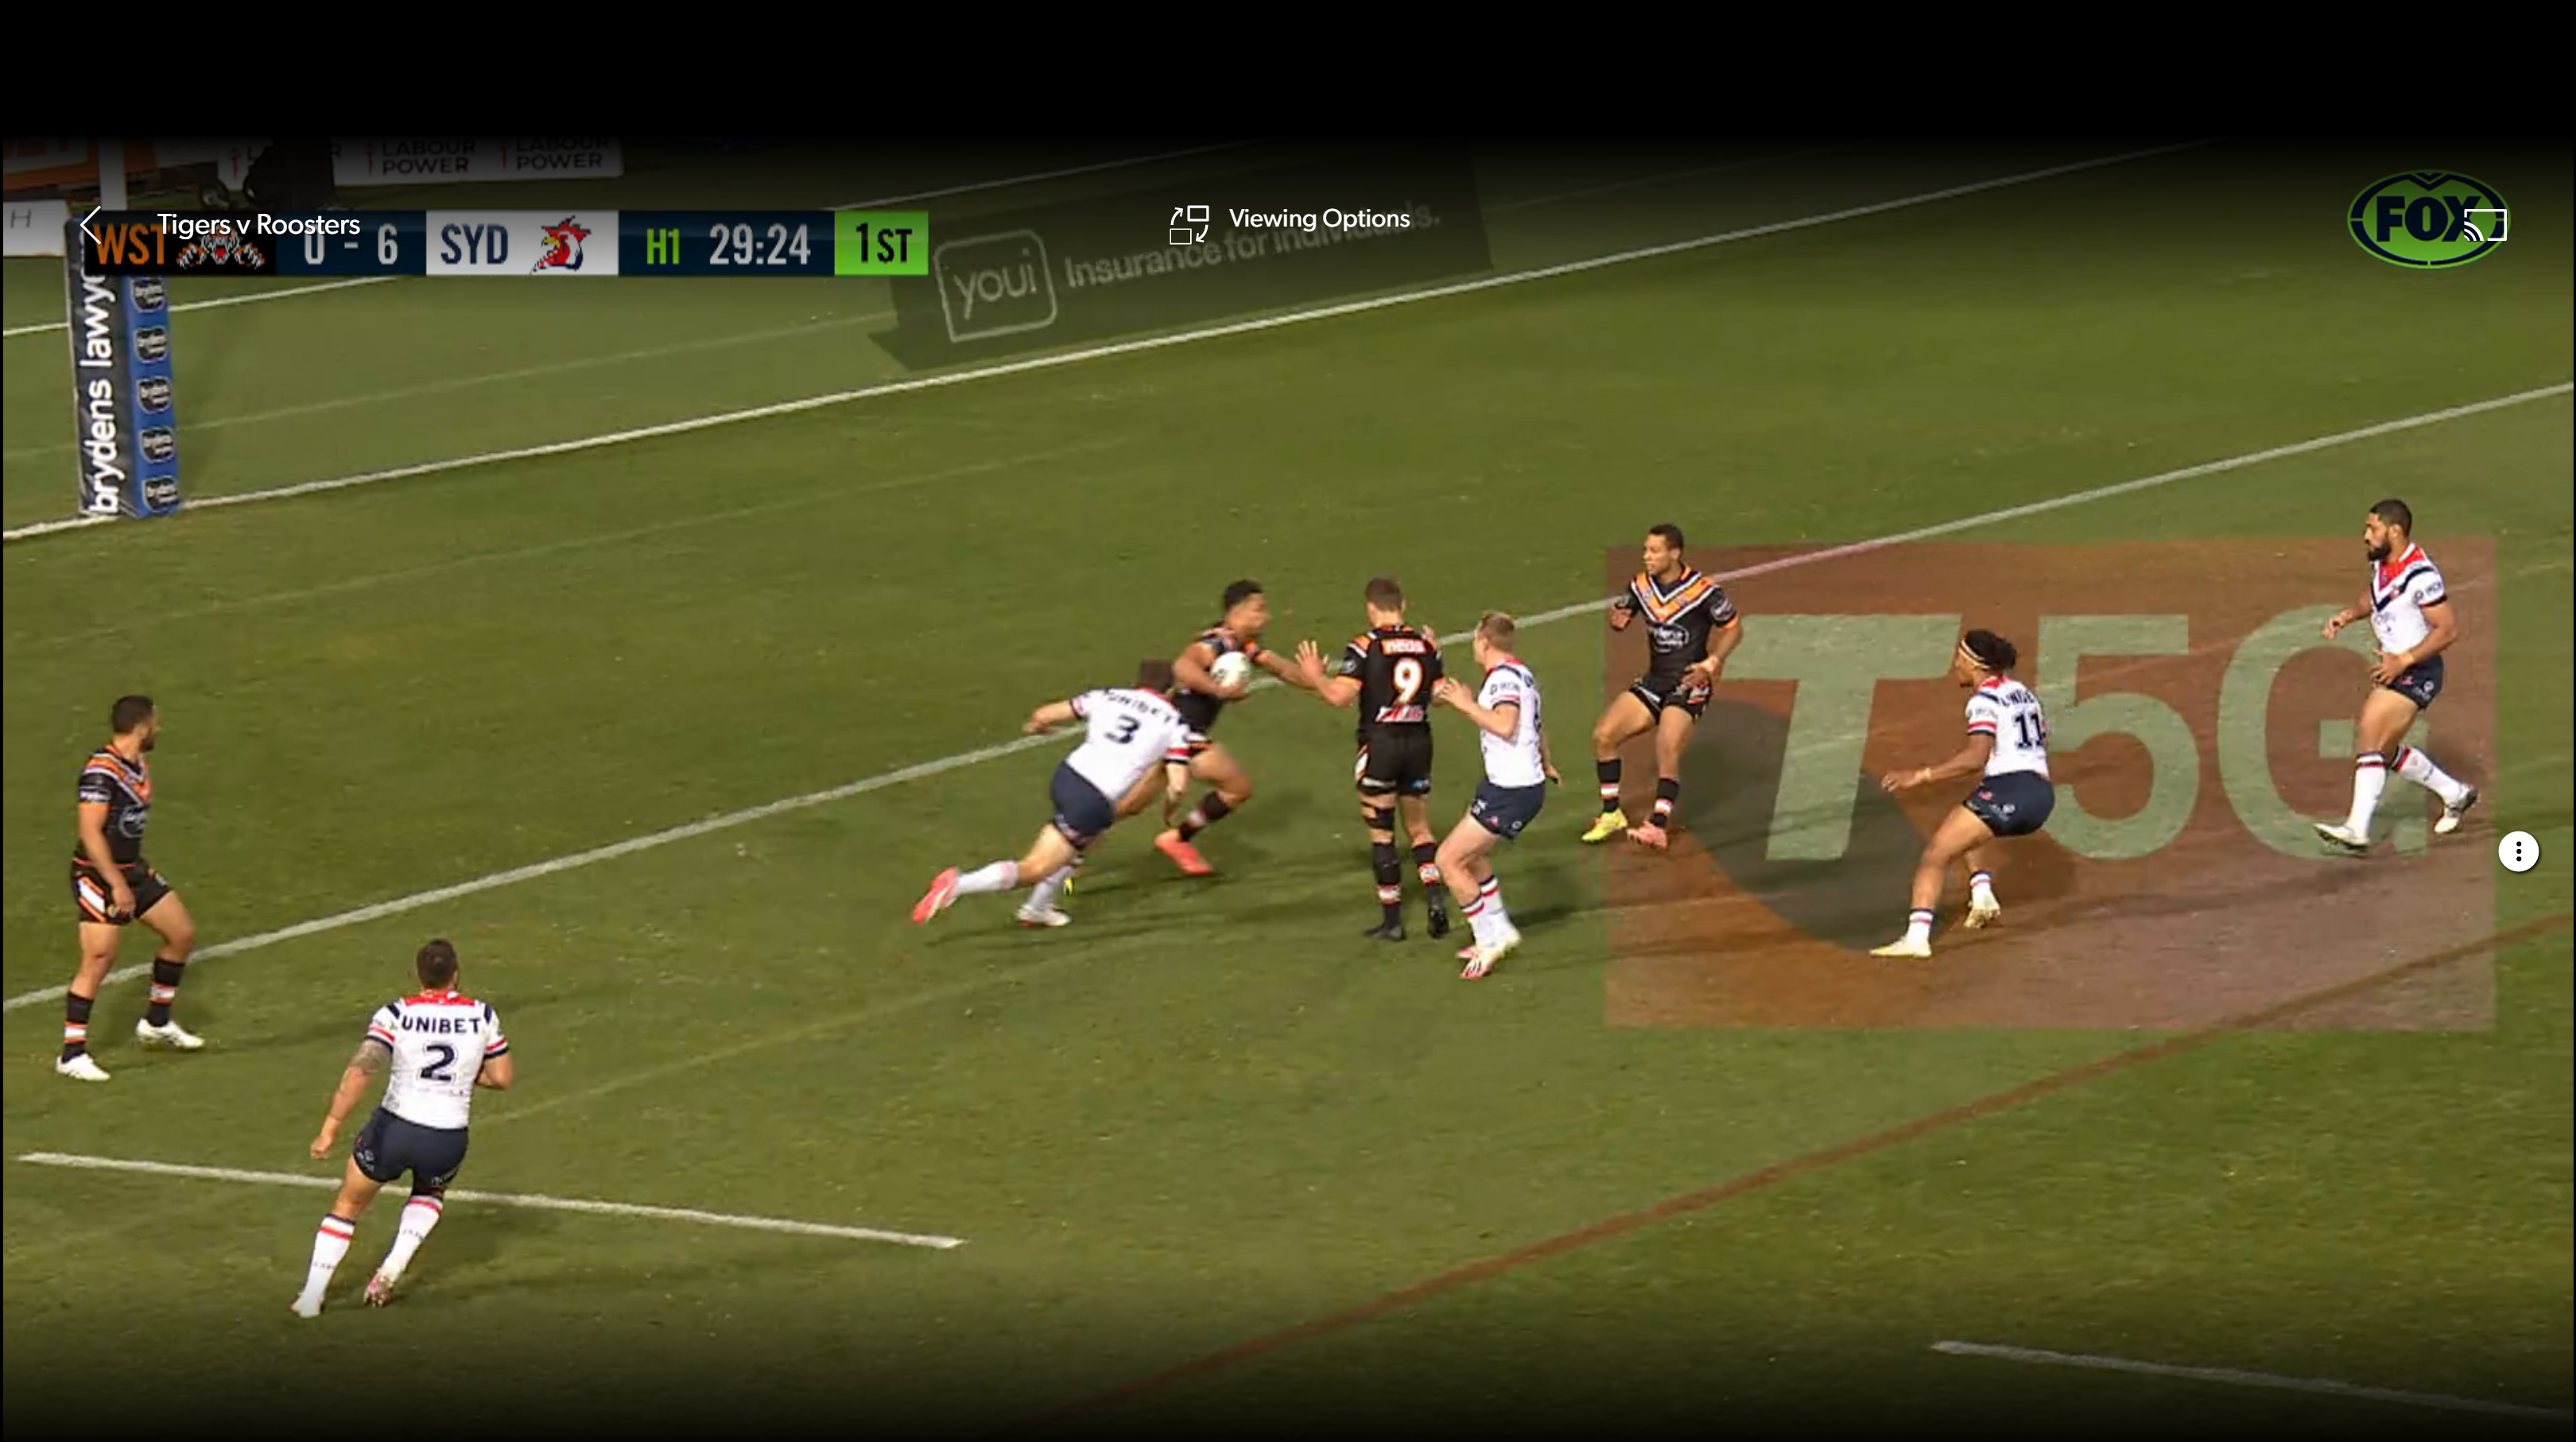
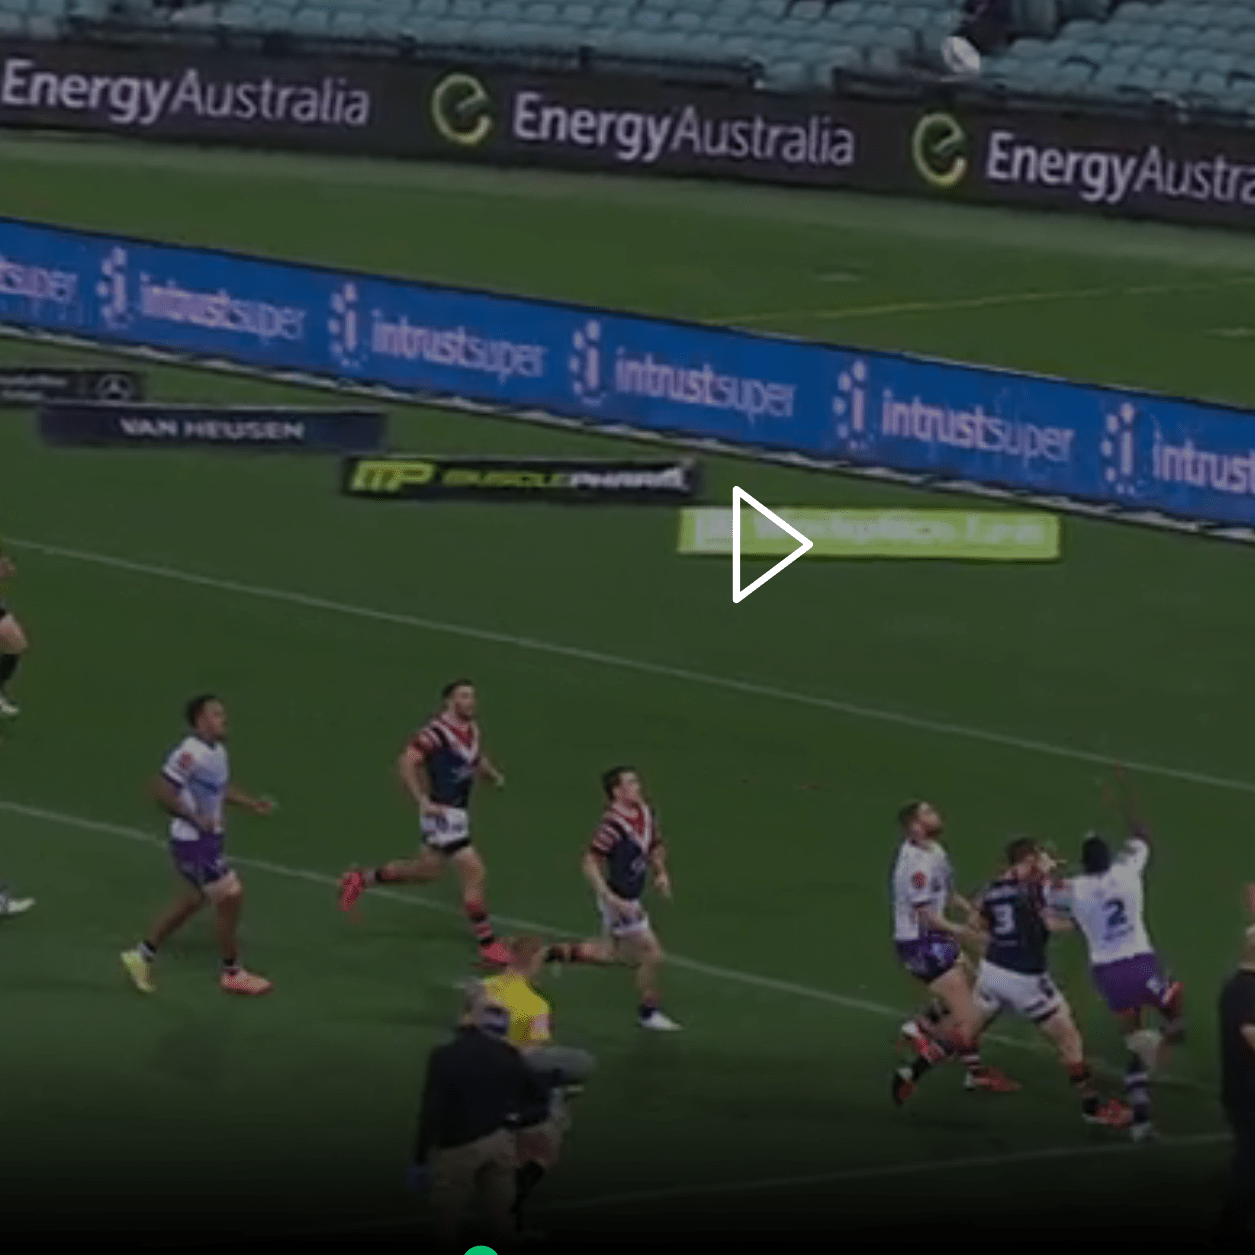
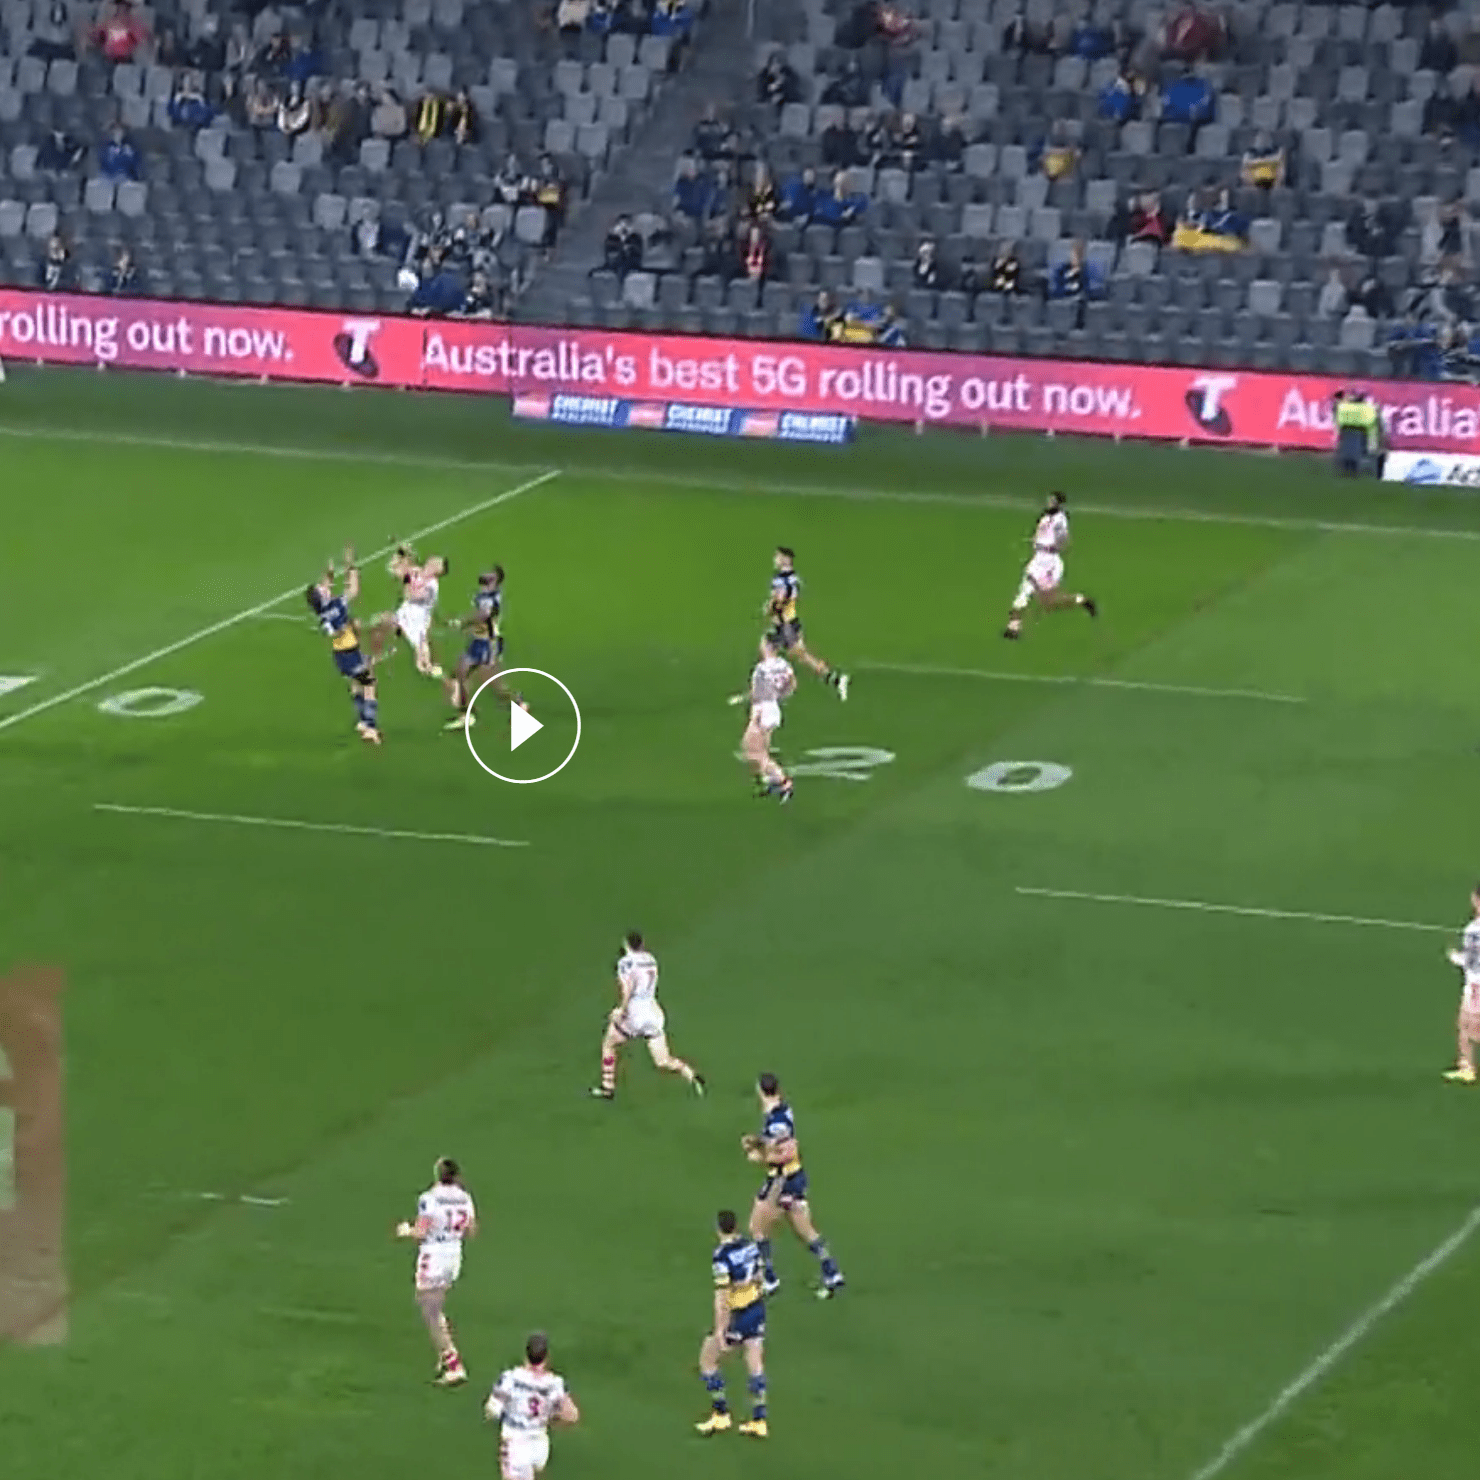
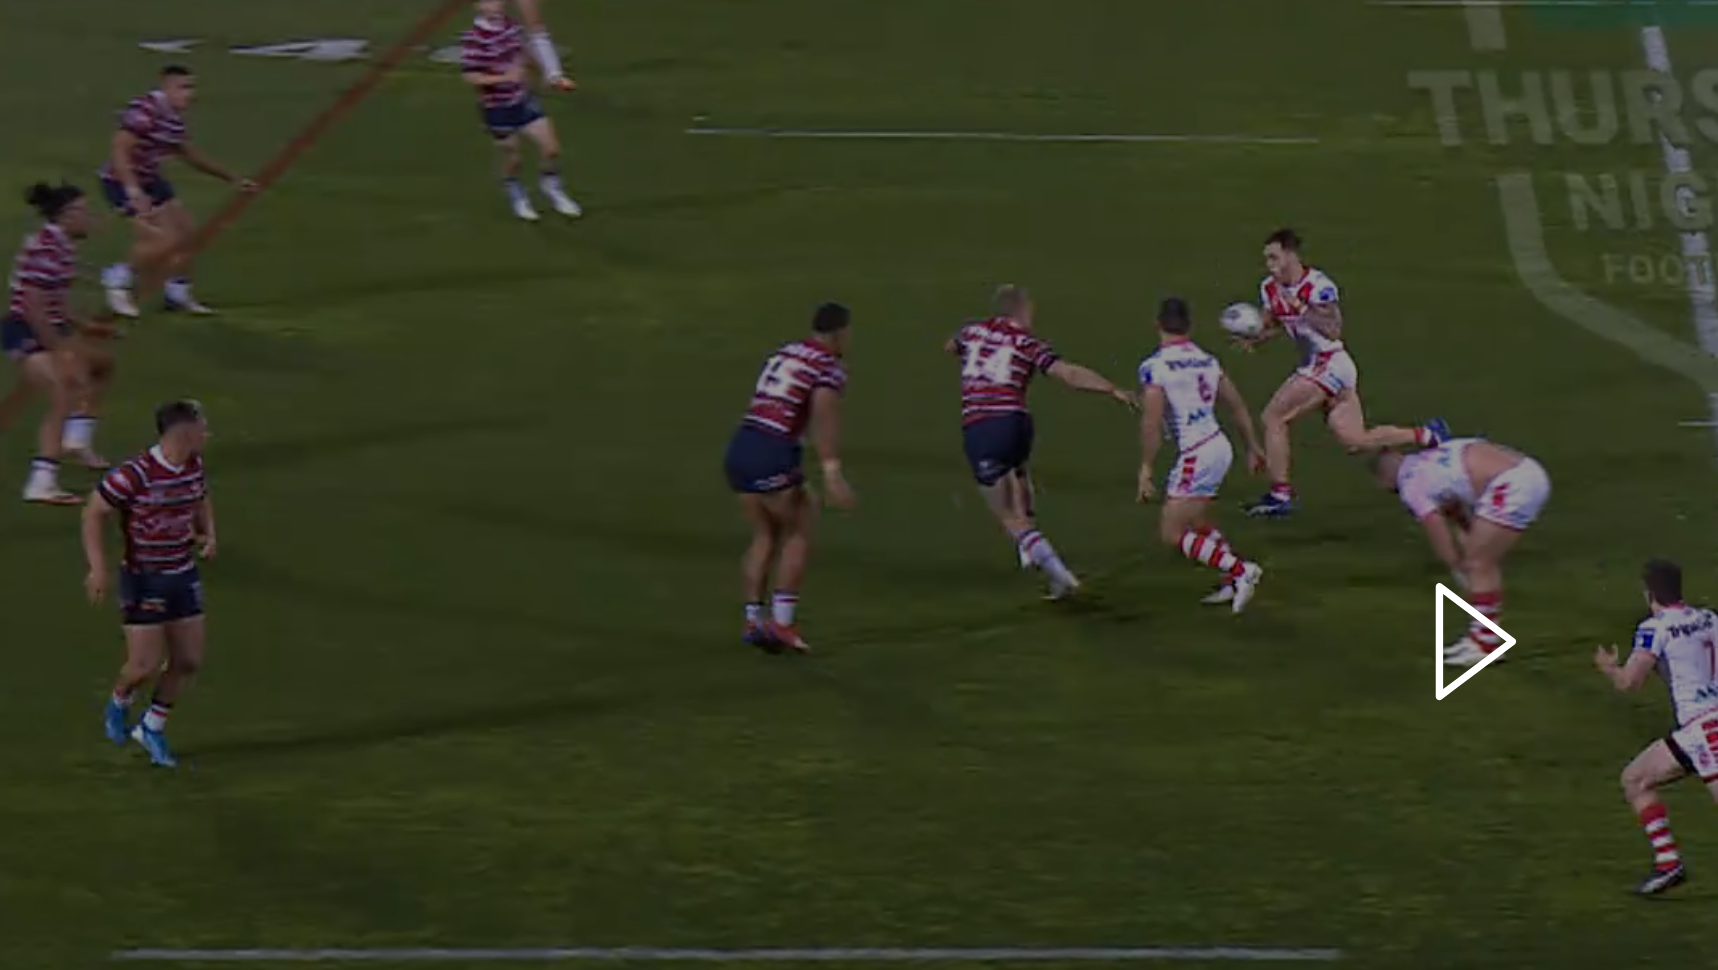
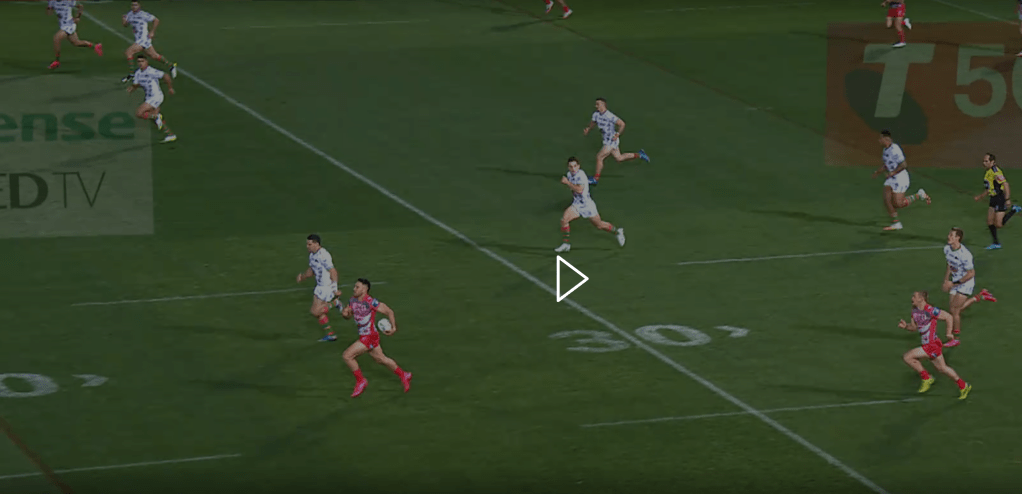
By the time Corey picks up the ball the rotating defender could be close to in front – at least closer and deeper than Cody.

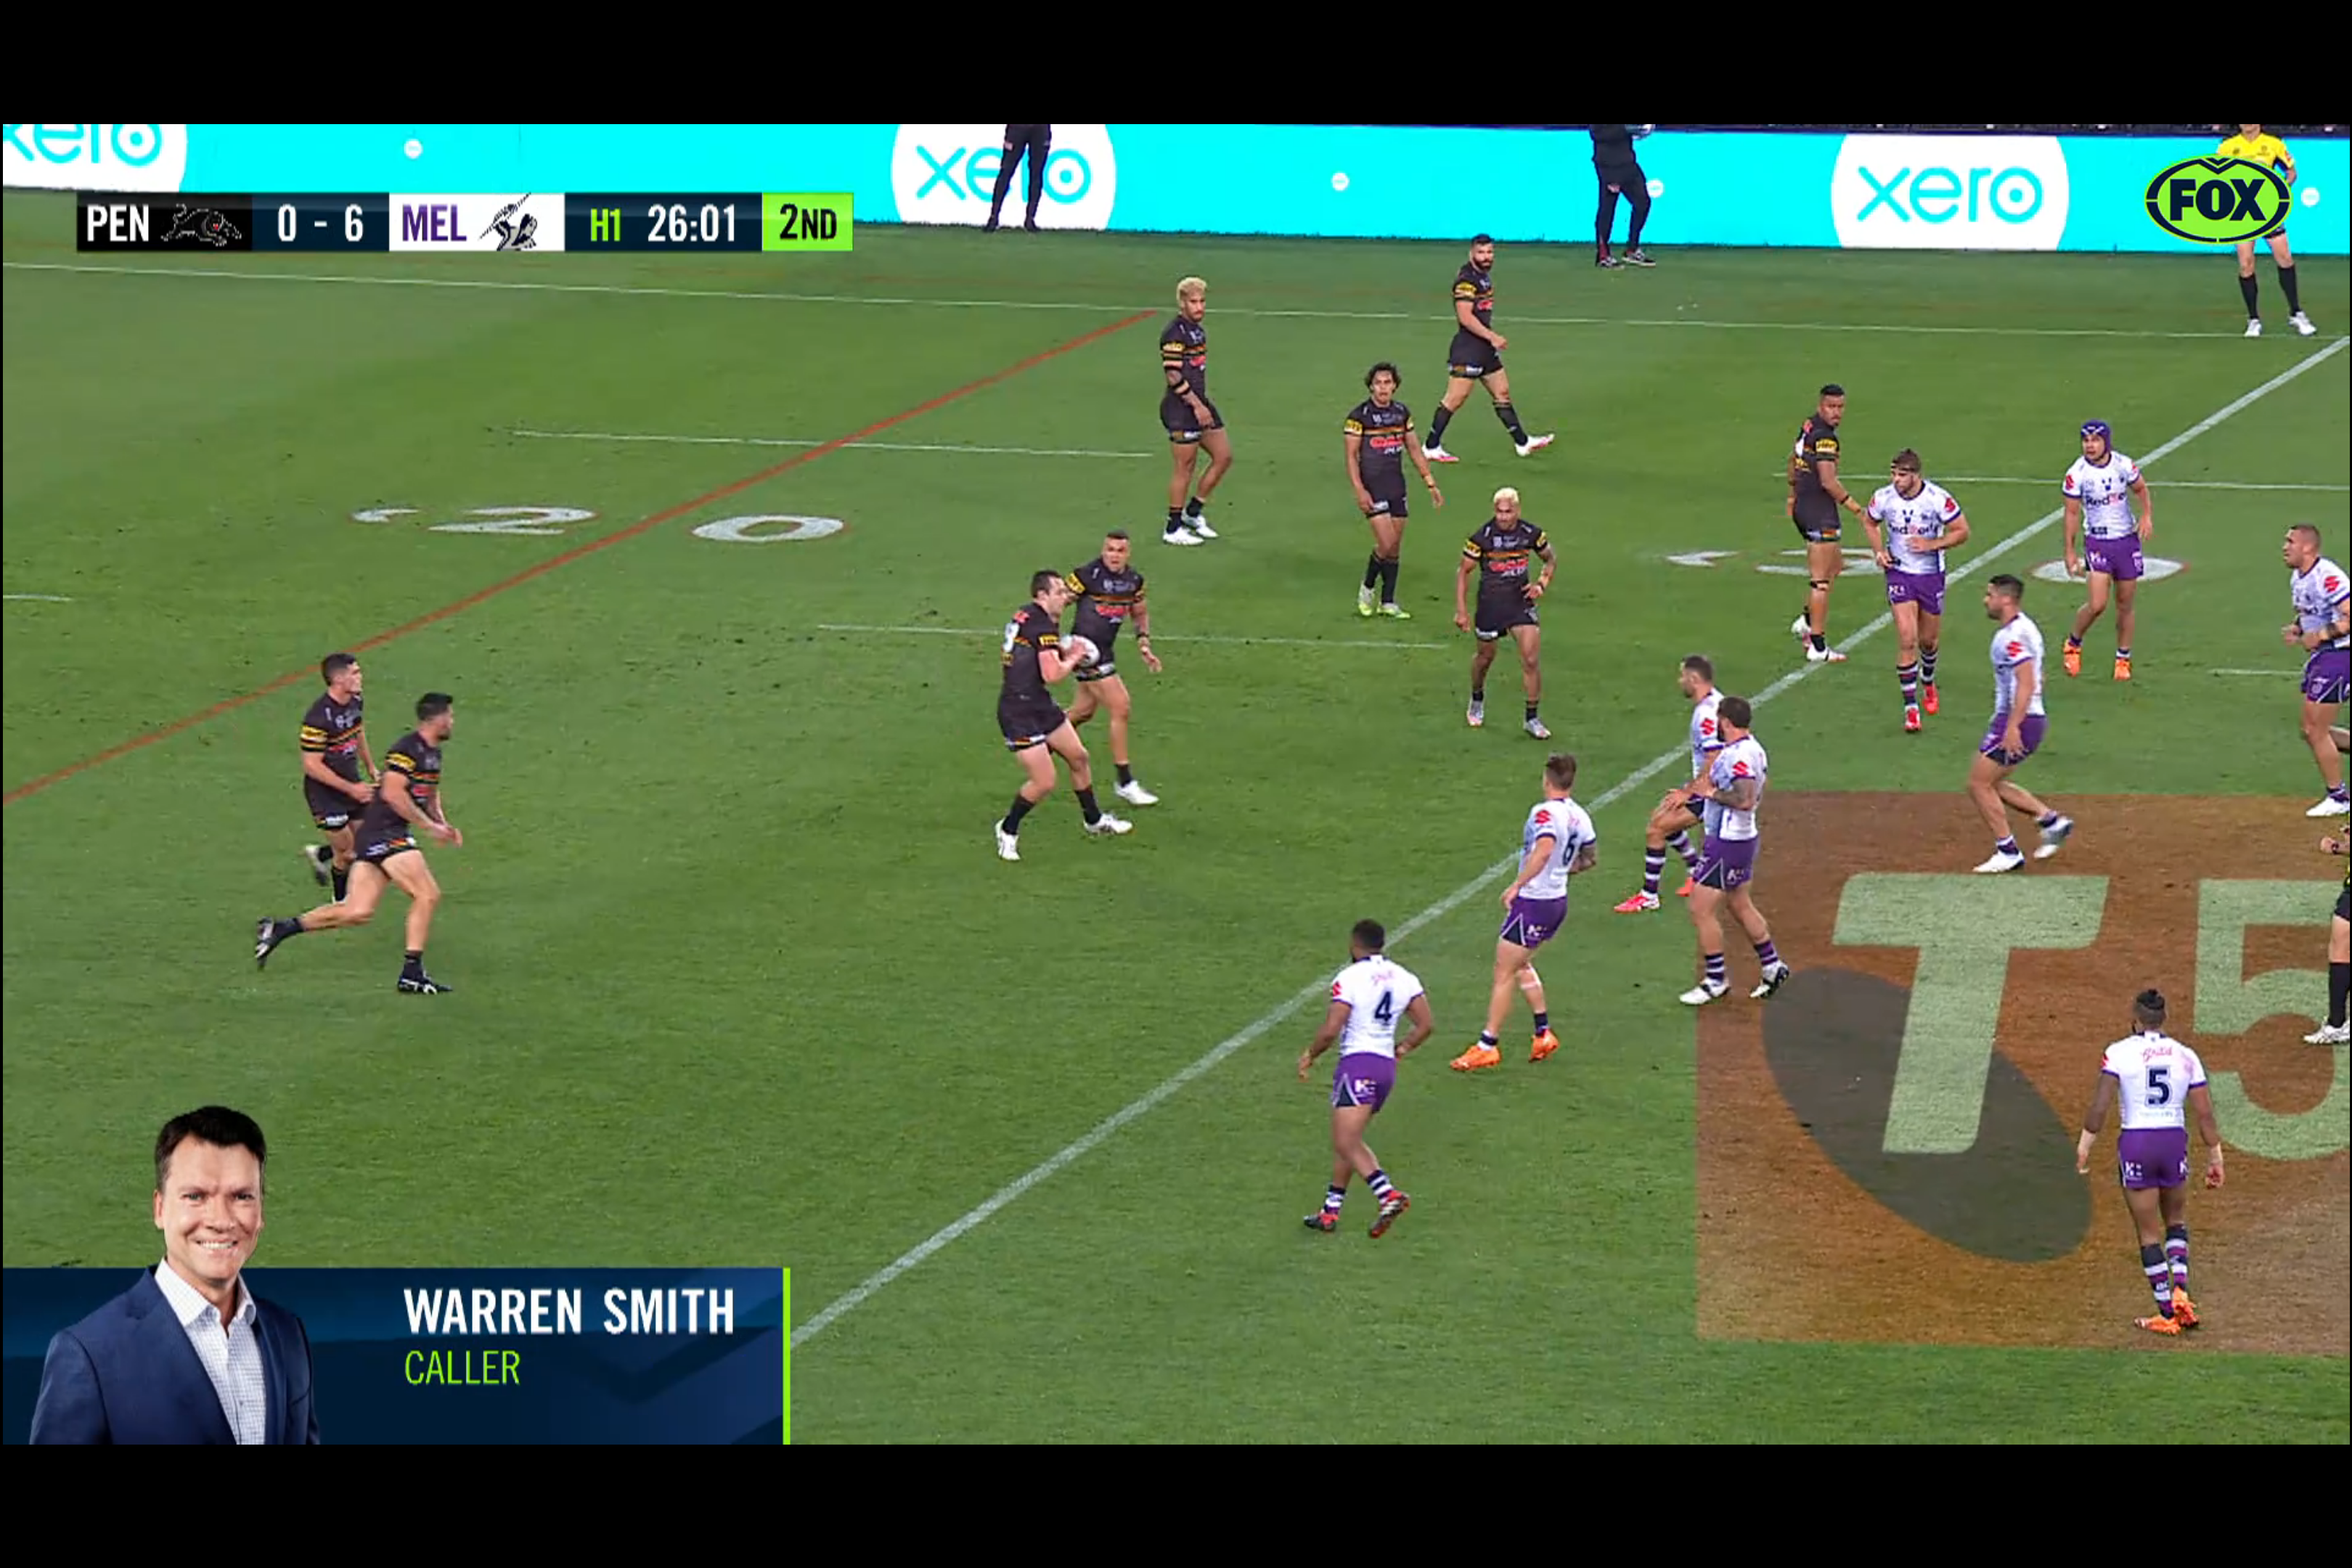
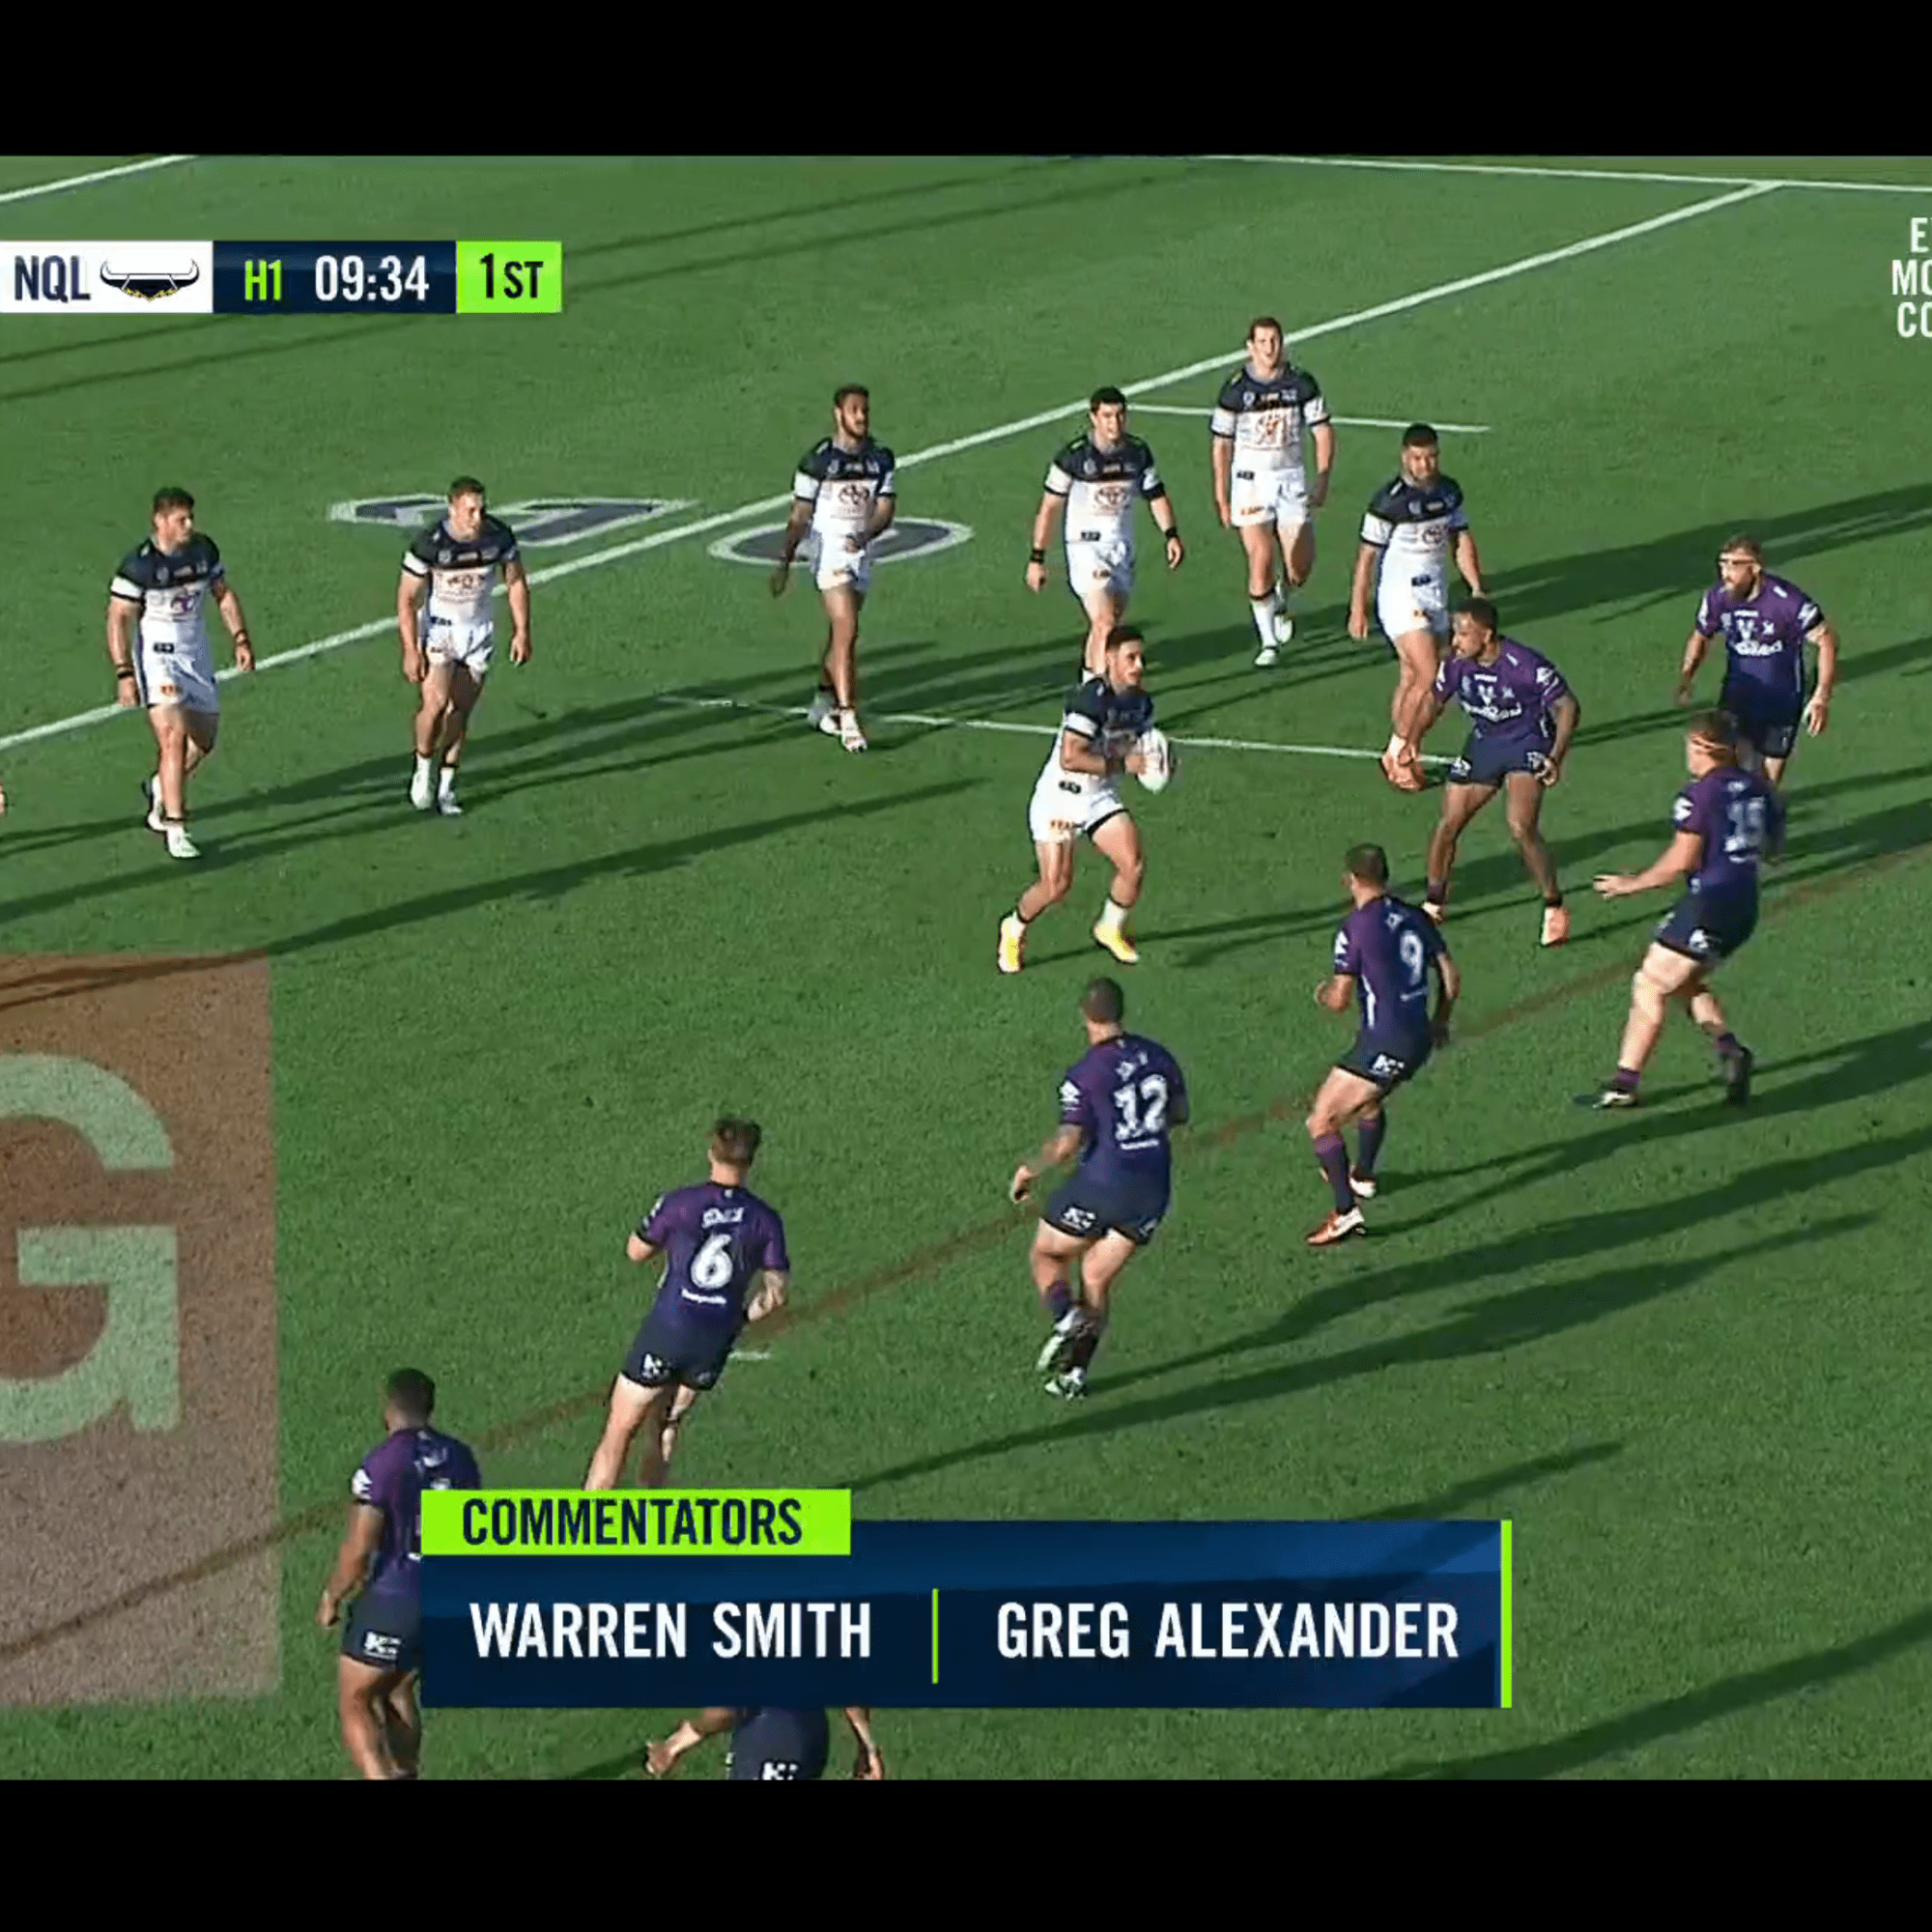
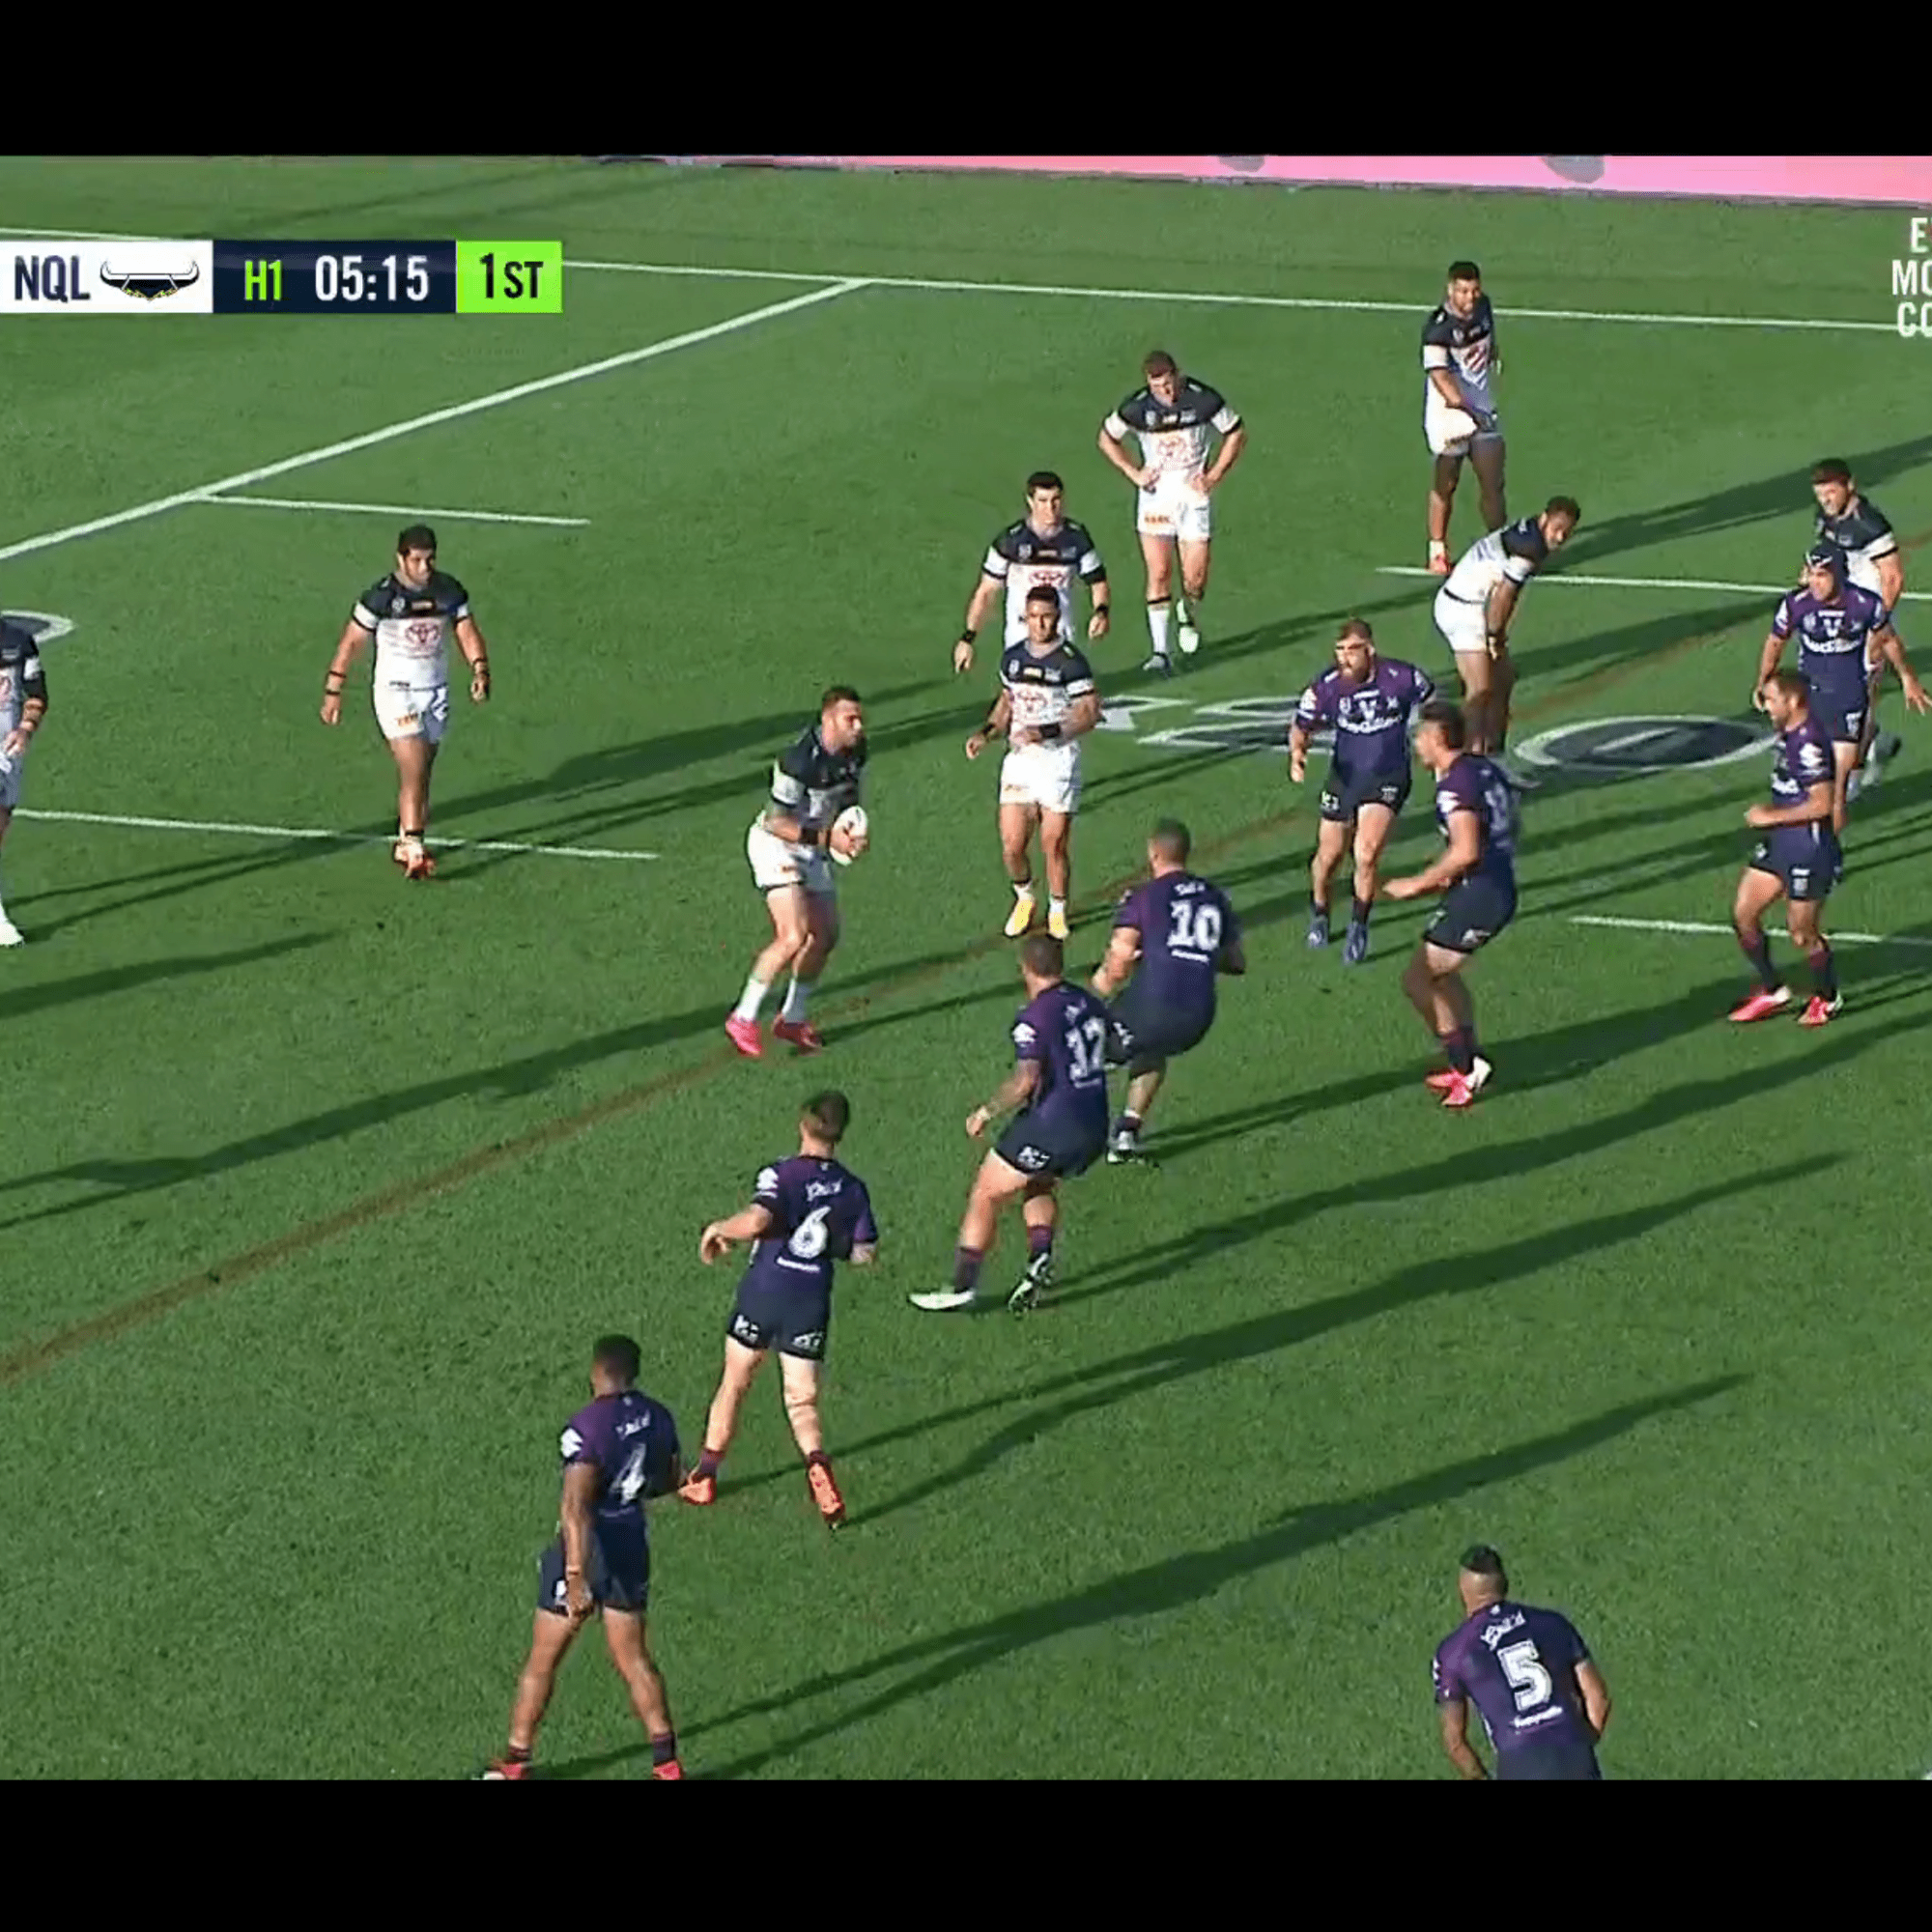
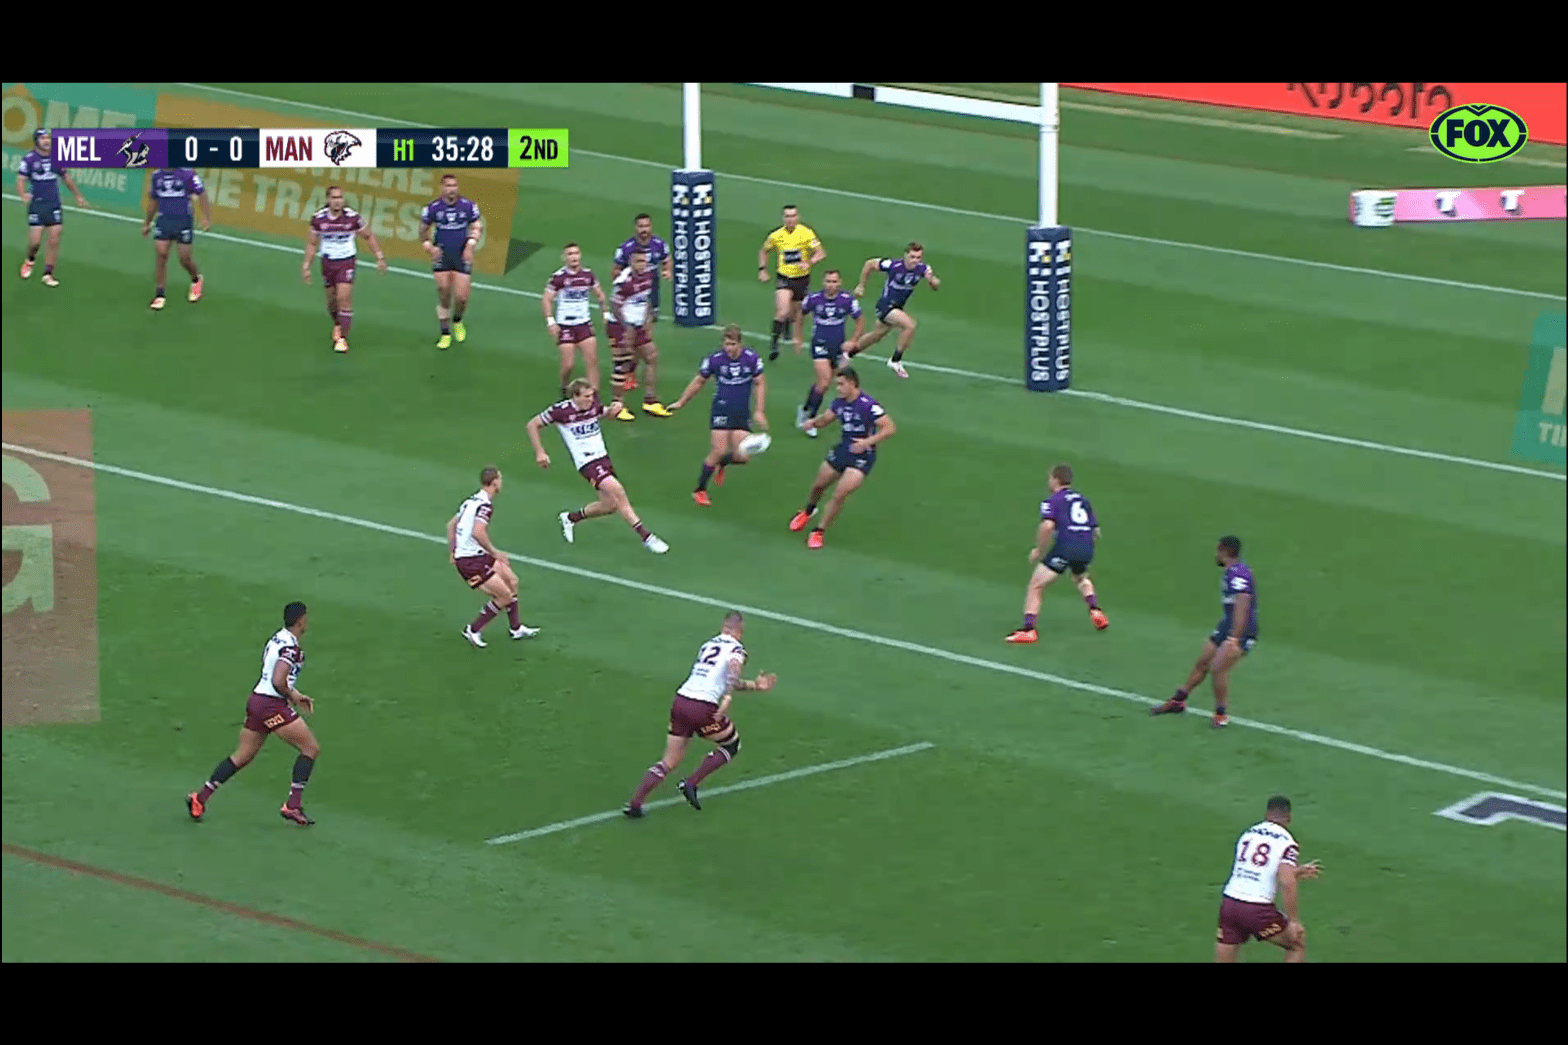
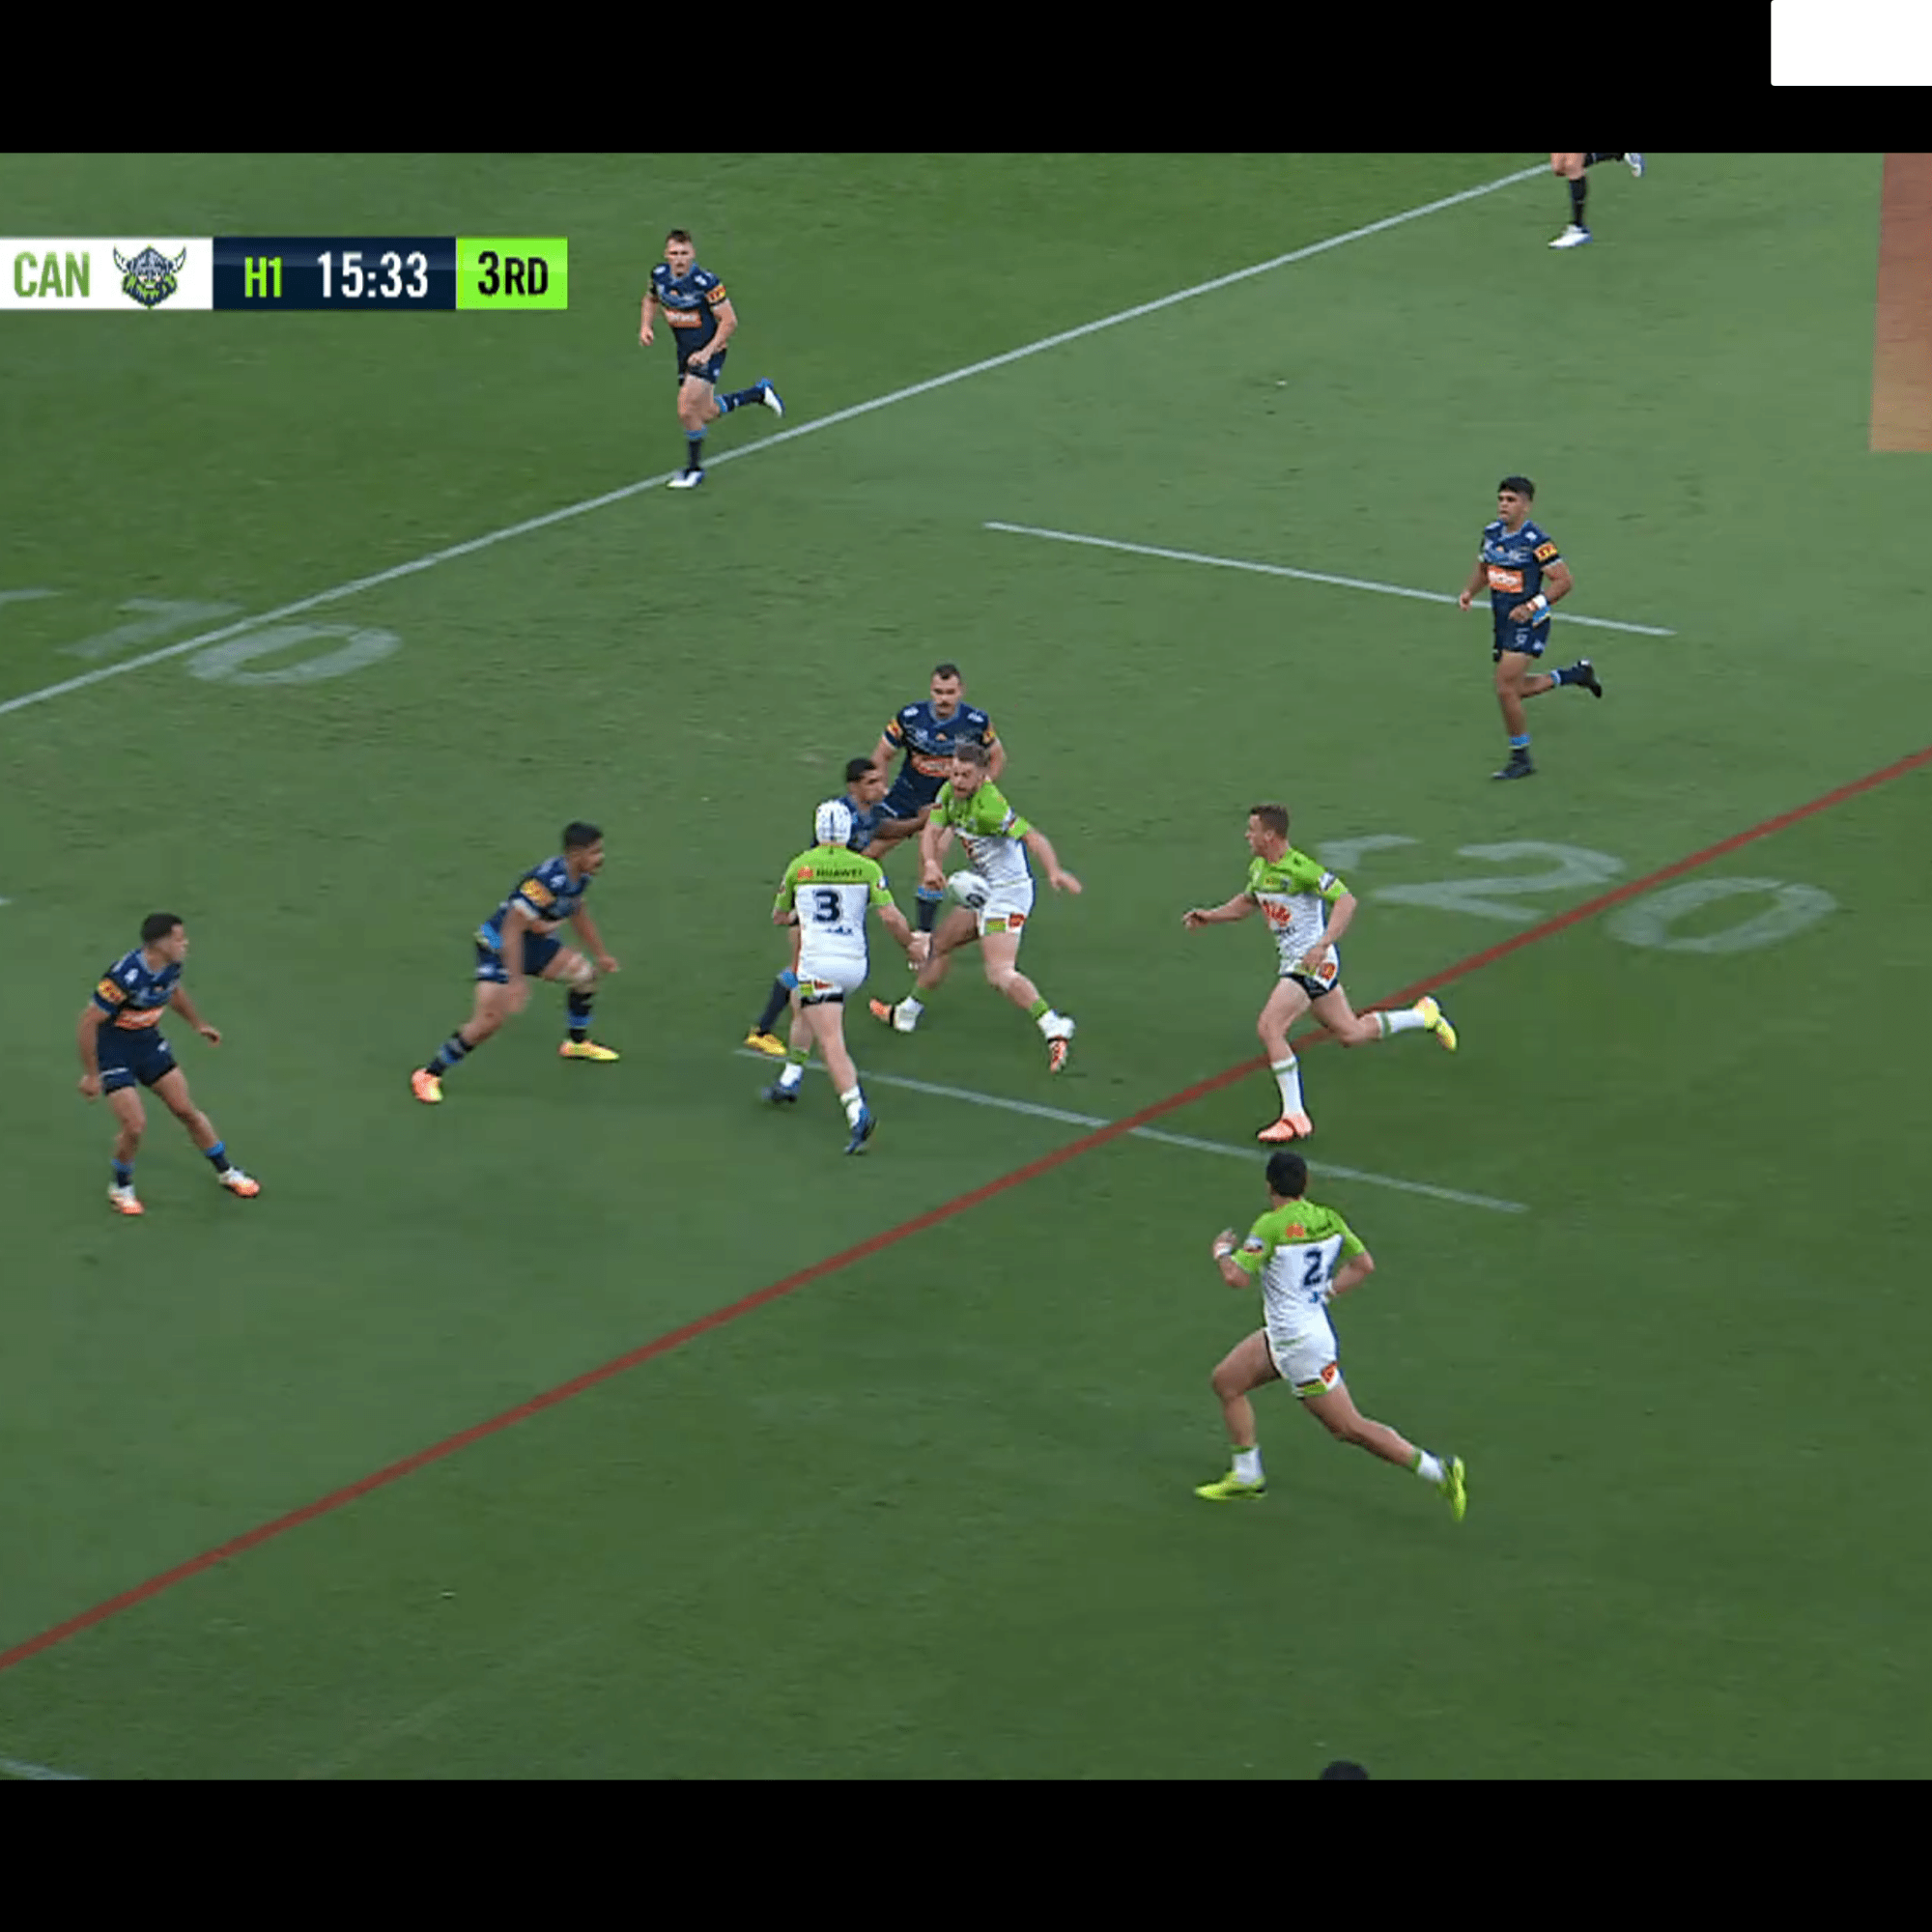
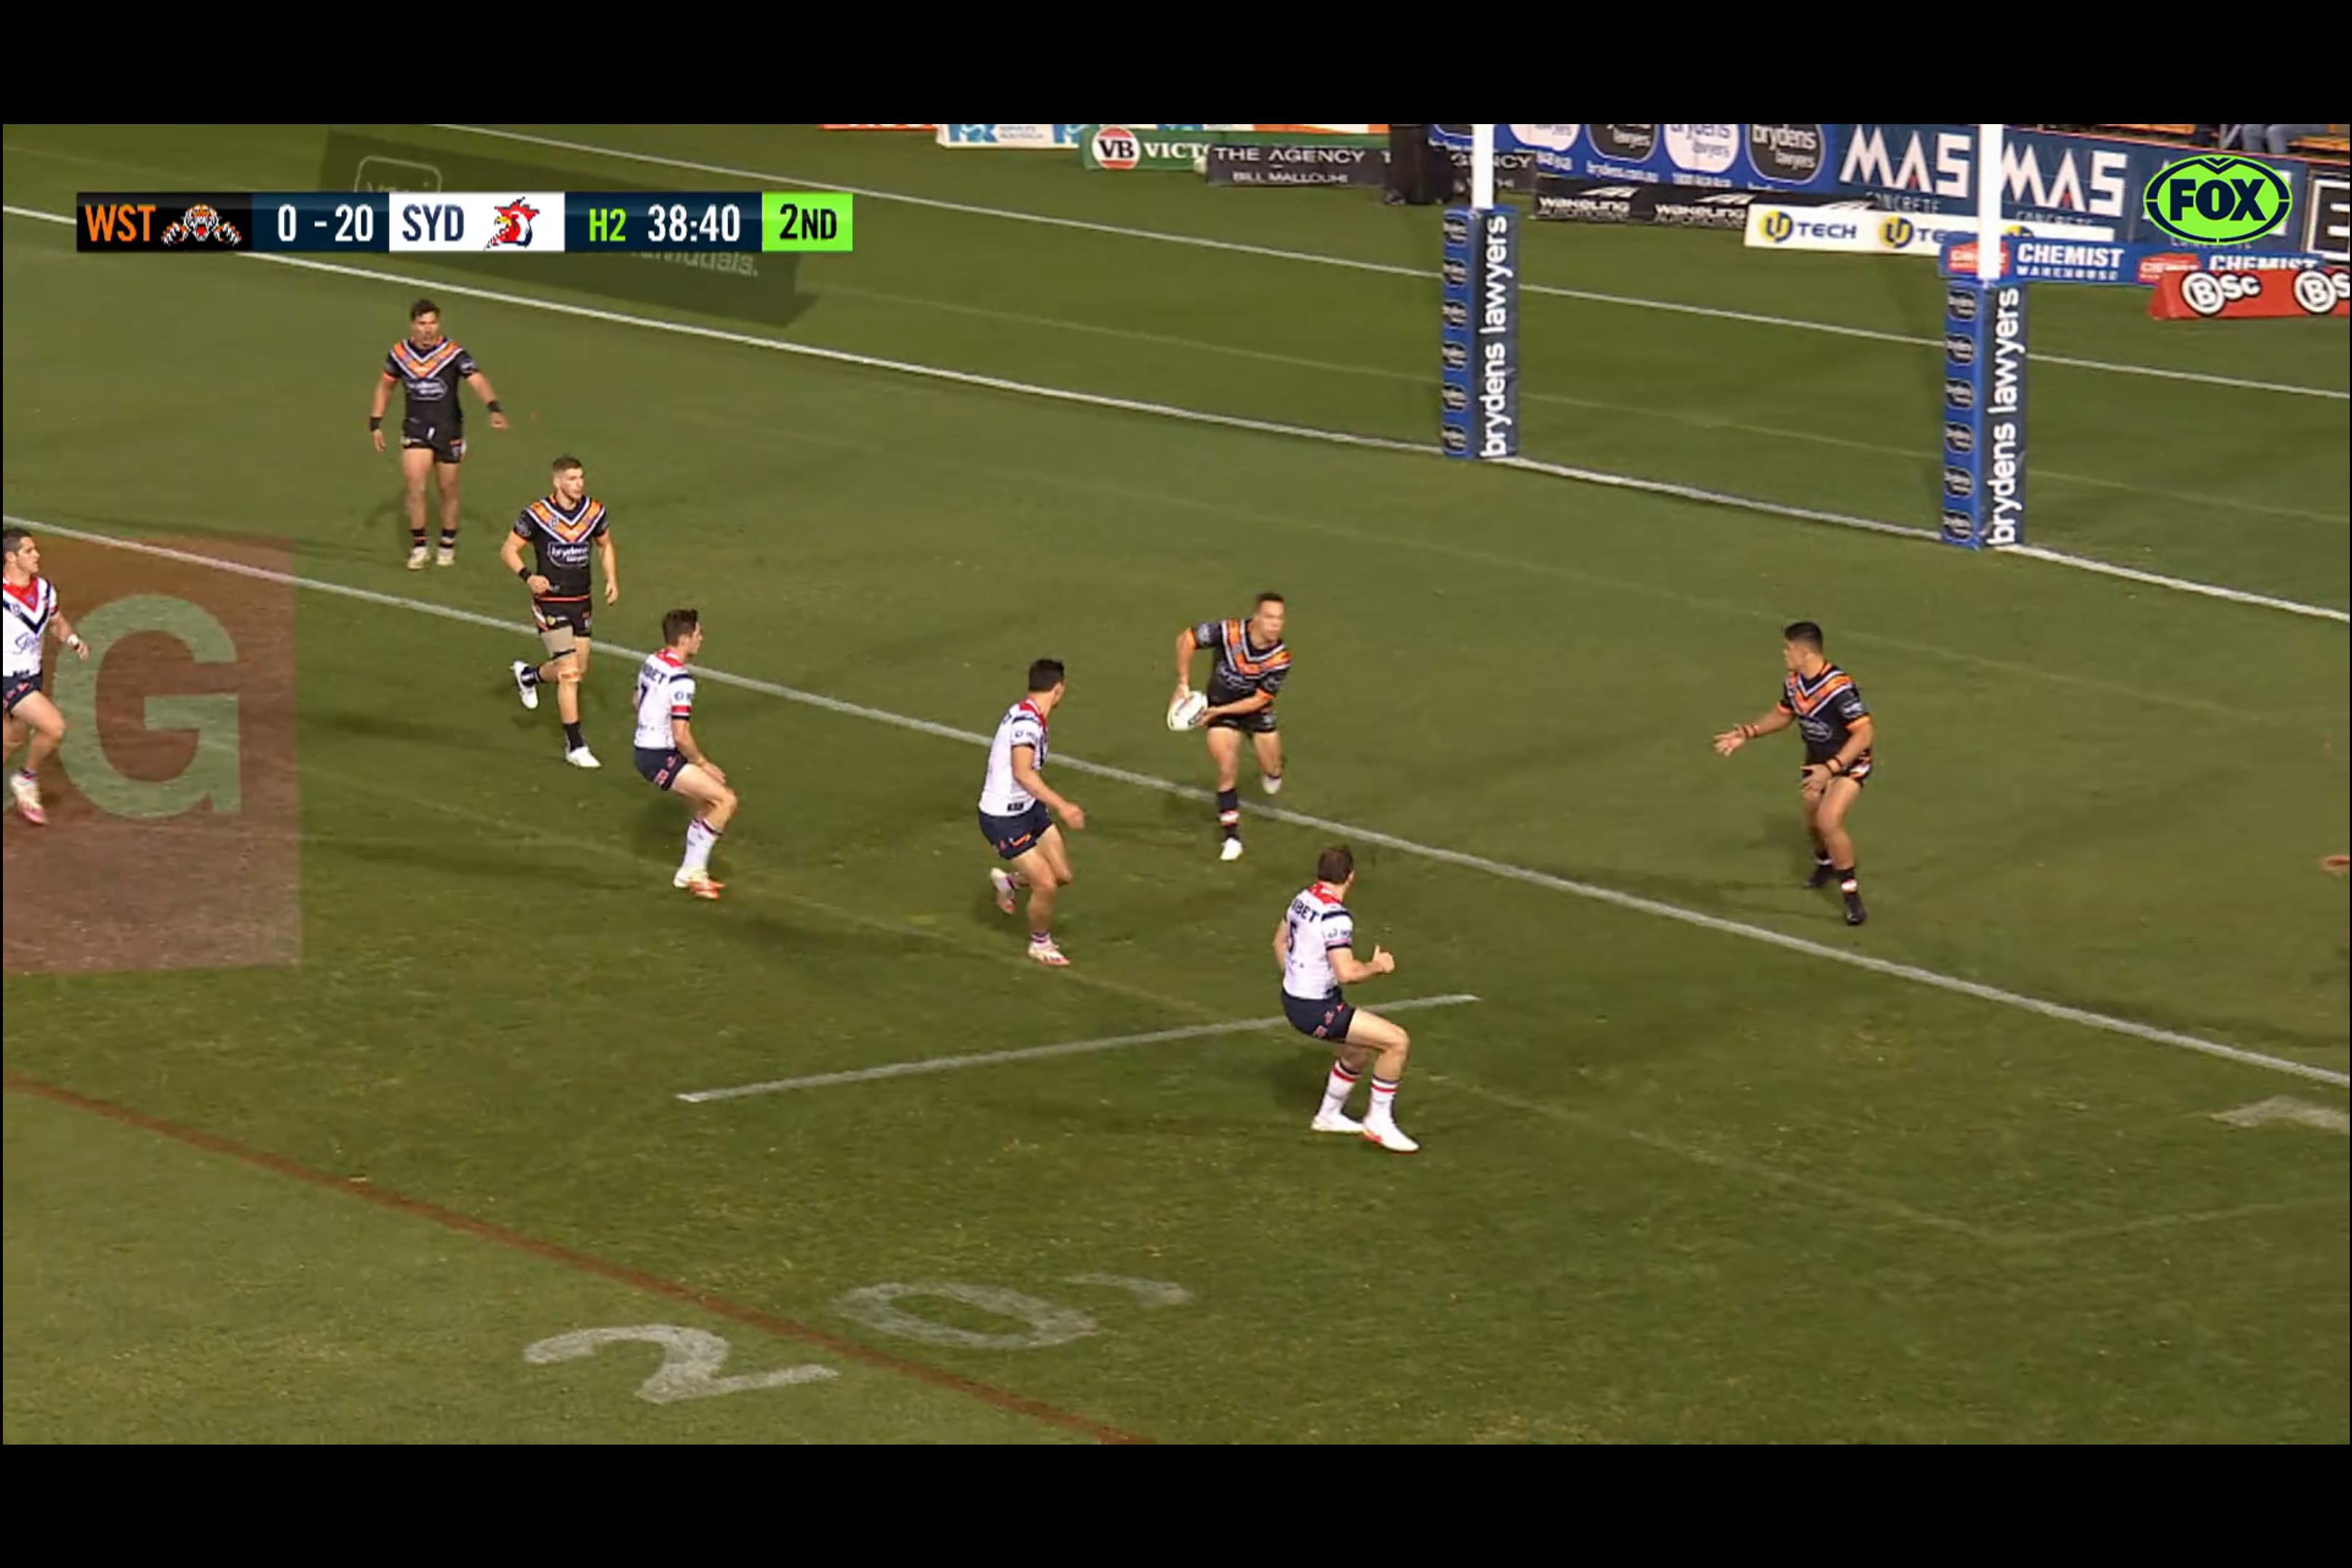
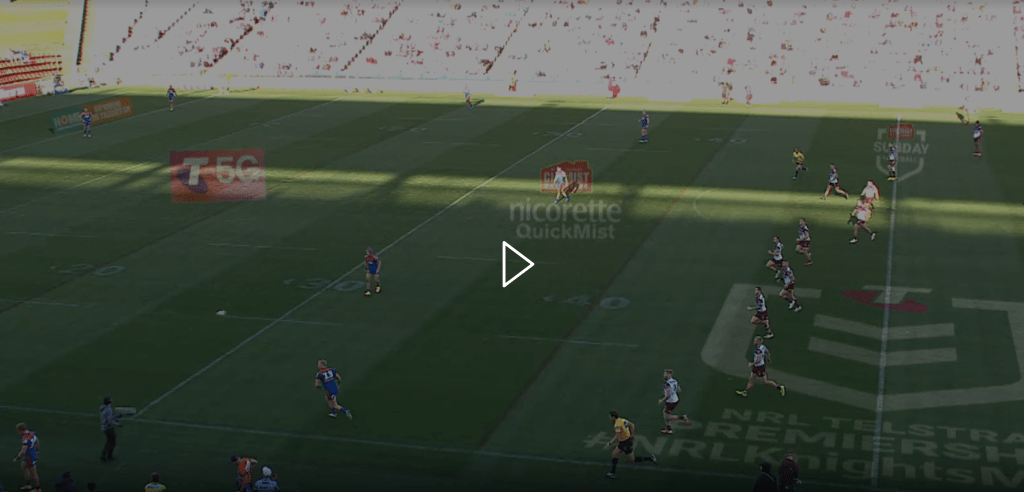
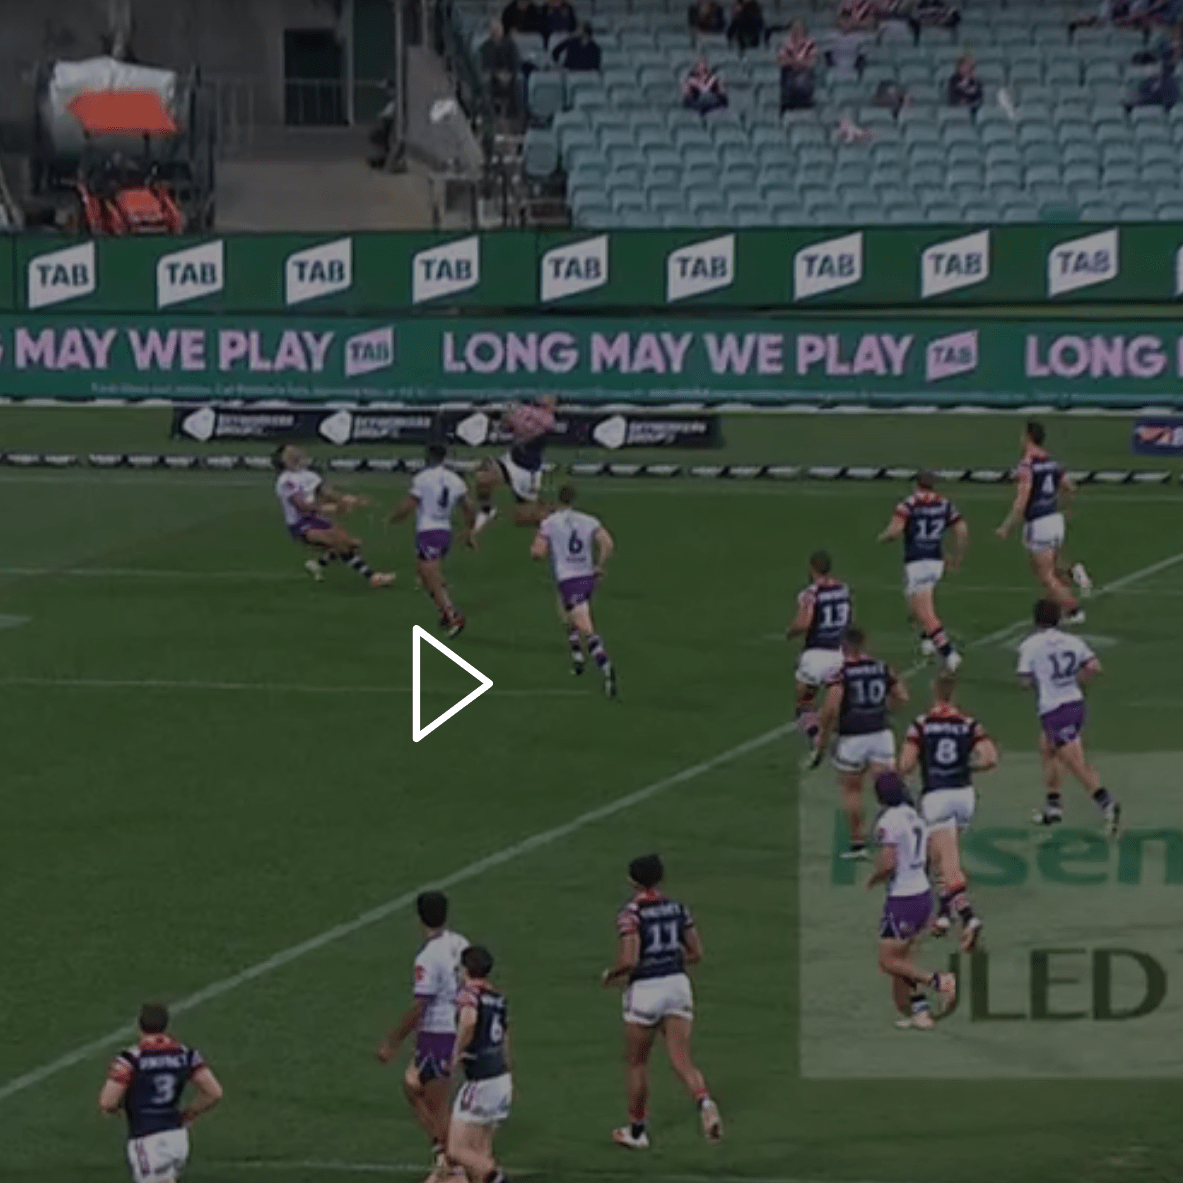
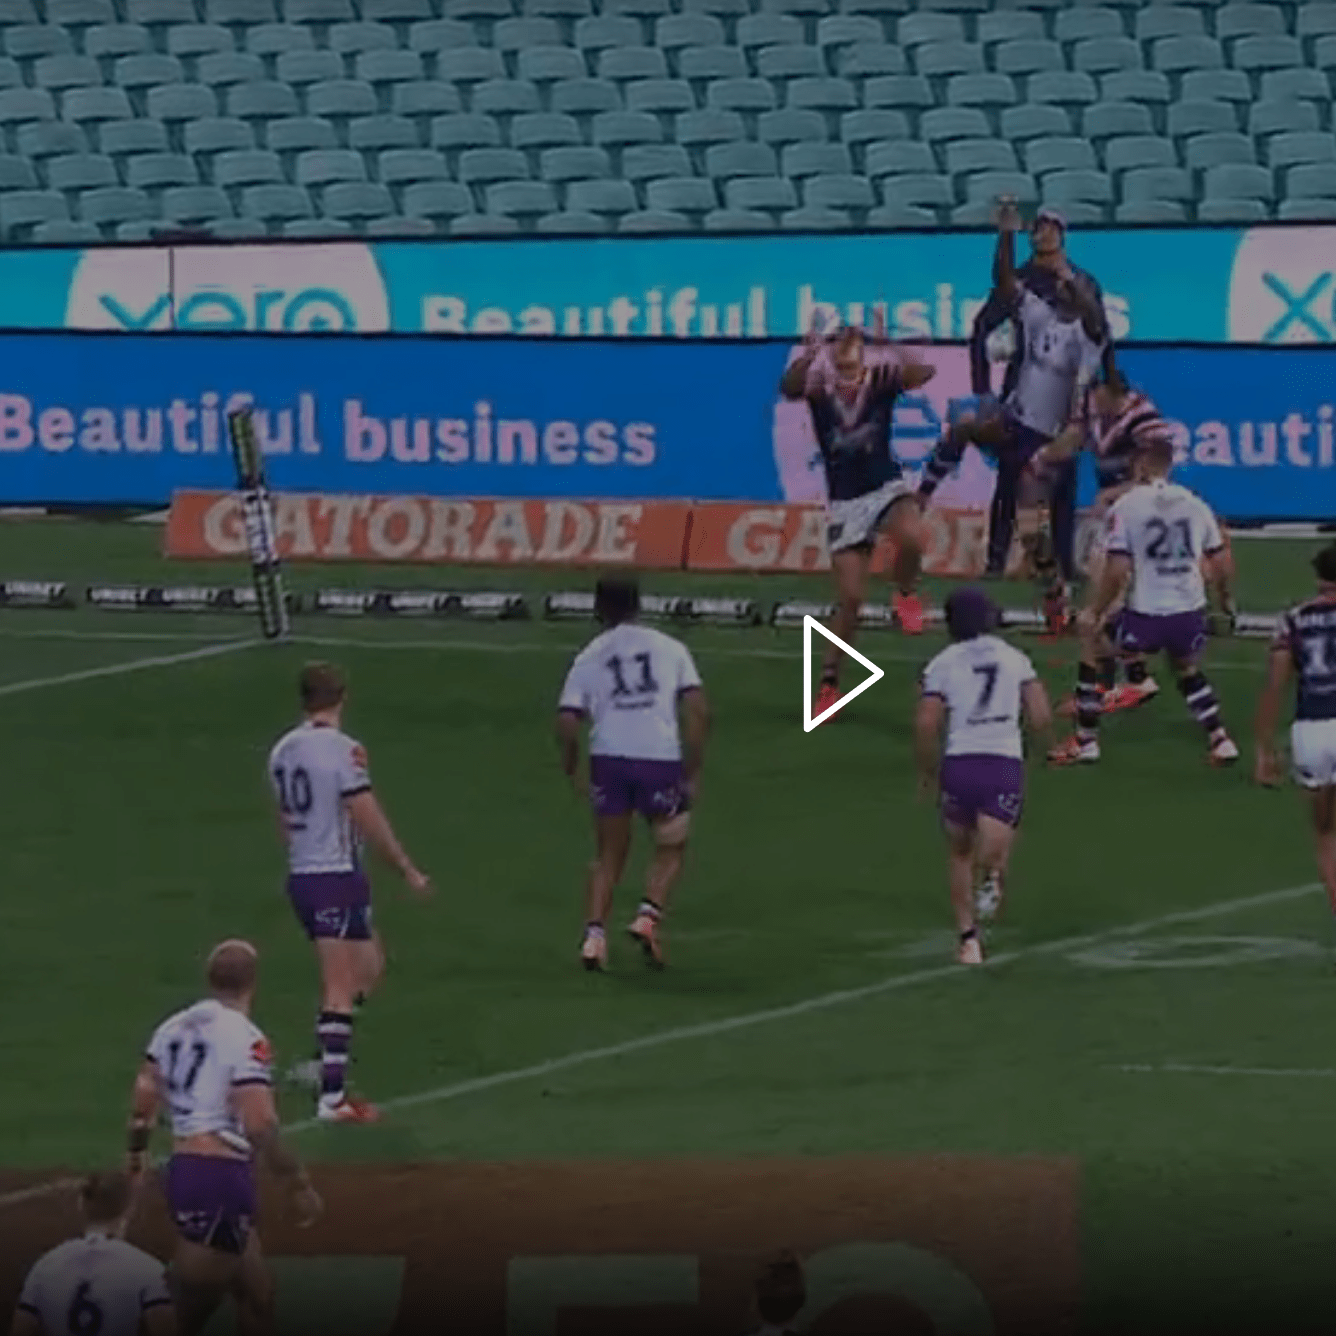
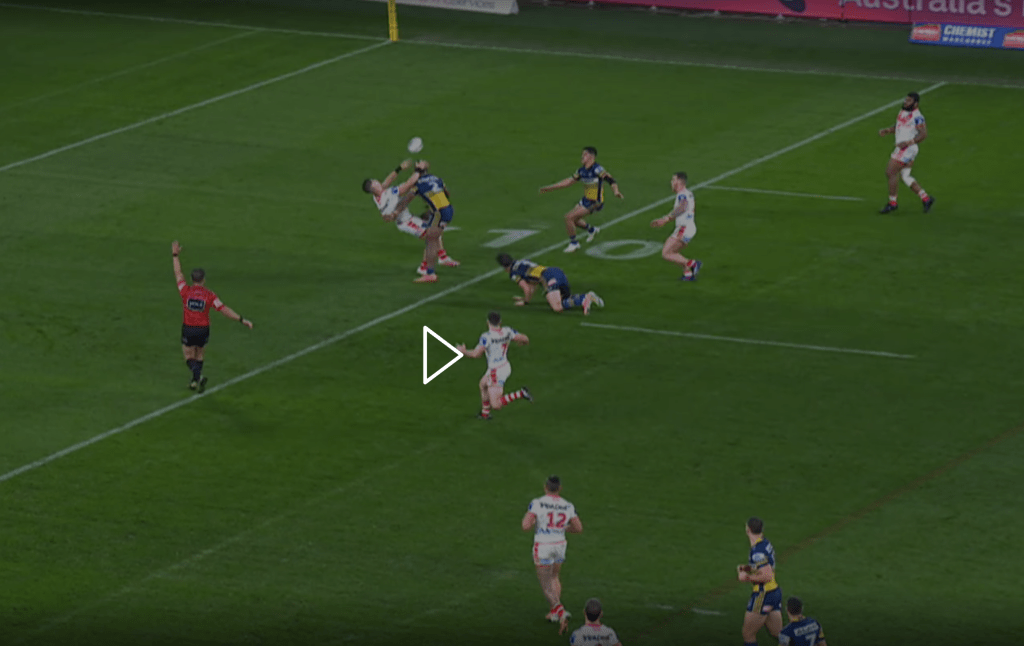
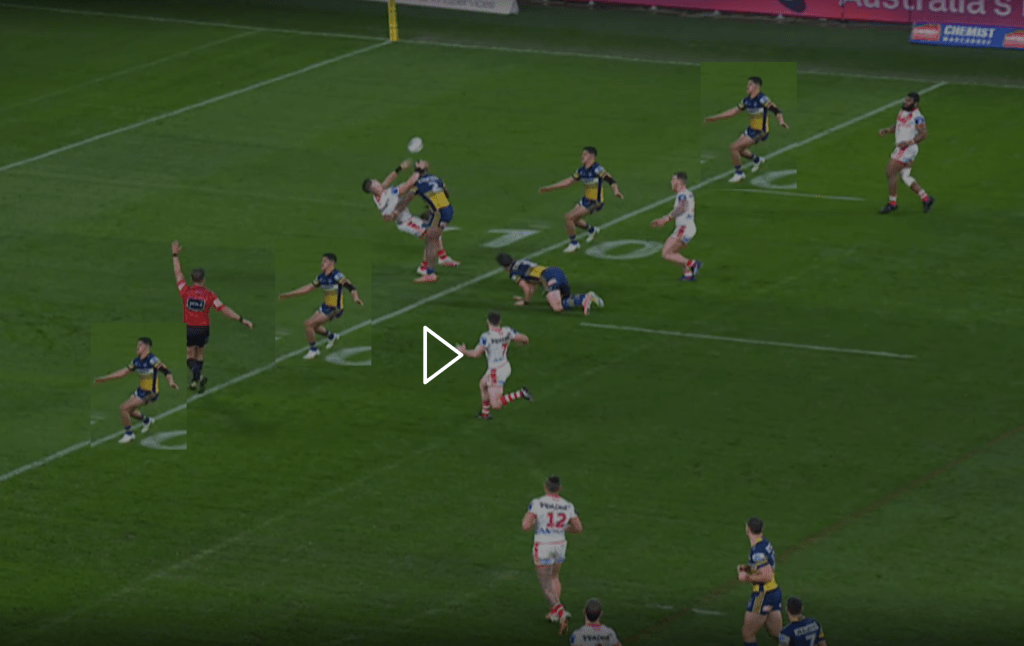
In this last photo South’s fans would be impressed with 8 defenders chasing but it would have been even better if they never had to chase at all. The players I suggested rotating would have had a 20m chase tops – instead they end up chasing for 100m. Even if they had brought him down the defensive line would be shot.

So is the expense of a regular 30m jog for a non-attacking side player into a defensive position worth the prevention of a 12 point swing and the gassing of 8 players? It would put a lot of load on this player especially a playmaker who needs to be on the ball for the next play – maybe the centre/winger could share it?

I’m sure there are other options to cover this risk but the point is no NRL club is deploying any strategy to cover this risk.

Actually Dane Gagai went the length of the field in Origin 1 last year so it is not even being managed at this level.

Is this worth bothering about? I say yes as the cost to manage this risk is extremely cheap – just some practice at training with players understanding their role to cover the “just in case” scenario of attack gone wrong.

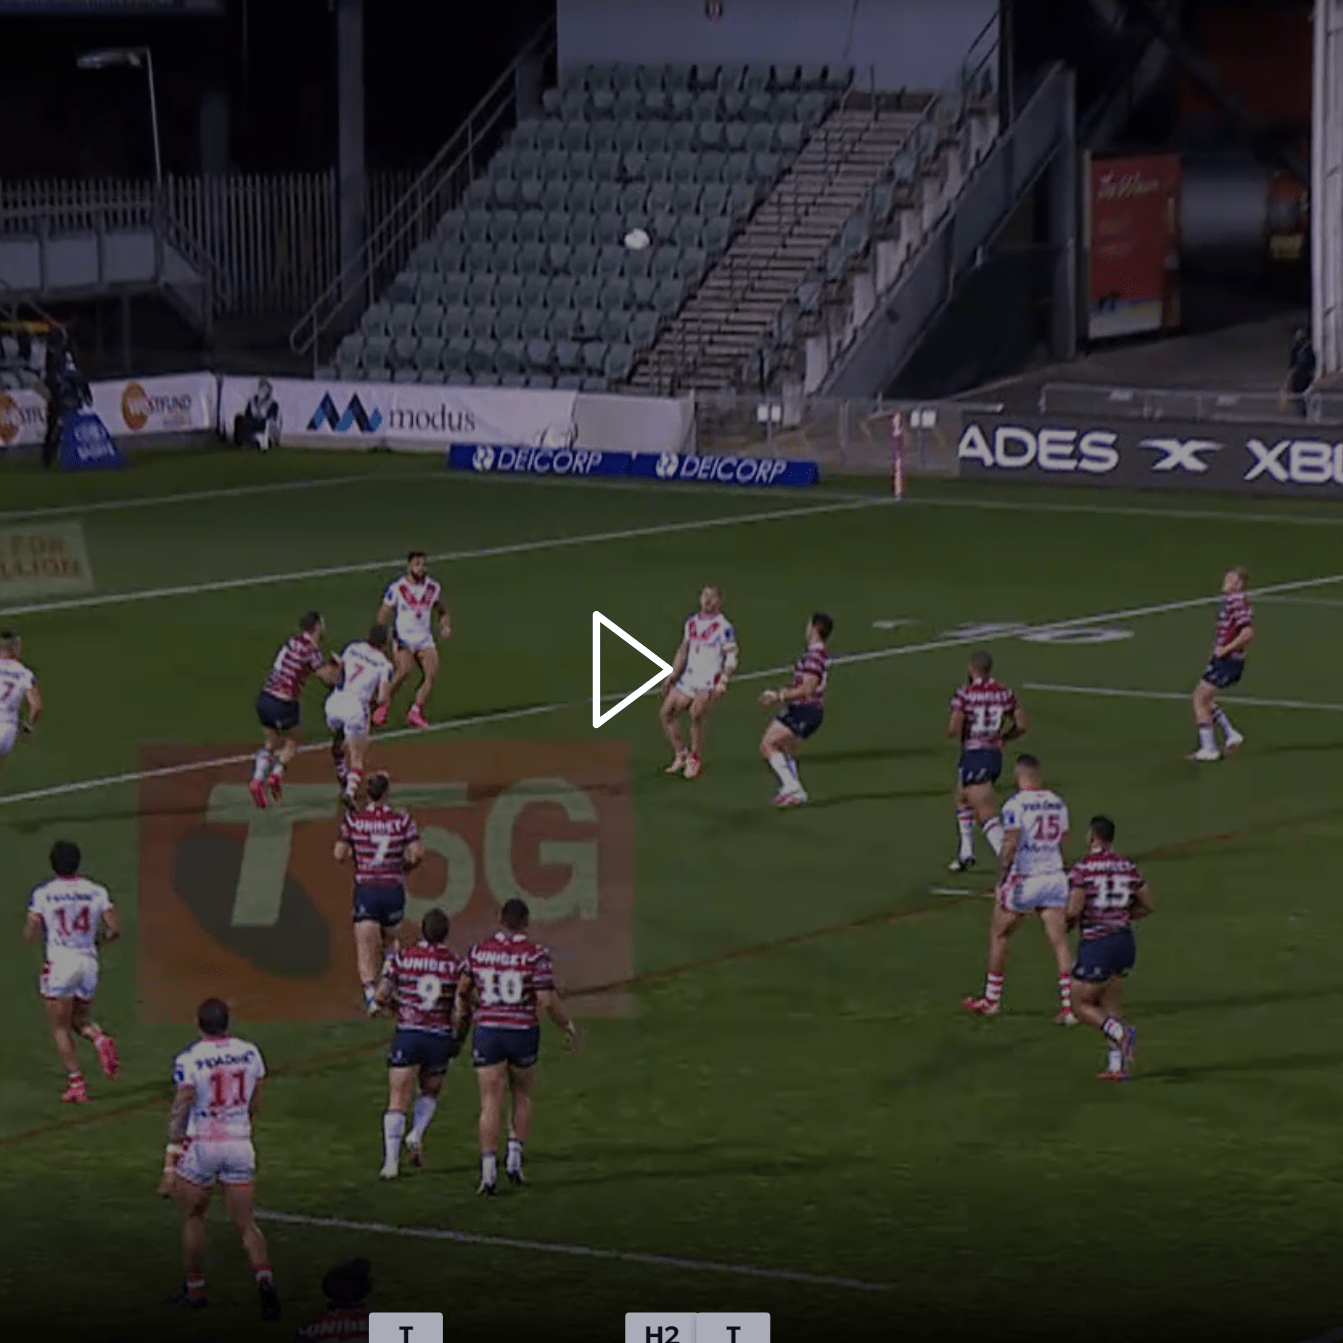
It’s more than just intercepts

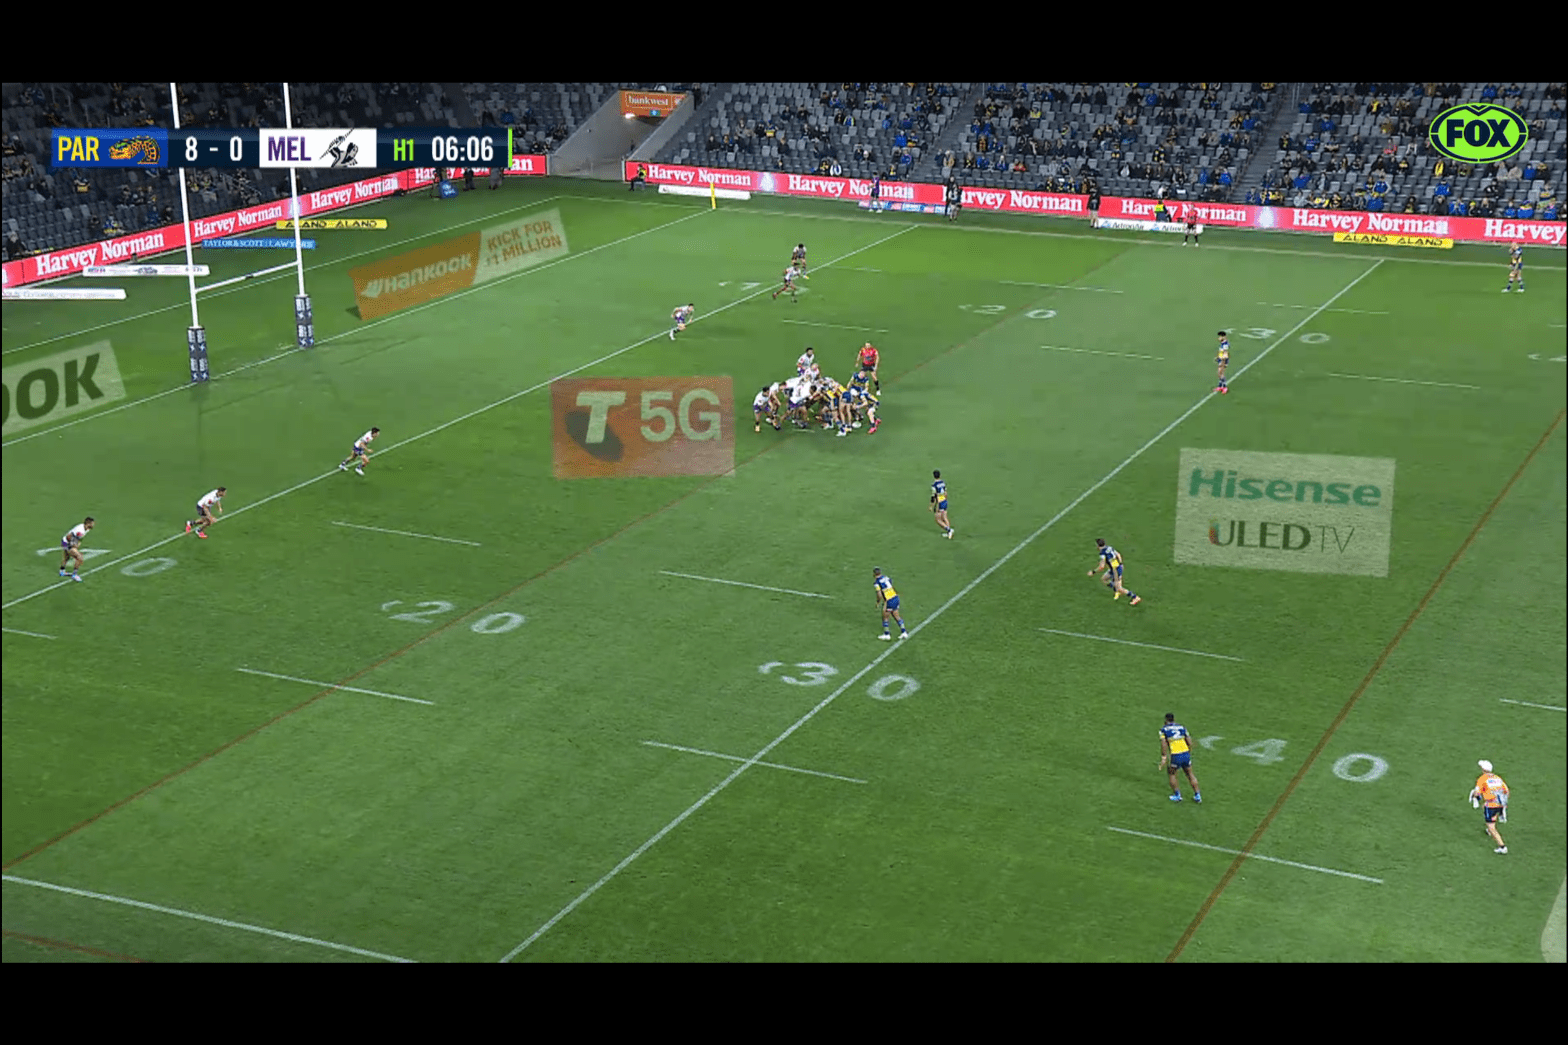
Consider how often the intercept’s close cousin the kick which gets “trapped and scrapped” (as shown above) or just the plain-old fullback/winger picking up an attacking kick and going the length of the field occurs.

Starting to appear as something that should be managed? Fortunately the strategy proposed above covers all scenarios.

I have started a count from round 10 and we will see how many points could have been prevented with this simple risk management exercise (I’m going to assume the cover defender makes the tackle and if not slows them enough to allow other defenders to make it).

Running Tally22 tries

RoundEventsTriesComment
GF11Vunivalu
F300
F211Paulo
F122Williams, Katoa
2011Taylor
1943Spry, Addo-Carr, Valemei, Whitehead
1810Gagai
1700
1611Addo-Carr
1500
1400
1332Addo-Carr, Vunivalu, Moses
1244Papenhauzen, Dufty, Johnson x 2
1111Fogarty
1033Katoa, Blake, Addo-Carr

Chanel Harris-Tavita a real no-looker

I haven’t seen much of the Warriors number 7 but in Round 1 he impressed me with a range of well executed no-look passes.

Check out the following clips (best watched at half speed) and see how he sets up his runners by maintaining eye contact as he accelerates towards the defensive line. Several times Warriors run the same shape (inside and outside support) until they finally bust the line – even when they don’t they usually get a one on one tackle and a quick play the ball.

Haven’t seen a young half play this direct for a while – hopefully it’s good signs for the Warriors.

Scrums 2021

Introduced last year centre field scrums resulted in a number of tries where teams failed to defend 4 v 4 (article – defending centre field scrums). With a whole off-season to plan I was interested to see what coaches would deliver in round 1.

Scrum Attack – The Trap and Wrap

I noticed a new attacking variation in round 1 which I’m calling the trap and wrap.

In the next clip the Storm line up 3 attackers and Souths mirror this in defence. To gain a 4 v 3 overlap the Storm ‘trap’ the ball in the second row and have their scrum half sprint around to the non-feed side ‘the wrap’ – defending scrum half Reynolds does not react and the Storm nearly score.

Later on in the same game Storm try a variation on this play – initially lining up with a 4/2 split then late switching Papenhauzen across as a fake. The ball is not trapped at all so the play breaks down but I liked the mis-direction.

The Sharks unveiled a very similar play:

Early on in the above clip they line up with Moylan left and Kennedy directly behind the scrum. On the ‘trap’ both Moylan and Kennedy sweep right. Fortunately for the Dragons Clune and Bird defend passively.

Later in the game though the Sharks run the same play with success when Lomax bites in.

The Sweep

The Titans unveiled another scrum attack variation – initially lining up 4 on the feed side before sweeping 2 players back to the non-feed side for a large metre gain (note Egan does a poor job assisting Chanel Harris-Tavita).

NFL Style ‘Pre-Snap’ movement

I also observed a lot movement by attackers from side to side just before the ball is fed in an attempt to confuse the defence. I’m excited to see how this type of NFL ‘pre-snap’ movement evolves.

I wouldn’t be surprised that in the future we see all attackers ‘in motion’ just as the ball is being fed.

Scrum Defence

Sharks continue to defend 3 v 4 on the non feed side. They put Brailey at 2RF on that side and he breaks hard from the scrum whilst the 3 defenders wait passively for him to get across (ie by passive I mean don’t move up aggressively and have each successive defender standing deeper as you move out to the wing).

This defensive scheme works well – the key points are that Brailey does not hang around but immediately breaks hard to help the 3 defender, the prop on that side must also work hard to protect Brailey’s inside shoulder.

In the above clip the inside defenders aren’t stressed as McCullough’s pass isn’t out in front. The below clip from their trial with the Bulldogs shows a good out ball will stress them – especially if the ball is trapped first preventing Brailey from breaking early.

In this case the play breaks down as Hopoate has to wait for Flanagan’s pass and they don’t run a block shape. I’ll be watching with interest how this defensive pattern goes against better attack.

Here’s the risk when the play is executed correctly:

Scrum pushes a defensive option?

A lot of attacking plays rely on quick movement from the base of the scrum – a big shove can mess that up. Keary and Tedesco were looking to put on a scrum half wrap in the clip below but a push in the scrum ruined that plan.

I’d like to see more defensive shoves – even if it’s only the 3 in the front row pushing. It’s a small effort with a high chance of ruining a good attacking play.

No Defending Scrum Half?

I thought I was seeing things when I saw 7 defenders back for Wests but given the Raiders loaded up with a 5/1 split Wests decided to not play a defending scrum half – not a bad idea in this situation.

Defence Overall

I didn’t see anything to suggest that defending 4 v 4 on the non scrum feed side is a bad one. I don’t have the statistics but I’m pretty sure the majority of tries from scrums have been scored on the non feed side. If teams persist with defending 3 v 4 on this side then I think the Sharks defence is a good one to copy.

As the trap and wrap is a new play which quickly creates a 4 on 3 it’s worth considering placing an extra defender on the non feed side when facing 3 attackers – just in case this play is executed. This would leave you short on the feed side but it’s much harder to generate attacking speed on this side (as the scrum half needs to do a 180 after feeding the ball) and the defending scrum half is already up. Look how easy the Tigers defend this attack short one defender:

Summary

I really like the ‘Trap and Wrap’ innovation – teams are going to have to quickly work out how they are going to defend this. The late sweep play by the Titans was a good metre gainer for scrums set in your own half.

I’m all about more ‘pre-feed’ players in motion and look forward to more innovations on this front.

I’ll start keeping stats on tries scored from scrums – which side they were scored on, the defender/attacker numbers and the plays executed as well.

Grand Final Review – Take Your Chances & Defend Your Errors

I really wanted Penrith to win the GF (prefer underdogs/new winners) but they met a committed Melbourne defence which held them to zero points at half time.

For me at this point the GF was over – no favourite up 22 points at half time had ever been run down in the last 10 years (sample of 112 events) – and this was Melbourne we were talking about.

Errors killed Penrith but for me the errors that hurt them the most were made when line breaks or tries were on:

  • Koroisau scoots from dummy half and drops ball (great deliberate slap out by Hughes) -> next set Melbourne score
  • Crichton obstructs Lee -> Mansour try overturned
  • Kikau half busts through line and knocks on -> next set penalty goal Melbourne
  • Cleary pass intercepted -> try Vunivalu
  • Half chance down the right and May throws pass forward -> Smith scores on ensuing possession chain

That’s 32 points wasted (counting Vunivalu intercept as a 12pt swing).

You often hear “you need to take your chances when they come” and “you need to defend your errors” and this rang true for the Panthers. Contrast this to Melbourne’s efforts:

  • knock on from kick off -> hold Panthers out
  • 1st attacking chance -> try Olam
  • 2nd attacking chance Kenny Bromwich knock on -> scramble defence holds out 4 great attacking chances by Panthers
  • 3rd attacking chance -> earn penalty goal
  • Concede penalty for slowing the ruck -> Vunivalu intercept try
  • 5th attacking chance -> Smith try

The videos below capture desperation defence by Melbourne and blown chances by Penrith in the 15th to 17th minute of the game.

When you are down 22-0 everything has to go your way to win. After early yardage exchanges in the second half Melbourne make an error to give Penrith an opportunity.

Unfortunately Leota drops the ball on the second tackle (groan) and from the ensuing scrum Papenhauzen scores.

From the kick-off set Melbourne make another error and once again Penrith make another attacking error through Kikau (head bangs against wall). Fortunately for Penrith Vunivalu knocks on the Hughes grubber which would have seen them go down 30-0.

The rest of the second half is like that for the Panthers with errors consistently undermining their chances.

So in summary – failed to take their chances, failed to defend their errors – my theme for the 2020 runners up Panthers.

For Melbourne I thought it was a great team effort – especially in defence. They compressed heavily and dared the Panthers to go around them.

There were opportunities for the Panthers to go around them early in the count (as I’ve mentioned in a prior post “Corner Trap – The Great Escape“). Several times Melbourne were so compressed they were only covering half the field.

I’m slightly critical of the Panthers for not adjusting their attack on early yardage options to go around Melbourne but to be fair Mansour/To’o/Edwards had been great for months punching through the middle – I wonder if this was a case of being too predictable?

Blow my Trumpet

I need to mention that my signature article “What Dane Gagai can teach us about Risk Management” and my post on “Defending Centre Field Scrums” played key roles in the outcome.

No cover for the Vunivalu intercept and defending 3 on 4 from a centre-field scrum for the Papenhauzen try.

Ryan Papenhauzen Clive Churchill winner?

This game was over at half time and Papenhauzen had barely contributed. I think he got the CC due to recency bias – he made two great plays in the second half scoring the last try and tapping back Cleary’s kick for touch.

For me I think either Nelson Asofo-Solomona or Suliasi Vunivalu deserved the CC for their first half performance which was where the game was won.

NAS ran hard all game, had some critical runs in the lead up to tries and some dominant defence (score with NAS on the field 22-6).

Vunivalu scored the intercept but also had some great yardage carries and bomb defusals. I think either would have been worthy winners.

Also the favourite Smith may have also suffered from recency bias. He finished with a kick dead, a holding down penalty and a forward pass error in the last 15 minutes and of course Melbourne’s only try of the second half was an individual effort.

Interesting Stuff – Round 19

Play of the Week

I liked this variation on the block play by the West Tigers

Lots of players crossing lines hold the defence in tight followed by some nice ball play by Eisenhuth – the elaborate first dummy brings Munster in and he can’t release (great line by Garner as well who somehow manages to not impede any defenders). The fact that Wests utilise 2 sweepers holds the Melbourne centre wide.

Long-Short Plays

Isaac John on his Instagram page calls the following play long-short. Set up 2 runners either side of the targeted defender – they guess wrong you score.

In this play the ball player runs across the first defender. The defender reacts by holding ground (stops sliding) allowing the ‘short’ player to hit the hole on their outside shoulder. The next defender feels compelled to come in on the short line opening the gap for the ‘long line’.

Very hard to defend when executed at pace and close to the defensive line.

Defending attacking turnovers

My headline article is “What Dane Gagai can teach us about Risk Management“. After a quiet few rounds there were a number of tries scored in R19 from attacking turnovers.

The 2 against the Warriors really show how important this risk is to manage as they were up 14-6. The 2 events back to back had them down 20-14 and were a big reason for them missing the 2 competition points.

As stated in my article – the cost of having a non-attacking side player rotate behind the play is very cheap considering the outcome.

Defending Centre Field Scrums – Strategy Fail or Execution Fail?

Last night I was pleased to see Souths lining up 4 v 4 on the non-feed side of centre field scrums. Then this happened:

I was concerned with this try given my push for this defensive setup. So was this a strategic fail or execution fail?

I’m going to argue for the latter (self-interest anyone?) so if you disagree please leave comments below.

The image below shows Cody shifting across nicely to protect Marsters inside shoulder – but what it also shows is Sironen, Allan & Burgess all meandering across (where is the urgency?)

In my view I put this try down to a distinct lack of enthusiasm of defenders to get across and help their team mate – guys you are 10m out and defending your line!

The commentators criticised Marsters at the time but I expected more from Sironen – at no time does he change his slow jog across the field.

If the 2 v 2 defence is to work on the feed side then the defence needs to be switched on.

Interesting Stuff – Rounds 17-18

Favourite play of the week – Scissors play cuts Dragons

This next try came after a long delay from a bunker referral so the Raiders had plenty of time to set this up.

After a long shift the magic happens. Whitehead and Wighton execute a ‘scissors’ change in direction which has them slice straight through. Initially Whitehead runs the straight line with Wighton fading behind in the standard block play formation.

Nek minute they both reverse lines – Whitehead fades for the overs line with Wighton straightening.

I’m going to support some of my earlier posts with evidence from the last 2 rounds that these ideas have merit.

Corner Trap & Early Attacking Shifts

I mentioned I saw attacking opportunities for early shifts after being trapped in the corner (my thoughts here). The Titans below reap the rewards.

You could rightly argue that the Bulldogs and Broncos aren’t exactly leading the way in defence at the moment but these opportunities do exist against the top sides. Below are some early tackle photos of the top sides showing as few as 2 defenders covering half the field.

Defending Centre Field Scrums

I’m still perplexed at sides choosing to defend 3 against 4 on the non-feed side of scrums (my thoughts here). In my opinion you are gifting your opponent a great attacking opportunity.

Compare the outcomes above to the West Tigers who opt for 4 on 4 defence against the lethal Souths left edge. The extra defender forces Souths to take them on 2 v 2 – but as it is on the feed side of the scrum Brooks shifts over to help making it an easy tackle for the centre.

Bomb Defusal

When a bomb lands on the goal line there is not much upside for the defending team to try to catch the ball (my thoughts here). The attacking team has all the momentum into the leap – much better in my opinion to punch the ball dead (called ‘spoiling’ in AFL).

In the first video Gutherson stays down – what would have happened if he leaped in and tried to punch it? There’s a good chance even if he fails he makes Martin drop it.

Teams seem happy to concede a line drop out from a good grubber – it should only be a matter of time before we see good bombs given the same respect.

Dane Gagai intercept

I couldn’t let this one go given it is my headline article.

Ruck holes

Everyone knows by now for the dummy half to take advantage of 1 marker situations but are there opportunities if this is not the case?

Late in the tackle count middle forwards get tired and forget to close gaps coming from the inside in defence – especially the ‘A’ gap on the other side of the ruck and the gap between markers. See below for the gaps I mean (marked with blue arrows).

In the image above Liu is the ‘A’ defender on the far side of the ruck and needs to trail Friend who needs to trail Butcher across the field in case the ball is switched back. A failure by any one of these players opens up good attacking opportunities.

Even if they do defend correctly there is a strong chance for a fast play the ball due to the shoulder positioning of defenders.

You can clearly see Butcher (second marker), Friend and Liu all have their shoulders pointed to the sideline which makes it difficult to affect a strong tackle. In the video below the gap I’m talking about is not exploited (as a further pass is required) but it does show how hard it is to make a dominant tackle.

When the switch from first receiver (or even from second receiver as in the Sharks example) is followed up with a pass these ‘lazy’ gaps can be exploited.

I’d love to see some further attacking variations to take advantage of these ruck holes – a second man play following the switch could be particularly effective.

Interesting Stuff – Round 16

Do the unexpected

Manly’s Jake Trbojevic kick for the winger went unrewarded even though it was a great tactic. Even Josh Addo-Carr with his speed was burnt.

Over-chasing from marker will get you into trouble eventually

Justin Olam is an enthusiastic player who looks like he leaves everything out there. I’ve noticed he loves to chase hard from marker – it won’t be long before he gets his pants pulled down on a switch back to the short side.

Play eyes up footy

What is ‘eyes up footy’? We hear this phrase often and usually because a team has gone through with a pre-meditated play when the defence a) has already read the play or b) there are better opportunities to exploit vs set play.

In this clip it’s clear the call is to shift wide to Benji Marshall for a pre-meditated grubber kick. When Brooks receives it he doesn’t even look upfreeze it when he catches it and look at the defensive gaps in front of him! and why kick it when the shift was so slow, Mansour is clearly back waiting and you are 20m out?

Scan quickly then execute or deviate.

Load both halves one side of the ruck and then go the other way

This one is my favourite play of the round. Panthers load Cleary/Luai to the left and dummy half Mitchell fakes to them hitting Leniu with a short ball. This causes Leilua to crash in for the tackle and with no time for the Tigers defence to adjust it ends up 5 on 3. Doueihi panics and crashes in which made it easier but even if he holds position I think they score.

Defending Centre Field Scrums

Introduced this season the option for a Centre Field scrum position has opened up exciting attacking options. With a standard field width of 68 metres this gives the attacking side the chance to setup flank attacking plays covering 34 metres.

What I’m struggling to understand is why teams are choosing a 3/3 split in defence in some circumstances when the attacking team goes for a 4/2 split in attack. Check out the below video and images:

Papenhauzen’s centre-field position looks like he could go either side so I understand Manly going 3/3 but in reality the best attacking option is for him to run to the non-feed side

Defending 4 vs 3 over 34m width within your own 20 is asking for trouble – especially the non-scrum feed side. It is quite easy with a good out-ball from the base of the scrum to have the 1st attacker engaging the 3 defender (ie third defender in from the wing) with the second rower/lock scrambling to get across after breaking from the scrum.

Melbourne are taking advantage of this by turning strong runners Asofa-Solomona and Fa’asuamaleaui under from Papenhauzen – best case they score – worst case a fast play the ball due to difficult 1 on 1 tackle from the scrum based covering defender.

But even the standard block play run by Parra below is damaging – in this case Lee/Earl are forced to guess where Brown plays – is it short to Jennings, to sweeper Gutherson or straight to Sivo?

Defensive Options

So what could be done instead? I’d suggest always manning up 4 vs 4 on the scrum non-feed side thus negating the scramble and overlaps created. This does leave you 2 vs 2 on the feed side with a lot of space – however your ace is that you have the defending scrum half who can immediately slide to assist the 2 defender from getting beaten on the inside. This option does expose the defence to an attacking scrum half run but at least your lock/second rower are very close by to cover this. I much prefer the risk profile of this defensive setup compared to 4 on 3.

If the attacking team goes with 4 attackers on the feed side I’d experiment with either sticking with a 3/3 defence utilising the defending scrum half to make the ground across (it’s important they immediately slide leaving the lock/second-rower to cover the scrum half) or man up 4/2 with defending lock/second-rower breaking immediately to assist 2 side.

Of course – why not just break from the scrum early? it’s only a differential and allows you to reset your defence. So far no one has been sin-binned for this offence and there has been plenty of blatant abuse of this rule.

Interesting Stuff – Round 15

Run-around variation

I think the run-around is an under-utilised effective play and I will be adding a post in the near future on its use. In the Raiders vs Titans game I loved the below variation:

In the first photo usually there is a fullback out the back but because there isn’t the defensive line doesn’t shift and slide backwards (step 1 in a great play – don’t do what’s expected).

Croker running off Whitehead’s hip plus Whitehead digging so deep into the line brings Tonumaipea in. A big part of defence is the centre and winger working together – in photo 3 this is not the case. Tonumaipea is ‘hitting’ or ‘crashing’ in whilst Thompson is sliding out.

The Titan’s had a chance of stopping this if Thompson also hits in on Wighton – at least then Wighton is forced to make a pressure pass and if he does make it Brimson is facing only 1 attacker rather than 2. All up nice play Raiders.

Block play – cut out sweeper

Cutting out the sweeper on the block play is nothing new but knowing when to use it is – Manly love up and in – especially on Daly Cherry-Evans’ side.

In photo 1 Cody Walker is the sweeper and Daly comes up hard in photo 2 (check his shoulder position – nearly pointing at the opposing sideline). Reynolds appropriately cuts Walker out who is there as defensive candy. Daly’s decision to come in means Suli and Garrick both need to come in as well (cohesive defensive policy).

Souths are obviously aware of this and that is why Latrell is so deep – he’s expecting Garrick in his face. In this instance however Garrick hedges his bet and slides hard – unfortunately there’s just too much space. Hat tip to Souths for correct play selection.

Block play – sweeper doesn’t sweep

The next play is another variation on the standard block play.

In photo 1 below the Bulldogs are in standard block play formation – Doorey is the lead runner with Hopoate the sweeper. In photo 2 you can already see the Warriors rookie Paul Turner fading out in expectation of the Hopoate sweep. The fact that Doorey also slides to the outside on his run also helps ‘persuade’ Turner to fade out.

Cogger executes this play nicely after initially shaping inside he then eyes up on Turner. If Turner was shaping in then Cogger hits Doorey with a cut-out. The Bulldogs don’t get a lot of credit for their attack but this was well executed.

Corner Trap – The Great Escape

A strongly applauded strategy is to kick deep into the corner to trap the attacker inside their 10 close to the sideline. From here attacking options are extremely limited (eg passing open side with few attacking players back on-side) allowing defences to compress and target 1 runner.

The first carry from this position is one of the toughest in rugby league – usually 3 on 1 with a good chance of being forced into own in-goal. Defensively the goal should be for the first defender to get under the attacker’s armpits to hold him up (rather than just putting a hit on as Olam did above) with 2nd, 3rd defenders driving him back.

Teams regularly take up to 3 tackles to make 10 metres from the corner position and end up kicking from within their 30. With a decent kick return the reward for kicking to the corner is usually a set starting near the half-way line with side benefits of an easy defensive set plus low chance of conceding a try (due to poor offensive options).

Offensive Options

Once trapped in the corner sides attempt to get to a centre field position to split the defence. They should ensure that first carry is a strong runner (eg not Matt Dufty) and other attackers should assist the first runner from being driven back in-goal (I have not observed this as an active strategy – it’s more like good luck with that).

The ball should also be an ‘out-ball’ to allow you to make the most ground towards centre field. A two pass or a long pass is extremely risky if the defence is set as first contact will be much closer to the goal line.

When trying to prevent a ‘push-back’ you will often see a team mate pushing from directly behind the ball runner – this is an okay option but you are directly opposing the force of multiple defenders. Much better to either pull the ball carrier sideways (pivoting the force) or tackling your own player around the legs.

Are there any other options to get out of the corner trap?

If the defence is set I’d say no unfortunately not – just take your medicine and pat the player who takes this run on the back.

Post this first difficult hit up however I’ve observed many opportunities for expansive play instead of just another hit up towards centre field. Check out the images below (note some of the images below are from a 6th tackle turnover not a kick – so the tackle count reads 1st in those instances):

In many of the photos above you can see the defensive centre and winger covering up to half of the field as a result of the compressed defence on tackle 1! Imagine if you had that setup on the goal line – you would attack that edge for sure!

There’s a good argument for organising your attack quickly for a long shift post tackle 2. Remember the standard ruck pattern will most likely have you defending your line again on the next set anyway (I would love for the NRL to release detailed statistics on play by play X-Y field co-ordinates so I could quantify this) and a best case shift could result in a long range try.

Yes the shift might result in a dropped ball and a turnover but so does rucking it one out versus a compressed defence.

In the video below you will notice Wests try to shift with two long passes with no success.

Just shifting with no block plays or straightening up allows the defence to slide comfortably. This does not mean shifting is a poor strategy just that it requires organisation and ‘shape’.

Notice the difference when Wests are organised with shape and shift on the very next play.

Summary

There are opportunities to counter a good attacking kick (or change of possession) in the corner if a team is organised and willing to shift post tackle 2. In my opinion the extra work to get into a decent attacking shape post tackle 2 is worth it.

The upside is more metres gained (maybe even a try), defences responding with less compression (can revert back to a one out carry), greater attacking options on subsequent tackles and more work for the opposition. Compare this to the usual outcome of a defensive set starting around 60 metres from your own line (my estimate based on 40m kick from 30 returned 10m – not supported with actual data).

Tackle 1 offensive options are limited but I have not observed much development in the way of strategies to prevent a ‘push-back’ into the in-goal (such as a trailing close-by attacker to assist) which I believe is a real risk worth mitigating.

I do understand possession transitions are a key ‘rest’ period for forwards but I think the upside from tackle 2 shifts is worth investigating – perhaps even just utilising the backs and 1-2 forward(s).

Note I have some ideas for tackle 1 attack as well as non-standard tackle 2 attacking shapes which I will write about in following posts.

Interesting Stuff – Round 14

Short kick-off variations – Manly

The above sequence is a good variation on the more typical style pop the ball high in the air for winger to catch short kick-off. Garrick does a great job of concealment with a last second inside-out kick.

It was only a wicked bounce and desperation by Ponga that prevented Manly regaining the ball. The kick went a little too far as well but it is a nice tactic that I’d like to see repeated.

I’d also like to see if Garrick could put some rotational spin on this kick so the ball bends back towards Manly (ie like the spin you see on attacking grubbers into the in-goal).

Later in the game Garrick tried another kick-off variation – driving the ball over the sideline on the bounce. This one too failed.

Compared to the concealed short grubber variation I believe this tactic is much harder to execute. With 3 defenders marking each sideline it must be hit with high velocity and accuracy.

Bomb Defusal – Risk Management Part 2

In this article we will cover bomb defusal which is another area where I feel risk could be better managed in the NRL (previous article: what can Dane Gagai teach us about risk management).

We all know teams with the best defence regularly contest finals matches – so why do I consistently observe poor defence on the last tackle – especially when the bomb goes up? (I’ll cover some offensive strategies to take advantage of this aspect later)

Here is a sequence of images from bombs from the last round of football – have a look at the defensive positioning of players in particular.

The Storm in particular terrorised young Tuipulotu bombing consistently for Vunivalu going close to scoring many times and earning several forced drop-outs.

What I notice from the images above is:

  • commitment of too many defensive players to the location of the bomb drop
  • lack of commitment of inside defensive players to be involved in the play
  • the defensive players who do commit do not position themselves well ‘just in case’ the attacker catches the ball
  • no adjustment of defensive strategy depending upon the location of the bomb drop or the strength of the attacker

Let’s zero in on one example to walk-through the above factors in detail.

Zac Lomax has proven himself to be a real attacking ‘bomb’ threat scoring and setting up several tries this season. In the example above Sivo has tried to run him off the ball which is a good strategy when done legally.

The key point is however once Lomax has run past him (run-off did not work) Sivo should try to position himself behind the ball to cover attacking players.

Dylan Brown (circled in yellow) also commits to the contest rather than covering dangerously positioned attackers like Ravalava or McInnes. Though to be fair to Dylan the fact there are no other defenders nearby didn’t help.

My theory for defenders switching off is that they are ‘conditioned’ by general field position kicking that there is no need to assist.

With field position kicking the kick is rarely contested by definition (too much ground to cover) so it makes sense to allow the forwards to have a rest. We have all seen forwards taking up to three tackles to get back onside.

Therefore when a bomb goes up I suggest many defensive players switch off – even though in this case the kick will be contested.

dragons attackers everywhere with all parramatta defenders concentrated around the contest

I’m a strong believer in cross-pollinating effective strategies from other codes. When a bomb goes up it is very similar to a contested marking situation in Australian Rules and anyone who follows this code would be mortified at allowing so many attacking players get ‘goal side’ of their defenders.

So what can we learn and potentially apply from Australian Rules contested marking situations? Here is some general tactics that should be thought about:

  • defenders placed goal side of their attackers
  • defenders not in the contest covering attackers in dangerous space
  • getting superior numbers to the contest
  • use of communication between defenders eg the closest player should let the bomb defuser know if it is going to be an easy catch (not contested) or contested
  • spoiling the contest – conceding the opponent is more likely to catch the ball than yourself and punching the ball away to a safer position
  • modifying the approach to ‘marking’ vs ‘spoiling’ based on the opponent and field position
Defenders goal side, covering dangerous space & superior numbers win out

By goal side I mean defenders placing themselves between their own try line and the attacker. By covering dangerous space I mean placing themselves between the location of the contest and the attacking player.

In the example above the assistance of extra defenders would have diminished the risk of Clune, McInnes and Ravalava.

with some extra defensive effort bomb defusal becomes less risky
Communication between defenders

This one is hard to observe – impossible from the TV and even if you are at the game you could be far away or crowd noise could wash it out. Because of this the impact of defender communication is understated and not commented on.

As someone who has played both rugby league and australian rules one of the biggest shocks was the amount of communication involved and expected in the latter – seemingly perfectly executed practice drills would be rerun because the coach could not hear ‘voice’. I will leave it to you to decide if the level of communication could improve for defenders in a bomb defusal situation.

To spoil or not?
GWS player prevents mark attempt from attacker by punching or “spoiling’ the mark

Under what if any circumstances should a defender consider not trying to catch the ball in rugby league but instead just punch it away?

Well obviously not if the bomb is uncontested but what if you are Jorge Taufua up against Daniel Tupou and the ball is coming down 1 metre from the try line and 1 metre from the sideline (a nightmare scenario for Manly supporters)? What are the range of outcomes?

  • Jorge catches the ball
    • tackled in field of play
    • forced into touch
    • forced into in-goal
  • Jorge drops the ball backwards
    • lands over side line
    • lands into in-goal recovered by defender
    • lands into in-goal try to attacker
    • lands in field of play recovered by defender
    • lands in field of play recovered by attacker
  • Jorge knocks the ball on
  • Tupou catches the ball
    • try scored
    • held up in-goal
    • tackled over sideline
    • tackled in field of play
  • Tupou knocks ball on
  • Tupou drops or taps the ball backwards
    • lands over sideline
    • recovered by attacker tackled in field of play
    • recovered by attacker try scored
    • recovered by defender

The above list is not complete but covers the majority of outcomes. Green = successful defusal, Orange = new attacking set, Red = try conceded.

What immediately becomes apparent is that there is not a lot of upside to Jorge attempting to catch the ballwhen the ball lands in this location. A bomb that lands in the in-goal substantially improves his outlook for catching. Similarly a bomb that lands 20 metres out and further in field also improves his outlook. It also changes with the threat level of the attacker and the bomb defusal capability of the defender (something else that is catching on from AFL is the ability to catch the ball over your head ie with arms extended rather than catching on your chest).

What if Jorge assessed the risk of catching is too high based on all the factors and instead attempts to punch the ball over the sideline or touch in-goal line? Spoiling is much easier than catching in a contested situation – it would definitely reduce the chances of Tupou catching or tapping the ball back vs Jorge trying to catch it. What if Brad Parker comes across and also tries to spoil?

We seem quite understanding when fullbacks or wingers defuse a grubber by grounding it, running it or tapping it over the dead ball line – so why not for bombs in certain circumstances?

Summary

Whether you agree with ‘spoiling’ or not is beside the point – I’ve included several other potential strategies from another code which spends a lot of time thinking about minimising the risk of aerial contests and I feel they are worth consideration.

The key point is that to manage risk effectively you should assess the risk of the range of outcomes and devise your approach/strategy from there.

“We come in peace” – preparing for first contact

We hear a lot these days about run metre domination and in particular post contact metres – what if I were to tell you non-contact metres is a better predictor of game margin.

Say Wut?

Yep the run metre metrics you see reported actually has sub-categories. The two most popular are:

  • Post contact metres – distance gained after contacting a defender
  • Kick return metres – distance carried into defender after kick receipt

“All run metres” includes totalling not only the above sub-categories but also line engaged metres (player has engaged the defensive line or run to a dead end before passing or kicking) and the ‘non-contact’ metres involved in your generic run (ie from where the player received the ball until contact with the defender).

I’m going to call and combine these latter two into a “Non-Contact Metres” (NCM) metric. I have to do this as I don’t have access to “Line engaged” run metre data.

First let’s have a look at Post Contact Metres (PCM) vs Game Margin since round 3 this season.

The above chart shows net PCM vs game margin (net means how many more PCM metres one team ran verse the other) and there is a pretty good relationship with winning or losing (data points in top right and bottom left).

There are some exceptions – notably Manly’s epic defensive effort to hold out Parra in round 10 despite a huge negative differential in PCM. On the other side Newcastle lost to the Bulldogs despite +100m in PCM – this was the game played in pouring rain where they lost both McCullough/Watson.

Overall though you can see why PCM is a highly rated performance metric and worthy of commentary.

How about Non-Contact Metres?

Net NCM also shows a strong relationship with winning/losing with a slightly higher correlation coefficient of 0.59 compared to 0.55 for PCM.

Now let’s be clear I am in no way saying NCM is more important than PCM but surely a metric that has this good a relationship with game margin is worth investigating/talking about?

Maybe there should be more discussion around improving a teams NCM rather than none at all?

For example when in possession generating quick play the balls (Cam Murray), fast leg speed (Nathan Brown), dummy half misdirection (Smith) and engaging defenders before passing it on.

When not in possession should we pay more attention to defensive line speed, effective tackling and trapping teams in corners (I won’t mention slowing down play the balls as this gets plenty of coverage).

who is running harder – the defence or attack?

In a lot of cases PCM and NCM are inter-related – a strong PCM run can have the defence retreating so on the next play NCM is high. Similarly engaging a defender can put a player half through a hole boosting PCM. The influence between the two would really come to light with play by play data which is something many ‘outside’ analysts are clamouring for.

I like the way NCM makes me think how I might complement PCM – sure I want my team to recruit big boppers and have elusive tackle busting backs who smash out the PCM but maybe I also want players who put others in holes/space? A team with a fast moving defence? A dummy half who can misdirect and provide ball in front?